Tag Archives: preschool

Building Independence in Children

There are three areas for thinking about building independence: chances, chores, and choices.
Give them as many chances as you can to try doing things for themselves. Think about chores they can do – taking on responsibilities builds their sense of being competent, capable and important contributors to the family. Then let’s practice independent decision making by allowing them to make more of their own choices.
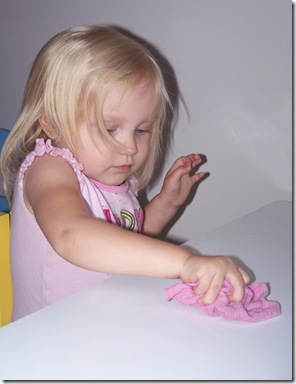
Chances to “Do it Myself”

Increase Accessibility

To build independence, think about how to make tasks more accessible for them. If you want them to get themselves dressed, choose clothes and shoes that are easy to get on and off. If you want them to help with cleaning, keep some cleaning supplies in their reach and store toys in containers they can open and close. If you’re nursing a baby, have a water bottle and snacks where your older child can reach them so they can help themselves if needed.

Teach Skills

Take the time to intentionally teach and practice skills, like putting on a coat or gloves or opening a cheese stick. For the first ten times, it takes a long time and is frustrating, but then your child will know how to do it themselves. Think how much time you save in the long run! (For lots of these things, search online for “hacks” for how to teach.)

Create Systems

Create systems that they can understand. Like having one container for all the toy animals and one for all the toy cars, with picture labels on them to help them remember. Or having a library basket so if they find a library book anywhere else in the house, they always know where to return it to – and when they want a book, they always know where to find one! Or writing a visual schedule of the bedtime routine with four pictures showing the four steps.

Accept the Mess

When your children “help out,” it takes longer, and it’s messy and it’s inconvenient. It’s hard to be patient, and easier to do it yourself. But, if we want to raise independent children, we have to give them chances at independence, and accept the imperfections of the learning process.

Chores – Responsibility and Teamwork

If you have a very young child, you may have never even considered chores. You may not have viewed them as being capable of contributing. But even a one year old can help with household tasks: “can you put this sock in the laundry bin?”, “can you carry this for me?”, “put the toys in the basket.” Children love to help out – doing tasks helps them feel competent and important.

Search online for “age appropriate chores” and you’ll find several charts with suggestions. Or ask other parents for ideas of tasks that you could try having your child help out with. For example, a 2 year old could help wipe up messes, a 5 year old could match socks, and a 7 year old could water plants – though you’ll need to have a system to help them remember.
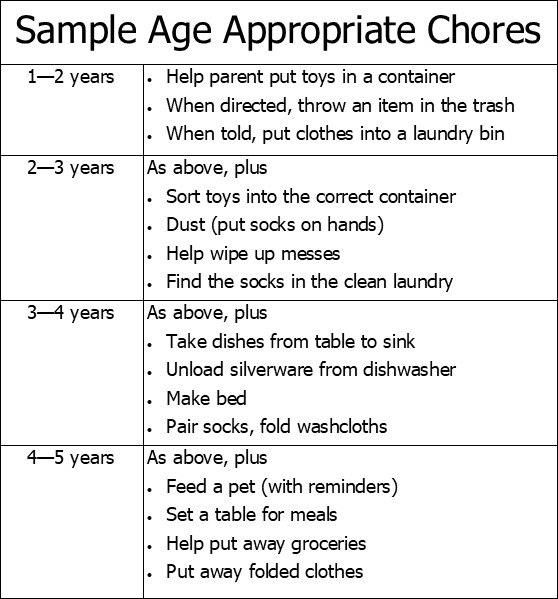
Your child will not be as good at doing things as you are…. If your three year old makes the bed, it’s not going to have perfect corners! If they feed the dog, they may spill kibbles on the floor. Your 5 year old won’t load the dishwasher perfectly – but they can at least put a cup and spoon in there that you can finesse later. Experiment with options, trying several out to see where they can be successful and which chores make sense to assign on a long term basis.

You can ask your child for input on what jobs they would LIKE to do or what would help motivate them. A kid who hates folding laundry might be more willing to do it if you watch movies together as you fold. A kid who likes feeling strong might like the heavy work – carrying baskets of laundry, putting out the trash, shoveling snow, bringing the groceries in from the car…  Some teenagers might prefer doing the grocery shopping to cleaning the house.

Chores: The Teamwork Approach

Often chores are approached in an if/then punitive way where the parent is in control: “If you don’t put your laundry away then you can’t play your game.” This often leads to battles of wills.

The teamwork approach is: “What do WE need to do so that our home life functions well for all of us? Here are things I can help with – what can you help with?” And then on chore days you can use the when/then approach “we as a family all have chores today – but when we get all our work done, then we get to celebrate a job well done by having fun together!”

Choices

As they do more things independently, they’ll make more choices. If they’re getting themselves dressed, they choose their clothes. If they’re packing lunches, they choose what food to pack. If they’re responsible for homework, they decide whether to do math or English first.

It’s important to note that the parent still defines what are acceptable options to choose from! For example: you could tell a two year old: “it’s cold today, so you need to wear a warm shirt – do you want this blue one or the red one?” Or tell a three year old: “There are three things you need to do to get ready for preschool – which one do you want to do first?” A rule of thumb is for a two year old offer two options. A three year old gets three options. An eight year old has a lot of options, with clear criteria set by you. For example, an eight year old packing their lunch might be told they have to have at least one protein, at least one fruit, and one starch. (And you’ve taught them what this means and set up systems that make it easy for them to do this.)

We can also offer choices in other areas to practice decision making. For example, they can have some “free choice” time in their daily schedule where they get to decide what they do and you’ll play along. Older children can decide what extracurriculars or camps they do.

Some parents give a young child allowance that they can choose what to spend it on. As the child gets older, they get more allowance, but it’s split into three pools: spending, saving and sharing. They can use spending money on anything anytime. They have to declare in advance something that they are saving toward and can purchase it when they have enough. And sharing money can be for gifts or for charitable donations they choose.

Sometimes children will make poor choices. If they choose not to wear a coat on a cold/wet day, it’s a learning experience! (Now, I won’t do this on a day my child is going to preschool and the teachers would have to deal with the unhappy child that results… but I would do it on a day I was just taking my child for a short trip to the park.)

It’s important to let them do so and to experience the consequences in a low stakes environment so they can learn from their mistakes and make better choices in the future.

Image credit: http://wesandrachel.blogspot.com/2010/08/tot-school-catching-up.html, marked as Creative Commons
Introducing a Sensory Bin

Maybe your child has tried out a sensory bin or a water table at a children’s museum, daycare, or a class, or maybe you’ve stumbled across sensory play ideas on Pinterest or Instagram or a Flisat table group on Facebook, and you want to try it out, but aren’t sure how to get started? Here’s a beginner’s guide.

Sensory play has a few basic components:

  • a bin – don’t feel like you have to start by buying a fancy table – it’s OK to start with water play in the sink or use a cake pan or a plastic storage tub
  • things to scoop and pour with – spoons and measuring cups work great, and tongs to pick up larger items
  • smaller containers to put in the bin – plastic cups and “tupperware” containers are good
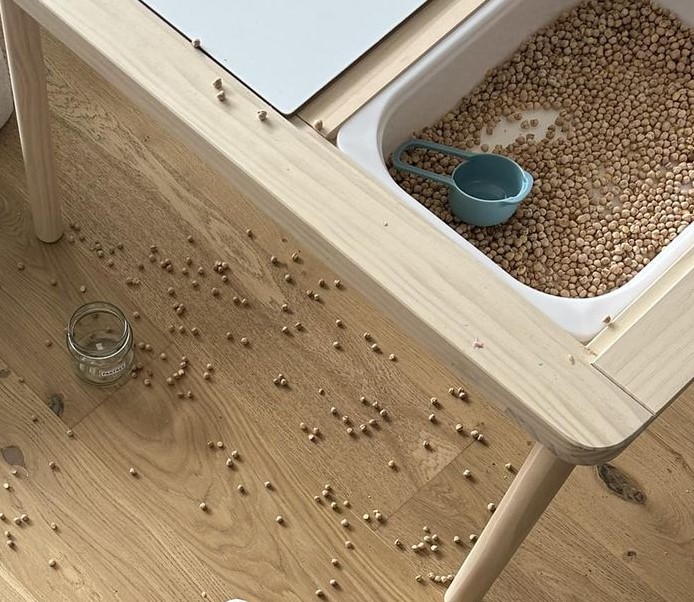
  • a sensory material – I would start with something that’s really easy to pick up: balls made of crumpled paper, pompoms or cotton balls, pasta (bowtie or rotini work well); rice is always a good option, but expect that it will get spilled across the floor!

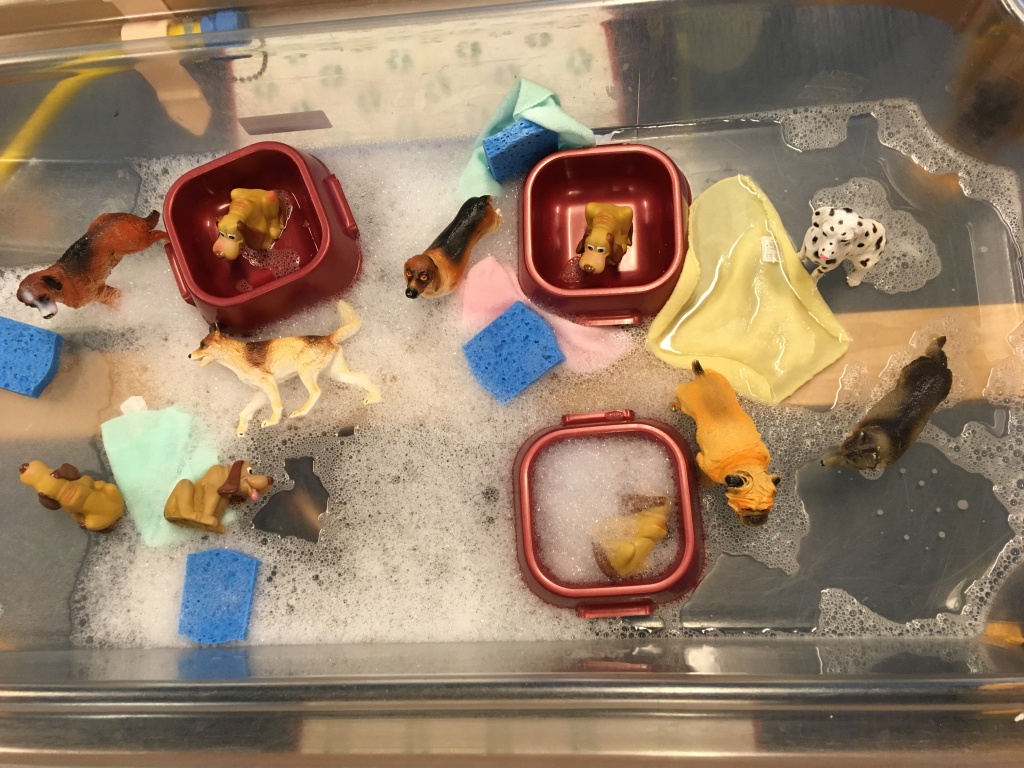
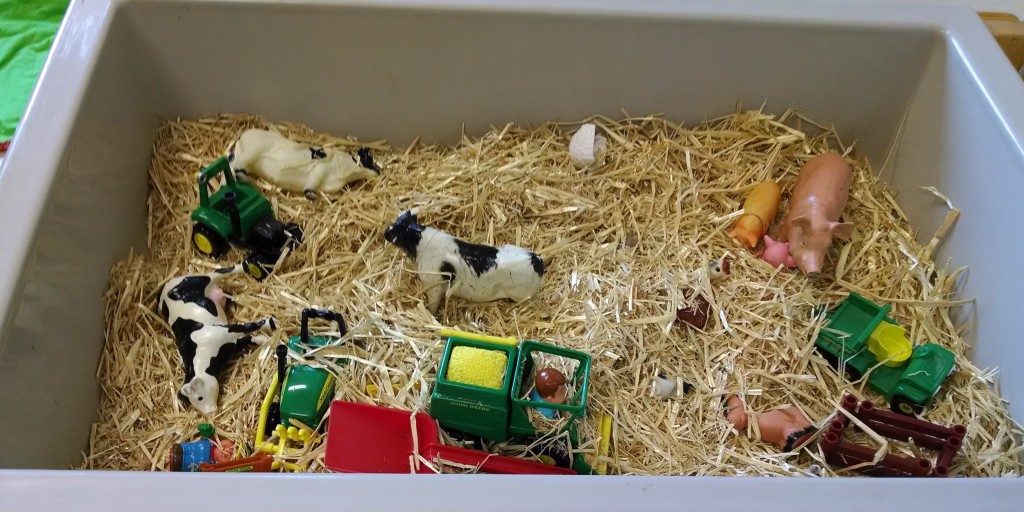
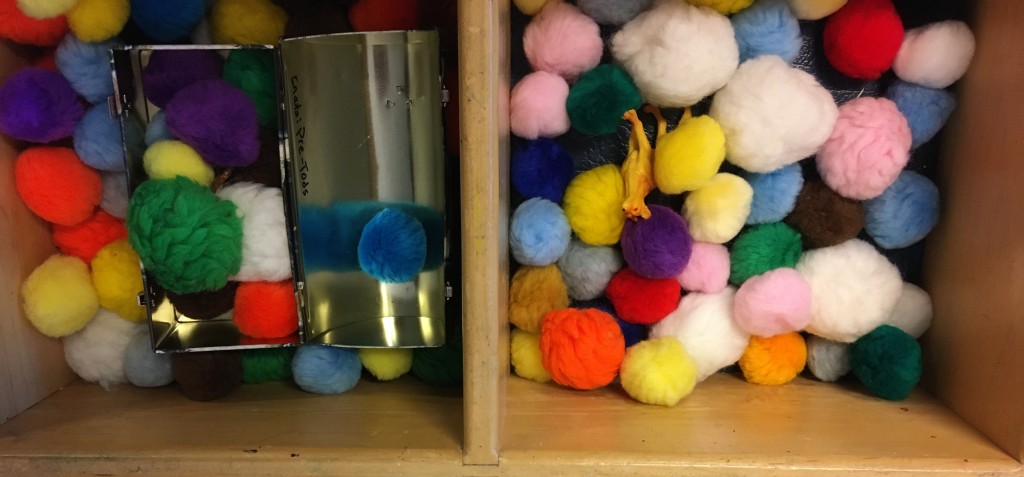
That’s all you really need to start with. Don’t feel like you have to create amazing Instagram-worthy wonders. Start simple! (For this post, I purposely picked photos of some really basic set-ups so you see how easy it is – like this one with pompoms, metal treasure box and some plastic animals.)

The first several times your child plays with it, sit alongside them, teaching them how to do sensory play – eventually this will be great independent play, but first they need you to teach them.

What do you do? It’s super simple – you scoop, you pour. You fill the container. You dump it out. You pick up a handful of rice and let it sift through your fingers. You stir. It’s OK if your child repeats the same actions hundreds of times. Sensory play is all about repetition. It can be a very soothing play activity while they’re also learning a lot about how to use their body and how to use tools to move things around. (Keys to brain development are: novelty, repetition, and down-time and sensory bins can bring all this.)

If you feel like you’re ready to liven it up a bit, the easiest way to add novelty is to take some of your children’s toys they already love and add them in so they can explore them in this new setting. (Filling a toy dump truck with rice, pouring rice over plastic animals, or hiding and finding puzzle pieces to assemble a puzzle with.)

Let them play as long as they want, and move on when they’re ready. They’ll come back to it again later. If they spilled materials on the floor, ask them to help with clean-up, even if they only clean up a few items, it’s a good practice to begin.

That’s it. That’s the basics.

Learn More

I’ve got lots more ideas on this blog which focuses on parenting skills, and my other blog Inventors of Tomorrow, which focuses on STEM learning.

  • This post is called Reducing Sensory Bin Mess, but it also talks a lot about how to teach your child appropriate ways to play with the bin.
  • Check out the Ultimate Guide to Sensory Bins to get LOTS more ideas about what sensory bins you could buy, what materials to fill them with (everything from flax seed to cloud dough), what tools to use (from water wheels to conveyor belts), and what add-ins to include (jingle bells? magnetic letters? seashells?). This post also talks about the benefits of sensory play for brain development.
  • Check out the Ultimate Guide to Water Tables to learn all about great options for enhancing water play. (Many of these ideas also work at bath time or in the swimming pool!)
  • Sensory Table Set-Ups shares lots of examples I found online and my observations about general lessons to learn from these ideas.
  • Looking for other simple, low cost ideas for what to do with a 1 – 4 year old child? Check out my Cheap Dates with Toddlers series.

Reducing Sensory Bin Mess

When parents or teachers first introduce a child to sensory bin play, they usually make a big mess!

While some mess is inevitable, here are tips for reducing it.

Teach Them How Sensory Play Works

One of my core beliefs is that children want to do well. If they’re not behaving well, it’s usually because they don’t yet have the knowledge or skills they need. So, let’s teach them!

Play alongside

Over time, sensory play becomes a great independent play activity for children, where they can play with little supervision or intervention from adults for quite a while. However, first you have to teach them how to do it, and then gradually fade out your support. So, expect to be right next to them the first several sessions.

Role Model

I mostly just start playing appropriately next to them, and they quickly follow along! I narrate my play, and also narrate theirs. “Look, I’m scooping the beans – oh, you picked up the scoop – see how I use it? I can pour the beans in the bucket. Can you?”

Re-Direct

If they are doing something “wrong”, tell them the right thing to do. “Let’s keep the rice in the bin.” If they’re pouring on the floor, substitute a new target – “can you pour into this bucket?” Try to avoid saying “don’t _____”. If you say “don’t splash”, all they can think about is splashing. If you say “oh, look, when I move my hand slowly, see the ripples in the water?” they will often stop splashing.

Set Limits

Once they’ve learned how to do well in general, they may still have days when they’re having a hard time not making a mess. It’s OK to sometimes say “it looks like now is not the right time for this – let’s put it away / close it up for now, and we’ll try again tomorrow.” To be as fair as possible, I try this method: first when-then: “when you show me you can play well with this, then we can have it out more often.” Then if-then warning – “if you keep dumping things on the floor, then I’ll close the bin.” Then follow through on that consequence if needed.

Setting Up for Success

Fillers

Start with fillers that are easy to clean up. I use pompoms as the first material for my toddler class. Or paper crumpled into balls. Later, I might use pinto beans – they’re easy to sweep up. Other things are harder to clean up. For example, kinetic sand needs to be vacuumed up and can get ground into carpet, so it’s not the thing to start with.

When you start, put a small amount of sensory items in a small bin inside the large bin. If they spill outside the small bin, the large bin catches it!

Don’t use too much filler at first. Don’t feel like you have to have a 3 inch thick layer of sensory material. Start with a thin layer – they can always pile it all up in one corner if they want a deeper pile.

Remember that they will mix together any item that’s within easy reach of the bin. So, if there’s something you don’t want to be mixed in, move it elsewhere. (For example, we don’t recommend putting a bin of rice right next to the playdough table or water table.)

What Surface to Put the Table On

If possible, put sensory tables on linoleum or hardwood floors – it’s way easier to clean up than carpet!

Many parents and teachers do sensory tables outdoors where they are less concerned about mess.

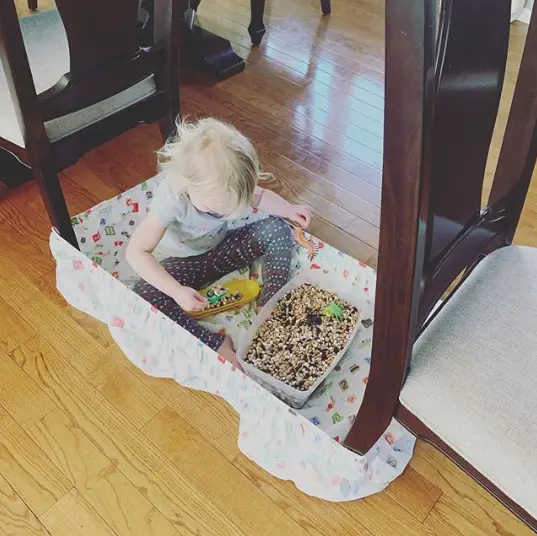
Many people recommend putting a mat under the table – like this mat where the edges can fold up to make a wall, or things like playpens and crafty pods and pop-up ball pits that help to contain the mess in one area where it doesn’t get tracked around. Some use fitted sheets – like in the image below (source) or shown here. Wrap the corners of the fitted sheet around some objects to create a little nest. Or use a table cloth or shower curtain liner. Sometimes you can salvage sensory material from any of these surfaces by lifting them up so the filler all slides to one corner and then scooping it from there.

One site recommended a “builders’ tray” that looks amazing, but the link is broken and I can’t find it anywhere… Amazon has a 20×20 play tray, or you could use an oil drip pan, maybe.

Allowing for Transport

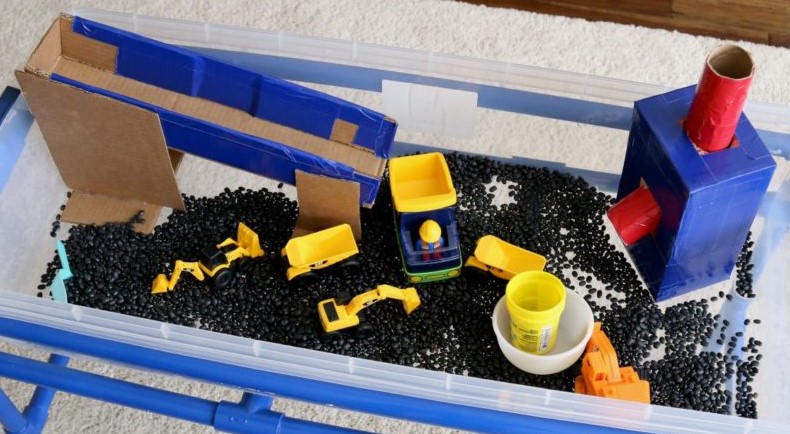
Kids LOVE to transport things. So, they often want to carry things from one place to another. Sometimes just having containers inside the bin, like having two buckets in the bin where they can move things from the bin to one bucket to the next is enough. Or setting up a cardboard box apparatus where there’s a higher spot in the sensory bin and a ramp for pouring things so they slide to the lower level, like these examples from Frugal Fun:

Or having a table right next to the sensory bin with containers on it they can move things into can work. But some kids like to have a separate bucket somewhere else they can carry things to – you can decide if that’s viable for you.

If they like the sound the beans make when they hit the floor, try putting a metal pie tin or hard plastic container upside down inside the sensory bin that they can pour onto to get the sound.

Helping with Clean Up

Ask your child to help with clean-up. You may choose to get them a mini broom and dustpan or a dust buster vacuum. (For some kids having to do clean-up is a disincentive – they don’t want to make a mess they’ll have to clean up later. Some kids like cleaning up the mess so much that they’ll make more of a mess!)

Remember, sensory play is a learning process, so they will accidentally (or intentionally) spill from time to time and there will be messes. Try to take a deep breath when it happens. If you’re having a day where you feel like the mess would be too stressful, it’s fine to close the sensory bin for the day and offer other activities.

Learn more

Check out my Ultimate Guide to Sensory Tables and my Ultimate Guide to Water Tables. You might also enjoy this post on Building a Child’s 8 Senses.

Books that Sing by Theme

I learned about the idea of “books that sing” from Nancy Stewart (Learn more about Books that Sing.) These are books that can be sung aloud, rather than read aloud – they may be illustrated versions of traditional songs, or may be new compositions. I built a year-long preschool music curriculum that included 4 of these books each month. Here are some of the books that I found and used.

Farm Theme

  • Old McDonald – Cabrera and others
  • Old Mikamba had a farm – Isadora
  • Barnyard Dance – Boynton – make up your own tune to this musical rhyming book
  • Mary Had a Little Lamb – Hoberman or Borgert-Spaniol
  • Pickin Peas by Macdonald – may be too long for preschoolers
  • Cat goes fiddle-i-fee by Galdone
  • Farmer in the Dell Owen

Winter Theme

  • We’re going on a bear hunt Oxenbury (notes here https://www.musicintheearlyyears.com/blog/2958-books-that-you-can-sing)
  • Ten on the Sled Norman
  • The Bear Went Over the Mountain – Trapani
  • Jingle Bells. Notes on the versions – Jeffers – words don’t go quite in the order kids expect and it does include Santa and Mrs. Claus; the version illustrated by Darcy May is simple and straightforward all the words in the right order, shows bob tail and sleigh and other new vocabulary well; Kovalski – not the best writing, so I might tell a new story to the pictures; Trapani – highlights Xmas traditions around the world, so may not be suitable for a non-secular setting

Stars/Moon Theme

  • Twinkle – several versions! I like Cabrera, Taylor and Litwin versions better than Borgert-Spaniol

Jungle/Zoo

Transportation

  • Wheels on the Bus, Zelinsky OR Raffi
  • Down by the Station Vetter
  • Riding in My Car – Woody Guthrie
  • We All Go Traveling By – Roberts

Spring

  • Five Little Ducks Kubler or Raffi (See more options)
  • Little White Duck;
  • Take me out to the Ballgame Simon
  • Singing in the Rain Freed (video
  • Dancing Feet by Lindsey Craig and Mark Brown (video) which would be so easy to make up a jazzy tune to sing it to
  • There was a tree – Isadora
  • Inch by Inch (the Garden Song) – Mallett
  • Over in the Meadow – many versions! (reviews)

Beach

  • Down By the Bay – Raffi
  • Baby Beluga by Raffi
  • Seals on the Bus Hart
  • Row Your Boat – Many versions
  • Baby Shark
  • Over in the ocean – Berkes
  • May there always be sunshine – Gill

Other

  • Roll Over by Peek
  • Tanka Tanka Skunk – the children can echo each line
  • Every Little Thing / 3 birds by Bob Marley – children can clap out 1-2-3-pause
  • Hickory Dickory Dock Borgert or Baker (all diff animals) or Summer (simple – always a mouse);
  • knick knack paddywhack introduces instruments – https://www.youtube.com/watch?v=VEHKQCtrHHw
  • If you’re happy and you know it – Ormerod

Here are other places on this site to find: lots of resources for Songs for Music Time, links to videos and lyrics for Favorite Toddler / Preschool Songs, and a post on the benefits of music for early learning.

Songs for Music Time (birth to age 5)

Whether you’re a librarian planning story time, a preschool teacher looking for new songs or a parent of a toddler who is tired of the same five songs, here are resources for learning new children’s songs.

The very best resources I know of are:

  • Tell Me a Story from the King County Library System – searchable collection of hundreds of videos of children’s librarians singing songs and showing the motions
  • Jbrary – two children’s librarians (Lindsey Krabbenhoft and Dana Horrocks) have created a huge collection of videos of children’s songs (with motions) and also have lists of favorite books, ideas for storytime, etc.
  • Sing with Our Kids, where Nancy Stewart has created a song library which includes lyrics and .mp3 audio recordings of lots of great traditional kid songs, and a collection of “Books that Sing” – picture books that you can sing aloud.
  • Jocelyn Manzanarez’s Circle Time Success on Instagram

And here are resources I have created that you are welcome to use:

And here’s why music time matters: How Music Benefits Early Learning.

Photo by Jelleke Vanooteghem on Unsplash