Tag Archives: toddler

Let Your Child Explore Fine Motor Skills

Introducing Playdough

Today in a Facebook group, a parent of a 12 month old asked for the best playdough for a child who still puts everything in their mouth. Lots of parents and teachers in the group had great advice:

They recommended edible options like

Note: just because they’re edible doesn’t mean you should let your child eat them! The point of using these, in my mind, is to help children learn NOT to eat their art supplies, but if they do mouth these, you don’t have to worry about it.

Many preschool teachers said to just use any good homemade playdough recipe with no toxic ingredients. (Here’s my favorite playdough recipes.) Some of these have A LOT of salt in them, so it wouldn’t be good for kids to eat much of them, but they won’t, because they taste nasty. A couple tastes and they’re done, no harm done.

But a few respondents to this Facebook post said things like “I wouldn’t recommend playdough till they are around 3 or 4 when they know not to eat anything you put in front of them.”

There are so many benefits for young children in playing with playdough. (Read about the benefits of playdough and more on the power of playdough.) I think it’s ridiculous to deprive them of years worth of that experience because of the worry that they’ll mouth or maybe swallow a few tablespoons of non-toxic ingredients.

And besides, learning not to eat non food items is a good thing to learn! And playing with non-toxic playdough is a great place to learn that.

Now, I wouldn’t introduce playdough for the first time by setting some on their high chair tray and walking away. Of course they would eat it! (Maybe especially if it’s made of marshmallows…) However, you can absolutely introduce playdough to a young toddler – one year old is perfectly appropriate. The first few times, you sit right there with them, showing them this exciting new thing and showing them how to interact with it. Role model – tell them what to do. (Don’t even say “don’t eat it” because they may not even think of putting it in their mouth till you say the word eat. Children are new to language, and may hear “eat” and not hear the “don’t” part of the sentence.) Play with it, explore it, then put it out of reach when you need to walk away. If they do begin to move it toward their mouth, that’s when you would say “oh, yuck, don’t eat that. It tastes icky.” And make your icky taste face. That usually does the trick. If they end up with it in their mouth, just say, “oh yuck – let’s spit that out.” And then gently say – “let’s put this away for now, we’ll try again another time.” (It’s a good time to put it out on a tray or plate the first time so if you need to remove it you can.) With clear guidance, toddlers can learn to use playdough appropriately, and then have access to all the great learning that can come from playdough activities.

This whole topic just brings me to a larger topic.

Building Fine Motor Skills

In order for children to learn skills, they have to be able to have hands-on experiences with things. Almost everything they interact with could potentially have some risk. But often the chances are small. And with supervision and playing alongside, we can reduce the risk of severe injury to extremely unlikely.

In order for children to learn fine motor skills, they have to be allowed to use them! That means they need to be allowed to explore small items that they have to use the pincer grasp to pick up. Some of that happens with eating finger foods – peas and cheerios and slippery diced peaches all provide lots of pincer grasp practice. But children also need to be able to practice things like threading beads onto a pipe cleaner and once they’ve mastered that, threading beads onto string. They can practice things like dropping pompoms into a water bottle or putting buttons into slots cut in a plastic lid.

I do developmental screenings with parents – the 9 month old questionnaire asks if the child can pick up a string, the 18 month old asks if they can draw a line with a crayon or pencil, and the 22 month old asks if they can string beads or pasta on a string. I can’t tell you how many times the child hasn’t met that milestone and parents have said they just have never done anything like that with their child where their child handles small objects. Often they have avoided this because of fear of choking.

What about choking?

Yes, it is well worth being aware of the risks of leaving your child unattended with small items that they could choke on. And, it’s absolutely a good idea for all parents and all caregivers to be familiar with choking rescue. (Here’s a video.) And it’s good to know infant and child CPR too, just in case. (Videos of infant CPR and child CPR.) But this doesn’t mean that you should never let your child touch anything smaller than their fist.

Introducing Fine Motor Activities

Toddlers can do all sorts of fine motor activities with small objects. Like with the playdough, do a really good and intentional job of introducing the item under close supervision. Use role modeling and demonstration to be sure they know what to do with the items, and if they start to do inappropriate things with the items (like put a bead in their nose or in their ear), then we correct that. (Note: I do sometimes count how many of an item I put out, so that when I clean up I make sure I can account for all of them – if not, I search the floor to see if one just rolled away.) After they’ve interacted with an item safely multiple times, you can let them play with it more independently. I also do this approach with food – I don’t slice up grapes for my child. Instead, the first time I introduce grapes, I sit down with them and show them a grape and show them how I take one little itty bite out of the grape and chew it up, then take another itty bitty bite… Once we’ve practiced this multiple times, they can eat grapes independently.

Why Fine Motor Skills Matter

If we don’t let our children have this fine motor practice, then they’re going to be missing important development. Children need fine motor skills and finger strength to be ready for kindergarten tasks like writing, using scissors and turning pages in a book. They need them for self-care tasks like: buttoning a shirt, tying shoes, eating with a spoon, and opening food packaging. They need them to play with toys at preschool and not be frustrated by their inability to do things other children can do.

Fine Motor Development

These sample activities offer ideas for what sorts of things your child should be capable of at each age;

  • 3 to 6 month olds – give them small toys that they can practice passing from one hand to another or hold them and shake them. Hold your baby on your lap and place a toy on the table in front of you that they need to reach for.
  • 6 to 9 months – show them how to clap their hands or give high fives, they start “raking” things toward them, so try something like ping pong or whiffle balls or baby toys or finger foods like cheerios, take toys out of a container
  • 9 to 12 months – continue to offer finger foods, encourage them to try picking up a block and putting it into a cup, encourage them to try picking up a string or a noodle, show them how to bang two toys together, wave bye-bye
  • 12 months – build simple towers by stacking two or three items, let them scribble, practice eating with a spoon, turning pages in a board book, take off socks and shoes
  • 2 years – practice using a fork and drinking from a cup, put on lids and take them off, string beads on yarn, show them how to draw a line, build a tower 8 blocks tall
  • 3 years – button and unbutton clothes, use scissors, draw shapes, make a cheerio necklace, place coins in a piggy bank

Fine Motor Activities for Toddlers to Preschoolers

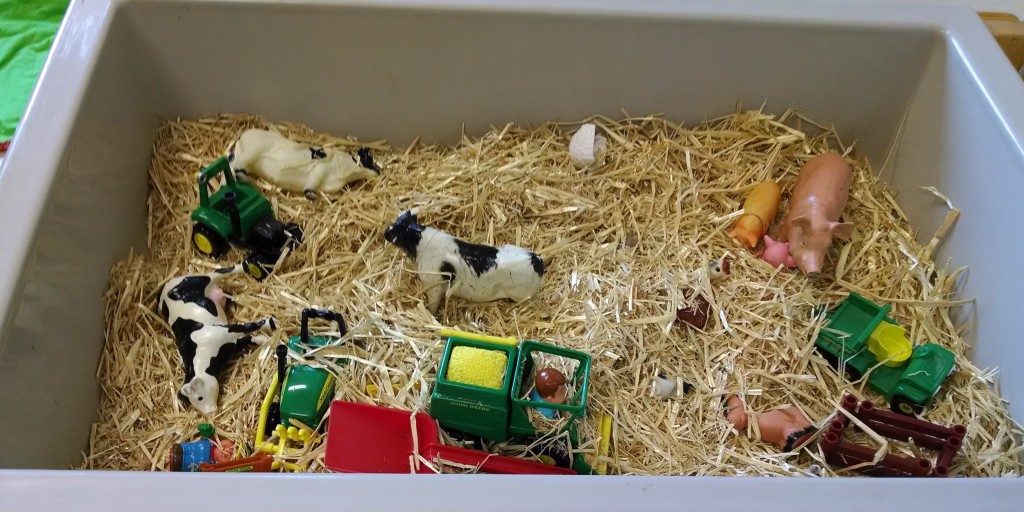
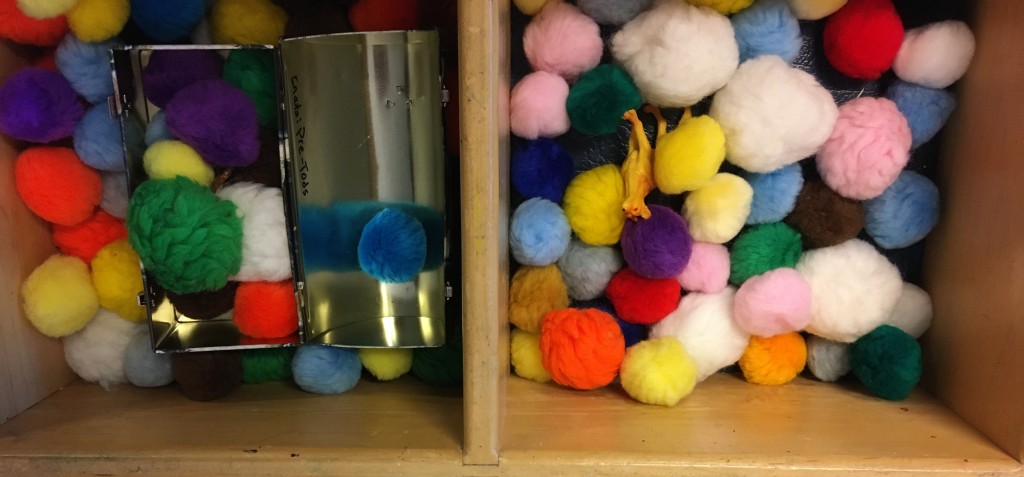
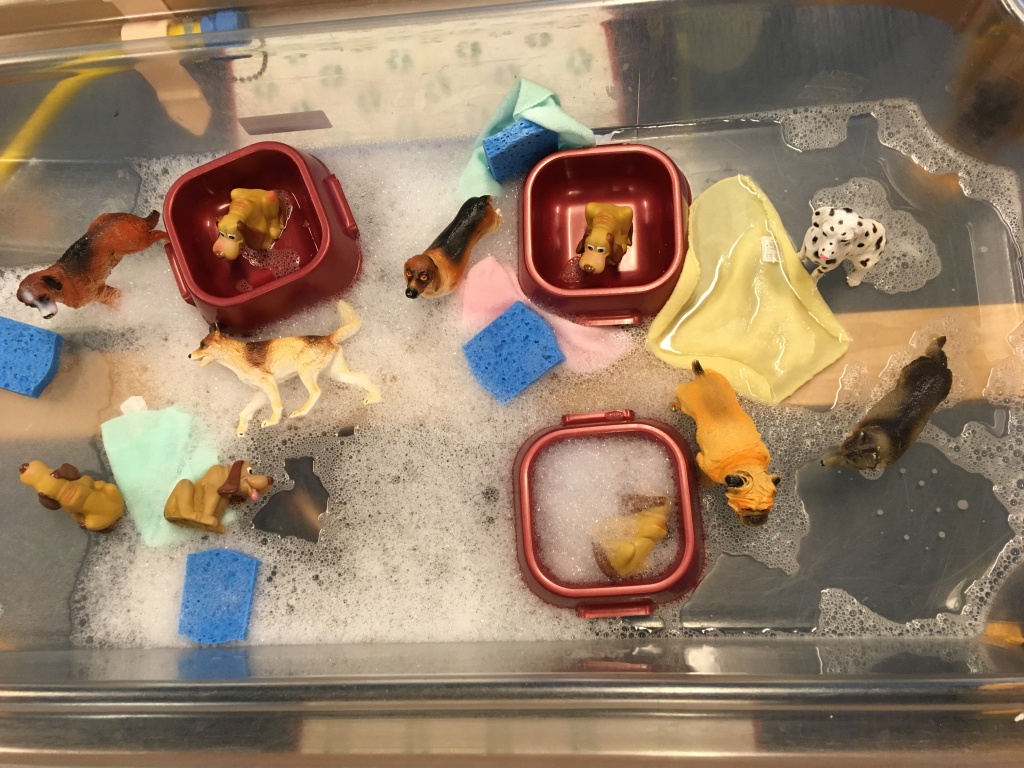
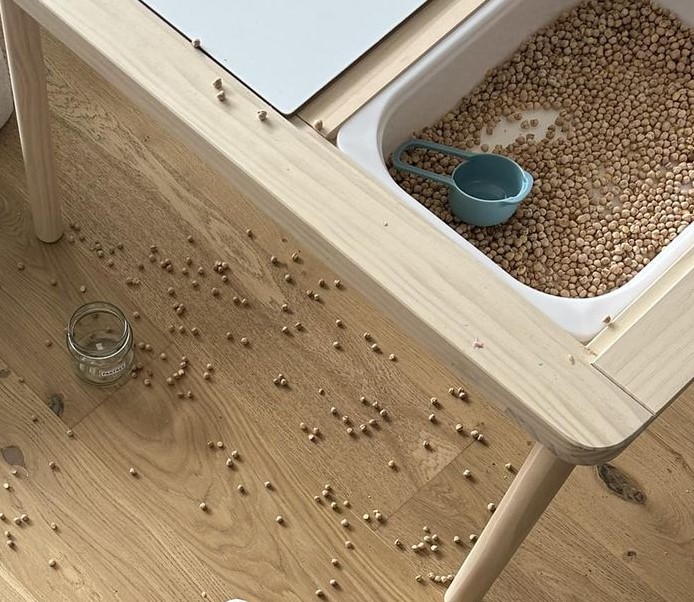
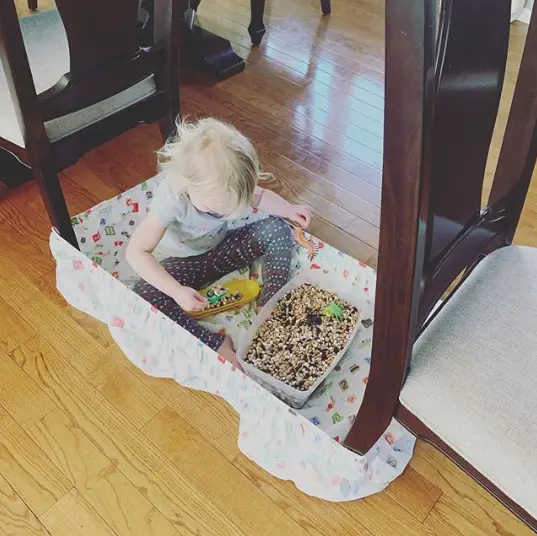
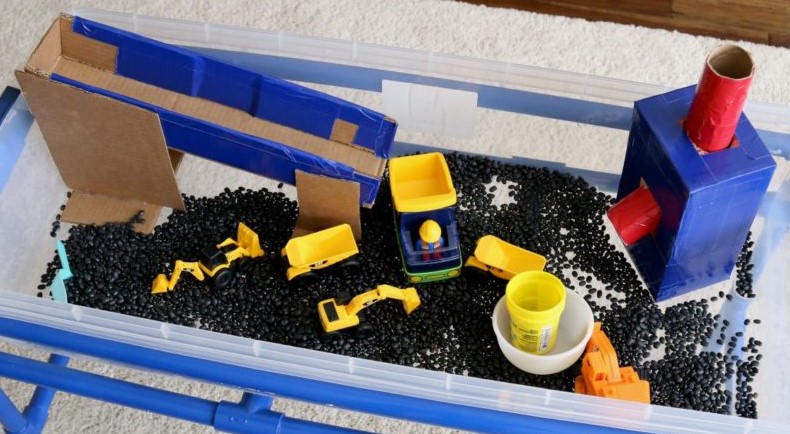
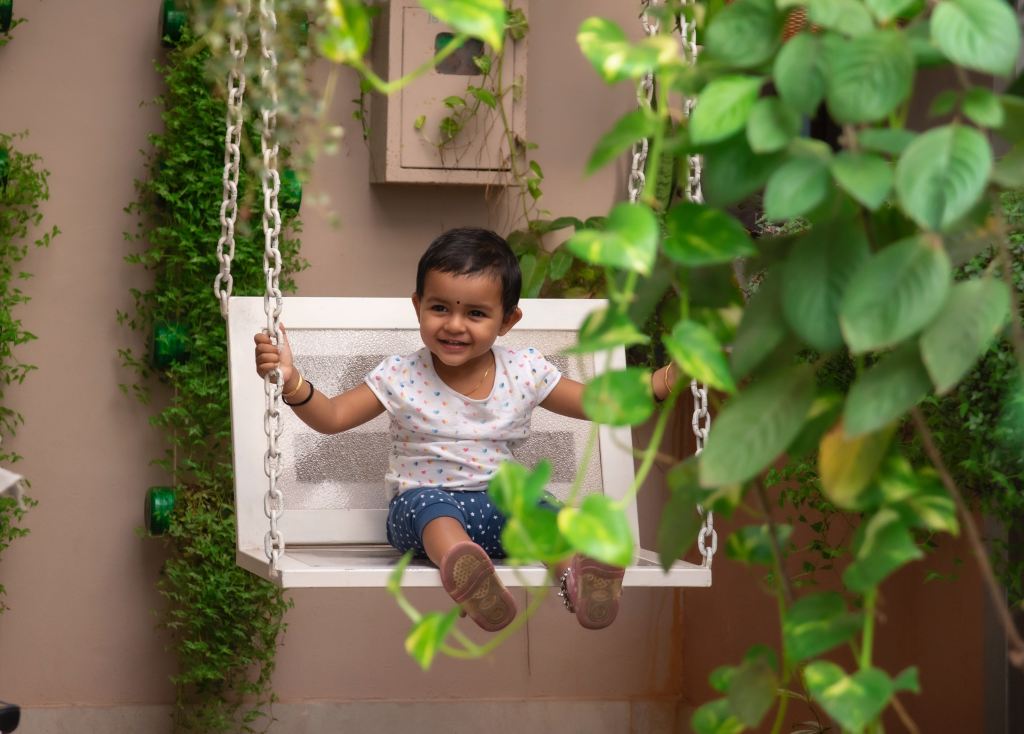
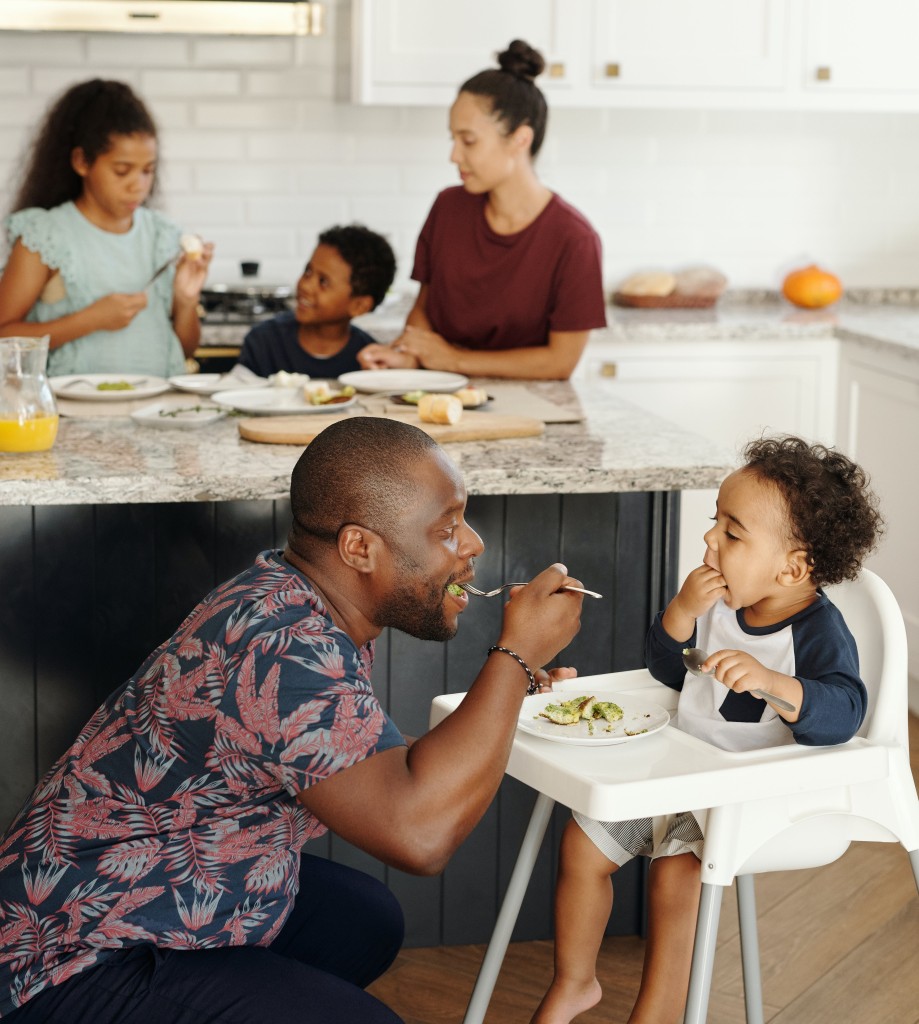
The pictures above are a random collection of activities we have done at our parent-toddler class for children ranging from 12 – 24 months old. Here are more ideas:

  • Play with playdough: for the youngest child, this is smushing it with their hand or poking it with a finger. Then pulling it apart into smaller pieces. Then you can introduce tools to squish it flat (rolling pin), or cut it (plastic knife, cookie cutters) and so on. Hide small toys inside the playdough that they have to unearth.
  • Shape sorters and puzzles: start with big and simple shapes, get more complex as they are ready for that.
  • Build with megablox, then Duplos, then Legos.
  • Twist pipe cleaners into shapes. Insert pipe cleaners into the holes on a colander.
  • Dress-up clothes: put on gloves, zip zippers, fasten snaps, button buttons
  • Stringing Beads (or pasta or cheerios): first, putting BIG beads on a stick or dowel, then medium beads on a pipe cleaner, then small beads on a string.
  • Drawing: first scribbles, dots, lines. Later: Draw pictures, trace letters, color inside the lines.
  • Collage: For a one year old, I use contact paper – take off the backing and leave the paper sticky side up – they can stick on pompoms, feathers, small pieces of paper… As the child gets older, have them practice putting glue on paper, then carefully sticking on small items like gems and googly eyes.
  • Painting – first, just glop paint (or shaving cream or an edible substance like pudding) onto paper or foil or a plate and let them smear it around with their whole hand. Later show them how to paint with one finger. Then with a brush with a large handle, then a small handle.
  • Filling containers: pick a small item (baby socks, pompoms, cotton balls, plastic lids, clothespins, dried beans, dowels, straws, q-tips, raw spaghetti, etc.) and a container to put it in (muffin tin, ice cube tray, jar with a big opening, water bottle with a small opening, boxes, a cardboard box with a small opening cut into it, a container with a plastic lid with a slot cut into it, a spice container or parmesan cheese container with small openings in the lid, a colander turned upside down). For one year olds, you’ll choose larger not-chokeable items that are easy to pick up and containers with large openings. For older children, smaller items and smaller openings. Once they’ve mastered putting items in with their fingers, let them use tongs or tweezers.
  • Pick berries. Pull weeds or pick carrots – you need to pull just hard enough but not too hard, so it’s good for practicing how much strength to use.
  • Sensory bin play – read my Ultimate Guide to Sensory Tables
  • Water table play – read my Ultimate Guide to Water Tables
  • Just go to pinterest or Instagram or google and search for “fine motor activities for toddlers” and you will have thousands of ideas. Don’t be afraid to try them! With you alongside as they learn, your children can safely explore and discover all sorts of wonderful things.

Stretchy Band Play

On a recent day at preschool, we weren’t able to go outside due to air quality issues from wildfire smoke, so I pulled an item out of our music/group time cabinet for some fun large motor music time. My co-teacher said she had no idea what the item was or what it was for, so I thought I’d write a quick post on it and how it works.

Ours is just a red elastic band loop – the elastic is maybe 1 – 1.5″ and about 12 feet in diameter. The products I see on Amazon are called stretchy bands, and look like they would work in a similar way. Or you can purchase from Bear Paw Creek. Or Elastablast from Let’s Play Together (they offer a booklet of ideas with a companion CD). On a 12 foot band, you could fit up to 8 adults or up to 16 children. On an 18 foot, you could fit up to 11 adults or up to 22 children. You can also find DIY instructions, including info on how to make one from pantyhose.

The basic idea is that children take hold of the band in a big circle, and then they move it up and down together or in and out together. It’s a little like how they use the parachute in parachute play but without all the extra fabric to get tangled up it can be easier for younger children (toddlers) to manage.

See a video of a stretchy band in action:

Or this stretchy band song shows how children can all work together as they raise it up and lower it, go side to side, and more. (I would do a simpler, shorter song for younger children!)

What makes this an interesting activity is that everyone works together. They are all encouraged to do the same thing at the same time, and they can tell if it’s working if they’re doing the same thing and the band is going the same way for them as it is for everyone else. Tuneful Teaching points out that this is helpful when you have a child who has a hard time keeping a beat – put them between two children who have mastered that skill, and the band moving in rhythm will give them the sensory experience of the beat.

There are lots of activities you can do with the band – many parachute play activities and rhythm activities can be adapted to work with it. But here are some specific suggestions:

Start when they’re sitting in a circle – tell them you’ll put something in front of them but don’t touch yet – and then lay out the band in a circle. Or lay it out in a circle BEFORE they come into the room. Then they sit around it and pick it up.

Have them raise it up, lower it down, go up, go down. Do that several times. Go in and out. Shake it fast and slow. You could do a wave where when you point at them, they raise the band – go around the circle where one raises, then the next, then the next. Play a game where if you play/sing a high note, they raise it high. If they hear a low note, they hold it down low.

From https://musictherapymoves.wordpress.com/2013/08/23/using-a-stretch-band-to-move/

Walk around the circle to Sousa march music or the Nutcracker March. Or to Mulberry Bush, where when you get to the “pop” part, everyone quickly lifts the band high and lowers it. Or to Ring Around the Rosey, where everyone falls down, still holding onto the band. Or I sing “Let’s go round and round the circle, go round and round the circle, go round and round the circle as we have done before. Go in and out the circle…”

Do a counting song – like 5 little monkeys if you have five children – at the beginning, all are standing and holding it and moving it up and down in rhythm to the music. When you say “one fell off”, you tell them which child should let go and sit down. They have a visceral sense then of how four is different than 5. And so on down. (Idea from Music and Movement Products.)

While sitting:

  • sing Sing Row Row Row Your Boat while making a rowing motion with the band. (Video)
  • Wheels on the Bus go round and round (rowing motion); wipers go swish (back and forth); driver says move on back (lean back), people on the bus go up and down. (Idea from Pre-K and K Sharing.)
  • Play a piece of classical music, and have them move the band to match it (might be slow and gentle waves, or fast and marching, depending on the music!)
  • Say “trot trot to Boston, trot trot to Dover, watch out baby or you might fall over” having children move hands up and down (trotting) and then fall / lean backward while holding onto the band.
http://strongstart.blogspot.com/2011/12/music-time.html

Keeping the beat. Count together as you move the band 1-2-3-4. Once they get the hang of the rhythm, go around the circle saying each child’s name on the first beat. Peter-2-3-4, Ben-2-3-4, Isabel-2-3-4. Or do animal names or colors or shapes or whatever.

If you have a multi-colored band, then you can do things like “everyone who is holding onto blue, lift it up. Everyone who is holding yellow lean back to stretch it out.”

Stretchy Band Train: make one person the engine, and one the caboose. They walk around with the band stretched between them to make a train car – other kids can board the train car and walk with them. Watch this video.

Use it as a resistance band to stretch out and away from each other – the children can face outward and put it around their bellies, or face inward with it around their backs as they back away. (See pictures on Music Therapy Moves.) Try this pattern: Holding the band from the outside of the circle: Take four steps out, take four steps in. Then get inside the circle, facing out and wrap the band around their bellies. Take four steps out to stretch the band. Take four steps in (going backwards).

Find more ideas:

Benefits of Multi-Age Programs

multi-ageL

In the U.S. most programs for children tend to be limited to children who are all close to the same age – for example, the children in a kindergarten class all turn five somewhere between Sept 1 of that year and August 31 of the next year. But some programs (like Montessori schools, Sunday school programs at churches, or scout troops) are multi-age, with a broader age range. (For example, I teach a multi-age STEM enrichment class for ages 3 – 7). Here’s why I love them:

Benefits of Multi-Age Programs

  • Knowledge and Skill Development: Younger children learn from older children. Older children reinforce and deepen their own understanding of a topic or skill by teaching it to the younger kids. This knowledge is passed on in a variety of ways:
    • Unintended modelling – when an older child is just doing something they want or need to do, (like using the potty or drawing a picture of a dog), they may not even be aware the younger child is observing and absorbing. But young children love to learn about what the big kids are doing.
    • Social play: The younger ones are exposed to things like better emotional regulation and more sophisticated problem-solving which helps them learn these skills earlier. The imaginary play is also richer as the older ones give ideas to the younger ones and have to figure out how to articulate those ideas so the younger one can play along.
    • Casual mentoring. When an older child is slowed down by the younger one’s lack of knowledge, sometimes they move in to help rather than waiting for an adult to help. (Like helping a child put on boots so they can go outside for recess.)
    • Support Desk: Younger children learn which classmates they can go to for help with various tasks, and may seek out their help before asking a teacher. (At one lunch, kids were given fortune cookies. All the non-readers went straight to the kids who could read to ask for a quick answer to ‘what does this say?’)
    • Intentional teaching. Sometimes teachers will ask a child who has mastered a skill to teach it to a child who hasn’t yet mastered it. The learner benefits by gaining information in a way that may be more fun and more confidence-building than learning from an adult. The child who is teaching has the chance to review their own knowledge from a new perspective.
  • Individualized curriculum, tailored to children’s unique skills, not just their age
    • Some kids are really advanced in some areas and a little behind in other areas. Being in a multi-age classroom makes it more likely that they’ll find peers to fit in with in both those areas.
    • There is a broader range of information being covered, so children are more able to learn at their own pace, making continuous progress rather than having to “wait till second grade, when we cover that.”
  • Children may stay with the same teacher for multiple years.
    • The teacher gets to know the child’s strengths and weaknesses, and is better able to tailor the lesson plan to meet that child’s unique needs.
    • There is a stronger parent-teacher relationship.
    • For the child, there’s the benefit of consistency, and a sense of safety and security in the classroom which enables better learning.
  • Less competition / labeling.
    • In a single age classroom, it’s easy to compare kids and say that some are gifted, some are delayed. In a mixed age classroom, it may be clearer that there’s a range of development: the one who does best in math class may have the hardest time in music class, regardless of age.
    • A child who struggles more with social skills might be ostracized by their age peers, but might find companionship in the younger kids in the classroom.
  • A more cooperative, caring learning environment.
    • Older kids learn to be patient, nurturing, responsible. (With guidance from adults!)
    • Role-modelling. The older children learn how to set a good example. If the teacher asks older kids who don’t always behave well themselves to remind the younger children what the rules are, the older ones behave better.
    • In group time, I find that the younger ones are better at sitting still and focusing because they see the older kids do so. The older kids like to show off their knowledge and can often answer the questions the younger ones ask – this builds confidence for the older ones and the younger ones are more excited to learn things from the big kids than they are to learn from a teacher!

Types of Preschools

When you start looking at preschools, you discover a whole world of jargon you never knew: play-based, emergent, teacher led, benchmarks, coop, Waldorf, Reggio Emilia, and so on. It can be overwhelming. And to make it more confusing, different people use words differently.. two schools that both call themselves “child-led” or “play-based” may look very different in practice.

A couple big picture ideas:

Structured vs. Play-Based: A structured preschool might use group time, worksheets, and individual projects to teach particular skills. Students may be drilled in the basics, or asked to practice things over and over. All the children are expected to be engaged in the same activity at the same time – they are all working on a craft project together or it’s math time for everyone. (Think of your elementary school education – structured preschools are using similar methods moved down to a younger group).

A play-based preschool typically has multiple stations set up and allows children to move between things when they choose, spending as long as they want at an activity. The teacher moves around the room, making suggestions and observations to further the learning. (Here is a research summary about play-based learning: https://www.easternct.edu/center-for-early-childhood-education/about-us/publications-documents/science-in-support-of-play.pdf) Most play-based preschools include circle time to provide some balance between structure and free play. Learn more about play-based preschool and activity stations at a play-based preschool, and how play-based compares to academic.

Teacher-Led vs. Child-Led: A teacher-led curriculum (may also be called didactic or standards-based) means the teacher always prepares the lessons in advance (it might be their own creation or they may use a curriculum written by someone else) and sticks to it. The teacher is active, the children are passive.

A child-led curriculum (may also be called emergent or constructivist) follows the children’s interests. So, for example, the teacher may know the math concept of the week is more than/less than. But instead of teaching that in a formal scheduled way, she asks the children playing with trains whether there are more blue trains or red trains, then asks the children playing with blocks which tower has more blocks in it, and asks the child who loves dinosaurs whether they think velociraptors ate more than T-rexes or less.

Brand Name Teaching Methods

Here is my summary of the methods. You can find many more descriptions online, including helpful comparisons at https://www.pbs.org/parents/thrive/comparing-preschool-philosophies-montessori-waldorf-and-more and www.privateschoolreview.com/articles/180. But remember that the actual practice of a school may differ from the theory of “the brand”.

  • Classic Montessori: The teacher sets up learning centers around the room, with “self-correcting” materials (e.g. a puzzle where the child can tell if they’ve done it right or wrong and thus can work to fix it themselves if it’s wrong.) Children work independently at their own pace, and are in a multi-age classroom.
    • Note: Montessori schools can range in quality and in how tightly they adhere to Montessori methods. The word Montessori is not tightly controlled, and anyone can use it, no matter what teaching methods they use. Some schools use it because it’s a known brand name that “sells” well, but the classroom experience may only have a very loose connection to Montessori practices.
  • Rudolf Steiner/ Waldorf – Nurturing, predictable structure and routines. Natural materials, with time outdoors, baking bread, working with wool, wood, and wax materials, no plastic. Lots of imagination and oral story-telling, but no electronic media (families are discouraged from having any screen time at home). Reading is not taught until age 7. Learn more www.youtube.com/watch?v=CoW0pCIG-FM and www.youtube.com/watch?v=tZmAX5adCl0 and www.movementforchildhood.com/uploads/2/1/6/7/21671438/heardaboutwaldorf.pdf
    Note: Waldorf requires all teachers and schools to be certified, so there’s much more consistency between schools with the Waldorf name.
  • Reggio Emilia. Child-led investigations. Project-based: when the children come up with an idea for a project, the class focuses for a few weeks on it, finding out together what they need to know to make it happen (including pre-reading and math.) They document projects with photos and journals. www.youtube.com/watch?v=XVv5ZL9nlgs
  • Nature-based or “forest kindergartens“. Common in northern Europe, they are newer to the States. There are several available on the Eastside of Seattle (My son attended Tiny Treks). Children spend most, or all of their time outdoors (yes, even in the winter). Child-led, play-based, emergent curriculum where teachers respond to children’s interests, rolling in math and science where it fits logically, often doing story-time, snack, and circle outdoors. To learn more, search for “forest kindergarten” on YouTube or check out www.youtube.com/watch?v=JBoXaQKoWL0
  • Academic preschools. There are preschools that have an academic focus that are taught in developmentally appropriate ways. But there are also schools which drill rote facts into children. That may mean the children will in fact learn to read words younger than they might otherwise have done, but this doesn’t appear to give them a long-term advantage. An occasional worksheet is a good experience for kids as preparation for future school experiences, but a worksheet-based curriculum is not appropriate for a 3 year old. (Read more: https://gooddayswithkids.com/2016/01/07/academic-preschools/)
  • Cooperative preschools. Most  are balanced programs with time split between play-based learning at learning centers (e.g. dress-up area, block area, art, sensory), circle time (includes story time, literacy skills, and concepts like days, seasons, colors, etc.) and outdoor or big motor play. There is a professional teacher who plans the curriculum and leads structured activities. What distinguishes co-ops is parent involvement. For a 3 year old, they might attend preschool three mornings a week. On some of those days, the parent drops off. On one morning, the parent stays and works in the classroom with the children. This means there is a very high adult to student ratio. Co-op isn’t the best answer for a parent who needs child care so they can work or do other activities. However, for parents who have the time available, many report that they enjoy the time spent in the classroom, and like knowing more about what their child does at preschool and who the other children are in the class. Parents also have the opportunity to build friendships with other parents. Note: Cooperative preschools tend to be much lower cost than other options.
  • Head Start. For families whose income is less than 130% of the federal poverty level (i.e. less than $25,000 in 2013). Provides preschool for child, but also: medical, dental and mental health screenings, meals for the children, and support for the parents. Fact sheet: http://wsa.iescentral.com/fileLibrary/file_71.pdf. To register for Head Start: http://eclkc.ohs.acf.hhs.gov/hslc/tta-system/family/for-families/Inside%20Head%20Start/Frequently%20Asked%20Questions%20%28FAQs%29/HowdoIapplyfo.htm

When considering which method you prefer, it’s worth keeping in mind what we know about brain development (see this post): Children learn best through hands-on experiences with tangible materials, through interaction with engaged human beings, and in environments where they feel safe and happy.

Becoming the Parent you Want to Be

Often as parents we find ourselves making things up as we go along – we think about what we want our kids to do right now, then take actions that give us quick results in the moment. Those actions may or may not be in alignment with our long term goals or visions of yourself as a parent – I’m sure we’ve all had moments of thinking “I can’t believe I just said/did that!!”

One step you can take toward becoming the parent you want to be is to define – in writing – what that means. This can begin with a process of brainstorming your goals and values, maybe even writing a vision and a mission statement. Then as you find yourself muddling through your parenting days, you can occasionally take time to reflect – am I on course toward my goals? What could I do to course correct a bit? You don’t have to be perfect every day if you’re remembering to check in from time to time to make sure you’re still pointed in the right general direction.

Picture1

Brainstorming the Basics

Here are some questions to ask yourself to discover what’s important to you.

  • What are your family’s strengths? What do you do best?
  • What are the most important values you want to pass on to your child?
    • What is the place of education in your family? What value do you place on work?
    • What are your family’s attitudes toward money?
    • How do you view religion/spirituality, and what part does that play in your daily life?
    • How important is it to you to help other people or participate in your community?
  • How would you like to relate to one another?
  • When do you feel most connected to one another?
  • What makes you happy?
  • What makes you fulfilled –brings you satisfaction, leaves you with a sense of completeness?

Answering those questions may be the insight you need to get started.

Figure out what the endpoint looks like

Another approach is “Begin at the end” – think ahead 15 years. What is your vision for:

  • What is your child like as a person?
    • What skills have you nurtured in them: Curiosity? Confidence? Compassion? Determination?
    • What are your child’s core values? (see above)
    • If your child is “successful”, what does that look like?
  • What are the relationships amongst members of your family like?
  • How would you like your child to describe what it was like to grow up with you as a parent?

Creating a Vision Statement

What is a vision statement?

  • It describes what your ideal family life would look like and what you want your family to be someday.
  • It provides inspiration for what you hope to achieve in five, ten, or more years;
  • It functions as the “north star” – helps you understand how your work every day ultimately contributes towards accomplishing over the long term; and,
  • An effective vision statement is inspiring, yet short and simple enough that you could repeat it out loud from memory

Some sample visions from organizations are: “To improve the health and well-being of each person we serve.” (a hospital)  “To inspire students to create a better world.” (a school) “We believe that strong families begin at home and building strong families creates thriving, healthy communities.” (a family support organization)  “To be a vibrant and welcoming community, feeding the human spirit, lighting a. beacon for love and justice.” (a church.)

Write your parenting vision statement. (Try several approaches until you find the one that sings to you.)

Creating a Mission Statement

A Mission statement focuses on a shorter time frame (1 – 3 years). There are lots of possible formats. One format answers three questions

  • WHAT you will do – what specific actions will you take?
  • HOW you will do it – what will be the quality of your actions (this is where you can articulate your values for how you want to interact with your family)
  • WHY – what results or benefits you will see when you look at your kids / your family in a few years?

Here are some sample missions, from the web… I don’t endorse any in particular, they’re just examples.

We are a family who believes that relationships matter most! We value spending time together. We hold each member of our family accountable for responsible behavior. We support each other in our individual pursuits of personal and professional interests. We cheer each other on. We laugh whenever possible. We hold our marital relationship as a top priority because this relationship serves as the foundation of our family. www.everythingmom.com/dynamics/the-family-vision-statement-a-solution-for-challenging-decisions.html

Our home will be a place where are family, friends, and guests find joy, comfort, peace and happiness. We will seek to create a clean and orderly environment that is livable and comfortable. We will exercise wisdom in what we choose to eat, read, see, and do at home. We want to teach our children to love learn, laugh, and to work and develop their unique talents. www.happyfamilyhappylife.com/examples-of-a-family-mission-statement/

Our family mission: To always be kind, respectful, and supportive of each other, To be honest and open with each other, To keep a spiritual feeling in the home, To love each other unconditionally, To be responsible to live a happy, healthy, and fulfilling life, To make this house a place we want to come home to. [also from happy family… cited above]

I choose to raise children who are respectful and believe they are worthy of respect. I choose to raise children who are confident and who know themselves enough to be true to the song in their hearts. I choose to raise children who are kind and caring and see kindness and caring in the world as well. I choose to raise children who are honest and value the power of truth. [in the post, the author gives concrete examples of how their parenting will reflect this mission http://lusaorganics.typepad.com/clean/2011/12/a-peaceful-parenting-mission-statement.html]

Implementing Your Vision & Mission

Write your Vision & Mission down, and post it where you can see it.

Review it on a regular basis and see how you’re doing.

Narrowing the Vision – Action Gap: when the theory of what kind of parent we wish we were meets the reality of how we respond to our child when we’re tired and they’re challenging, it can be easy to get discouraged. Be gentle with yourself – don’t beat yourself up for your mistakes, just use it to help you remember your goals. Ask yourself what you could do differently the next day to move in that direction.

Revise your mission as needed to in order to reflect new values, hopes, and dreams.

More Resources:

On this blog:

  • Here is a free printable worksheet for developing a mission/vision statement.
  • Read about Parenting Style: Authoritarian, Permissive, Balanced and Uninvolved are ways to describe the intersection between how high the demands are that you place on your child, and how responsive your rules are to their individual needs and goals. Are you your child’s Boss? their Friend? A Friendly Boss?
  • Read about Connecting Your Child with their Cultural Identity. What traditions and values will you bring in from your cultural background?
  • Think about what rituals you will incorporate – how will you celebrate holidays? What about the tooth fairy? Bedtime routines? It’s often the little things that define our families.

Elsewhere: