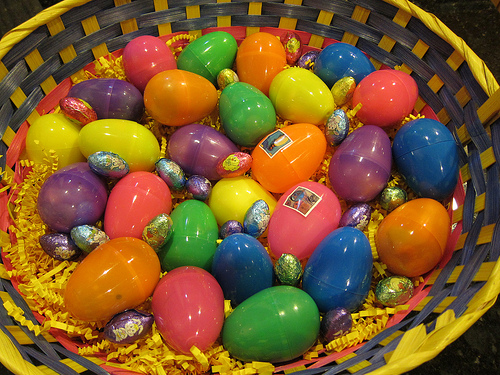
 Do you suddenly have an abundance of plastic Easter eggs in your life? Don’t throw them in the trash!
They can be washed and re-used again and again – Just throw them in a sink (or big bowl) full of soapy water to wash – it takes minutes. Then they can be stored and re-used again the next year. So much easier on the environment than land-filling dozens of plastic eggs per kid per year.
But, beyond just re-using them in one year, there are so many other fun things you can do with plastic eggs! Try some of these before you pack your eggs away for the year.
Egg Hunts: Egg hunts are a fabulous activity year round! (Read my post from last year on what your child can learn by hunting for eggs – counting and math skills, persistence, delayed gratification, observation skills, and more.) Check out this post from Hands On as We Grow, where she links to ideas on spicing up your egg hunts with new challenges. I like this one from Sugar Aunts – the kids have to search for things to fill the eggs with – something yellow for the yellow egg, something red for the red egg… this is just good for color learning, but also a great spatial intelligence builder as they have to think about whether things are small enough to fit in an egg, and fine motor skill builder as they learn how to fill and close eggs.
Shaker Eggs: You can use eggs to make musical shakers by filling with a variety of small objects. (Tape or glue closed if you have little ones who still put small things in their mouths.) Family Sponge has a great post on this, and they and Motherhood on a Dime also suggest a sound `matching game you can do: make pairs of eggs (two with kidney beans in them, two with rice, etc.) Have your child match the eggs – great practice at sound discrimination. Here’s a sound discrimination and math game in one. Fill eggs with objects. Have the child shake and listen and guess what might be inside by the sound. Then open it up and count the objects.
Egg Critters. You can add googly eyes, sequins, pipe cleaners and other decor to create little animals and make paper bag nests.

Sink or Float: Here’s a Sink or Float experiment from No Time for Flashcards where you fill the eggs with various items and see if they will float. If they sink, add salt to the water – does the egg float now? Try an experiment where you build a mini, watertight submarine from an Easter egg.
Writing on the Eggs: On I Can Teach My Child, she posted 20 ideas for what to do with eggs. My favorite was Posh Lil Divas word family eggs. 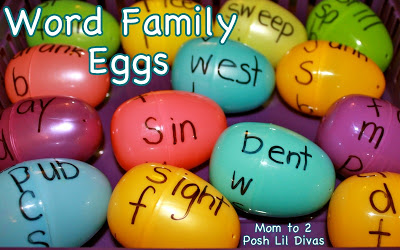 You could also write numbers on one half egg, and then on its partner, draw a number of dots to correspond to that number. Children have to match the 7 dots egg to the number 7 egg.
Filling the Eggs: You can make your own “Kinder Surprise Eggs” by filling eggs with toys and surprises for your child. If you’re ambitious, you could also then cover the egg up with playdough so your child has to peel away the playdough first, then open the egg. (There are countless YouTube videos about surprise eggs…. ) You can also get creative by filling the eggs with materials that lead into an activity.
- Get a Lego set and divide it up, with the 5 blocks needed for the first step in one egg labelled one, and the blocks for the next step in an egg labelled two, and so on. Do the egg hunt first, then your child can assemble the kit.
- Divide up jigsaw puzzle pieces between several eggs. After all the eggs are found, assemble the puzzle.
- Take the magnetic letters off the fridge. Divide them up in 26 eggs. As your child finds them, they put them in alphabetical order, and if any are missing, they know they haven’t found all the eggs yet.
- Make a lunch of finger food snacks (cheerios, crackers, raisins, blueberries, and so on) and hide them around the house – your child gets to eat lunch as they hunt.
- Fill the eggs with stickers or beads or other supplies for a craft project.
- Put finger puppets (or toy dinosaurs or whatever) in the eggs, and each time your child finds an egg, they open it up, and you tell a story about the puppets and the adventures they’re having.
Drop the eggs – engineering challenge: Put a bouncy ball (or similar weight object) inside the egg. Drop it – it will break open, as a real egg would. Now try putting it inside a plastic bag filled with packing materials. Drop it again. Does it break? Continue to design containers and test them (do a search for “egg drop challenge” for lots of ideas.) Once your child has perfected a container, test it with a hard-boiled egg, or if you’re brave, test it with a real one. For lots more egg science activities, check out my Inventors of Tomorrow blog.
Egg Balancing: Frugal Fun had a fun idea: take a cardboard box, mount sturdy straws, dowels or pencils standing upright, and put out with a collection of plastic eggs. Kids can balance eggs on the sticks – it’s a surprisingly challenging motor skills game.


What do you do with plastic eggs?


