You may hear early childhood educators say “Focus on Process more than Product.” Let’s explore what they mean by process and product, and some concrete tips on how to stay focused on the process.
In product-focused activities, the teacher or parent has a finished product in mind and has created a sample for children to copy, children have instructions to follow and all the children’s finished products look similar to each other. The closer the result is to the displayed sample, the more the adult will tend to praise the child for doing it well.
There is definitely a place for product-focused activities, and learning how to follow directions to create something specific. This can be an excellent way to learn certain skills. But, if children only follows directions, it can limit their creativity and limit their learning. It can also create stress if they feel like they have to do things ‘the right way.’
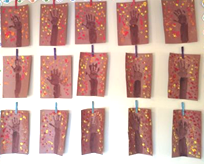
The three pictures below show paintings made using a flower as a paint brush. The lovely picture on the left is from here. The others are from 3 year olds in my class. All we did was set out paper, paint, and flowers, and the kids in our class had a fabulous time exploring this art experience. But imagine if we had set the painting of the flowers in a vase on the table at the start of class. How would that have affected the kid’s process and product?)

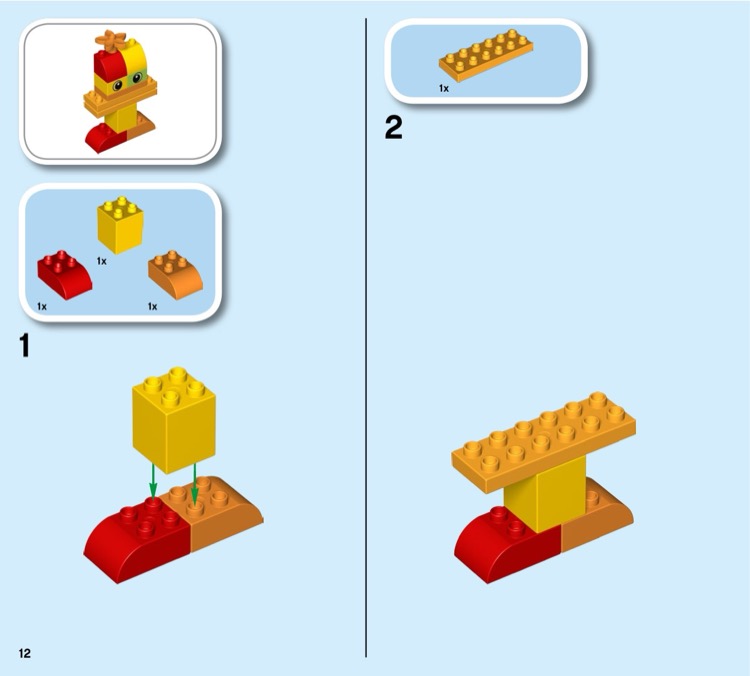
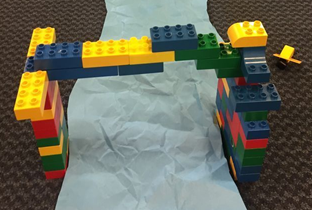
So, we want a balance of product and process in our child’s lives. For example, if your child gets a Lego set and follows the directions precisely to create the model as designed, they learn about paying close attention to directions, doing things in the right order, and not leaving out any steps. They are satisfied with their result. But then, you can encourage them to take that Lego set apart when they’re ready, and mix it with their other Legos, and play as long as they want, and build anything they want to build, they might use skills learned to build a bridge over “water”. This spontaneous building to meet a play goal is the process-focused side of Legos.
In process-focused activities, the focus is on experience, and exploration of tools and techniques. It is completely child-guided, with no right or wrong way of exploring. Children decide whether or not to do the activity, and how much time to spend on it. Examples in our classroom include: the water table, sensory table, block building, easel painting, “creation station” collages, and collaborative group art projects. We also do lots of explorations of scientific ideas and engineering projects which we think of as “tinkering.” These process-based activities do not lead to beautiful masterpieces to hang on the refrigerator or mail to grandparents. But they do lead to lots of fun and lots of learning.
Ways that you can support the Process:
- When planning an activity, instead of asking “what will the children make”, ask “what will the children do?” and “what materials can I put out that invite creativity and learning?” If your child asks “what am I supposed to do?” you can say “I see lots of cool supplies and tools on this table. Want to try them out? What would you like to do with them?”
- Approach the project like open-ended play. Let it be a joyful experience.
- Provide plenty of uninterrupted time for kids to explore. Let them decide how long to spend on an activity. Some days you’ll put out an “invitation to play” and it will captivate them for hours. Other days, they’ll have other ideas of their own to pursue and barely skim past something that you planned.
- Let go of your own judgments. Process-focused art and building projects can seem messy and pointless. Don’t think of them as a waste of materials, think of the brain cells your child is building through this experience and the skills they’ll learn now and apply to later efforts!
- If you’re sitting with a child who is doing art or building something, try to copy what they are doing. Otherwise, they will try to copy you, and think that the way you’re doing it is the “right” way. They may be disappointed when their item is not as good as yours.
- Or, if you’re playing side by side with them, make some mistakes: paint with your non-dominant hand, or build a tower too tall so it falls over. Let them see you explore.
- Don’t ask them “what is it” – ask “tell me about what you’ve done.”
- Don’t distract them with irrelevant questions. If they’re completely engaged in a process, don’t interrupt it with a name-this-color quiz.
- Don’t decide for them that they are done. Often adults watch for when there’s a “nice” painting, and then offer to take the paper away before the child “messes it up.” Or they watch a child building and realize that it’s all about to come tumbling down, so they encourage the child to stop and not add that toppling brick on the top.
- Ask them if they want to write their name on their art. If they say yes, then ask “would you like me to write it or do you want to?” If they want you to write it, ask where to write it. Ask them where they want to put it. On the refrigerator or in the recycling bin? Try to not be disappointed in their choices of what to keep and what to let go of.
As your child gets older, more and more of their time will be dedicated to products – book reports, math tests, science fair presentations, scoring goals at soccer, and more. Lots of time “doing things the right way.”
The early years should focus much more on process. All of a baby’s play time is process and free exploration. A toddler’s life should be about 90% process, 10% focused on specific accomplishments – learning to undress themselves, learning to eat with a fork, holding a pencil and making a scribble, stacking a few blocks to make a tower. In the preschool years, we may aim for 80% process, 20% product. Never think of the process as a less valuable learning experience. It’s building creativity, inspiring curiosity, helping them make unexpected connections, and getting them excited about what they can do ‘all by themselves.’
Thanks to these articles for inspiration:
http://www.naeyc.org/tyc/article/process-art-experiences
http://prekandksharing.blogspot.com/2012/02/making-transition-from-product-to.html
http://www.prekandksharing.blogspot.com/2012/02/childrens-art-process-versus-product.html