Category Archives: Seattle area

What’s the Best Summer Camp?

20180803_222448381_ios

Each year around this time, parents start asking me about summer camp. They want to know which are the best ones. Just like with choosing preschool, I can’t give you a simple answer. Because what’s “best” depends on what your needs or goals are.

So, I recommend that before you look at camps, you first answer these questions for yourself. [Note: at the bottom of this post, I recommend camps my family has enjoyed on Seattle’s Eastside, so local folks may want to check those out!]

Needs

What are your basic logistical needs?

  • Scope: Do you need full-time care all summer while you work? Or full-time care for a few weeks so you can focus on adult projects? Or part-time enrichment camps that leave the afternoons for free play? (I know families that when they visit the grandparents, they enroll the children in a part-time day camp, which may be more fun than hanging out at the grandparents’ house all day, and allows the adults some time to do adult activities.)
  • Schedule: What time would it work for you to drop off? What time can you pick up?
  • Location: I’ve often enrolled my kids in camps that are quite a ways from home. (Like wilderness camps and farm camps that were both about 40 minutes from our suburban house.) It works for me, because I just bring my laptop and while they’re at camp, I sit at nearby parks or coffee shops and get my work done. But you may prefer to stick closer to home or your workplace.
  • Cost: Costs range a lot! And it’s hard to compare costs between camps, as some camps are 5 hours long, some 6, some 7…  For example, even within the one Parks department, for a 7 year old, the hourly cost could be anywhere between: $9 per hour for theater or ballet camp to $11.50 for Lego/STEM to $22 per hour for pottery camp (high materials cost, I’m assuming.) If you need full-time care, the hourly cost matters. If you’re just looking for an activity focus for a week, and don’t necessarily need 6 – 8 hours of child care, maybe the total cost is more important. The Lego camp is $400 a week (9 – 4 each day), and the pottery camp is $242 a week (10 am – 12:30 pm).
  • Age requirements. There are plenty of camps for age 6 – 12. It’s harder to find camps for little ones, and if you do, they tend to be EITHER full-time child care OR very short – a few hours at a time.

Goals

The next question is what are your goals for having a child attend summer camp?

  • Is it just about child care while working? You may choose to have them attend the same camp every week all summer because having that routine is easiest for you.
  • Is it about summer fun? You may choose camps that emphasize being outdoors and playing, or you may send your kid to the same camps their buddies are going to so they have built-in friends.
  • If you want to expose your child to lots of different activities to broaden their life experience, you may dabble through a: farm camp, wilderness camp, theatre camp, art camp, science camp, and multi-sports camp all in one summer.
  • Is there something you want your child to learn that you’re not able to teach? (Bike camp for me!)
  • Do you want a church-based camp, or a scouting camp?
  • Or do you want a family camp that you can ALL attend together?

Each family may have unique goals for each child.

Limitations: You should also keep in mind if your child has limits to what they can do. My youngest is autistic. He’s also very bright, so he can do so well at a camp that the staff  never realizes his challenges. But he has limits… and when he passes those limits, he has giant meltdowns. So, he does best when I enroll him in half day camps, not full day, and when he is one of the oldest kids in the program rather than one of the youngest so the social/emotional expectations are set at a lower developmental level. Know your child, and choose camps that set them up for success. (Note: there are camps that offer a few sessions each summer that are sensory friendly and have higher staffing levels, and there are also specialty camps that are solely for kids on the spectrum and that really focus on social/emotional skills – those can be a good match for some families’ needs.)

Research your options

Check out your parks department, and those in neighboring cities. Check the Boys & Girls Club, Campfire, Boy Scouts and Girl Scouts. They tend to offer LOTS of different camps, in lots of interest areas and locations and may be fairly affordable options.

Your city may have a summer camp fair (in the Seattle area, ParentMap has offered camp fairs in February and March where you can discover lots of options for summer camps). 6 Crickets is a camp directory. Check ads in local parenting magazines – but  there are lots more great programs that can’t afford to advertise, so also get word-of-mouth recommendations. Ask your friends, family, parents of your kids’ friends, and parents at the playground about what camps they have loved (or not).

Once you’ve collected names of interesting options, you can do your research online to learn more. Look at their websites and Facebook pages, and also search to see what else other people say about them online. (Always remember with online reviews, the people most likely to submit a review are the ones who are mad about a bad experience – anger motivates action. They’ll mark one star. The second most likely are the ones who had unusually amazing experiences they want to share in five star reviews. But there may be 100’s of other people who had perfectly fine experiences who don’t get around to posting their 4 to 5 star reviews.)

Questions to Ask

Things to look for when you’re researching your options:

  • What is the typical schedule for the day?
  • How much is structured activity and how much is free play?
  • What activities does your child participate in?
  • How many children attend? What is their adult to child staff ratio?
  • What experience / training do those adults have? (Note: the vast majority of staff at ALL summer camps are college students, age 17 – 22, with one or two years of summer camp experience.)
  • What backup staff is available in case unexpected challenges arise at a camp site? You may not be able to find this info online, but it’s helpful if they do have this. (I had one camp we went to the first week of their season and it was the first year they’d used that site and the young, inexperienced staff faced some unexpected challenges without experienced folks on-site to back them up… the senior staff got there, but it took them a while – I’m now inclined to choose long-established camps for the beginning of the summer, and save those “start-up” experiences for later in the summer when they’ve worked out the bugs.)
  • Do they have an indoor option in case of weather problems (too wet, or too hot)? I don’t find this a necessity but some parents really don’t want their children out on a really wet or really hot day.

After you go through this process, you’ll have a lot better idea of what you’re looking for in a good summer camp. And one of the nice things about summer camps is that they’re only one week long. It’s a lot less pressure than choosing a school for a full school year. I figure it’s easy to just try it out for a week, and if it’s great, we return every year, if it’s not, it’s a learning experience we move on from.

Camps We Have Liked

Sometimes when I offer parents ‘more questions to ask’ instead of answers to their questions, that can be frustrating. So, here are some recommendations of the “best” summer camps my kids have attended over the years. (All on the Eastside of Seattle metro / King County)

These are  my personal experiences as a parent, not representative of the views of my employers (Bellevue College and Parent Trust for Washington Children.)

My logistical needs for location, cost and schedule were always fairly flexible, so I was able to prioritize my goals of broad learning experiences for my kids. I put them in part-time summer camps most weeks of each summer, because I find I’m the best parent to my kids when I have a few hours to myself each day to work on my projects – that energizes me to come back for a great afternoon with them – going on hikes, swimming, picnics, and more.

Here are camps that my younger child has attended recently and enjoyed (most are camps my older kids also went to years ago.)

  • Studio East. Theatre camps for ages 4 – 19, held at multiple locations in Kirkland. Kids spend a really fun week learning dance, music, lines, and more, and put on a show at the end of the week. Theatre education is also great for social skills, emotional intelligence and teamwork. They really encourage creativity and include kids’ ideas in the experience.
  • Pacific Science Center camps. We’ve tried lots of science camps. PacSci’s are the best, I think, for science learning. They offer lots of themes, in multiple locations throughout King County. Staff is well-trained, and curriculum well-developed. PreK through grade 8. What I don’t love – they’re pretty indoors and pretty structured for a summer camp experience. And most of their camps are full day (9-4). [My child is autistic, and that long of a camp was simply more than he could handle when he was 5 – 8 years old. So, he tended to make it through Monday to Wednesday of a PacSci camp, start melting down on Thursday and on Friday they ask me to take him home partway through the day. I love that they’re starting to note “sensory-friendly” camps on their schedule that are a better match for kids with autism or sensory issues. I wish they’d realize that a shorter schedule would also help.]
  • Wilderness Awareness. Day camps for ages 4 – 13, overnights for 11 – 18. Day camps in Kenmore, Issaquah, Seattle, and Carnation. Nature games, story-telling, songs, hikes in the woods, animal tracking, and more.
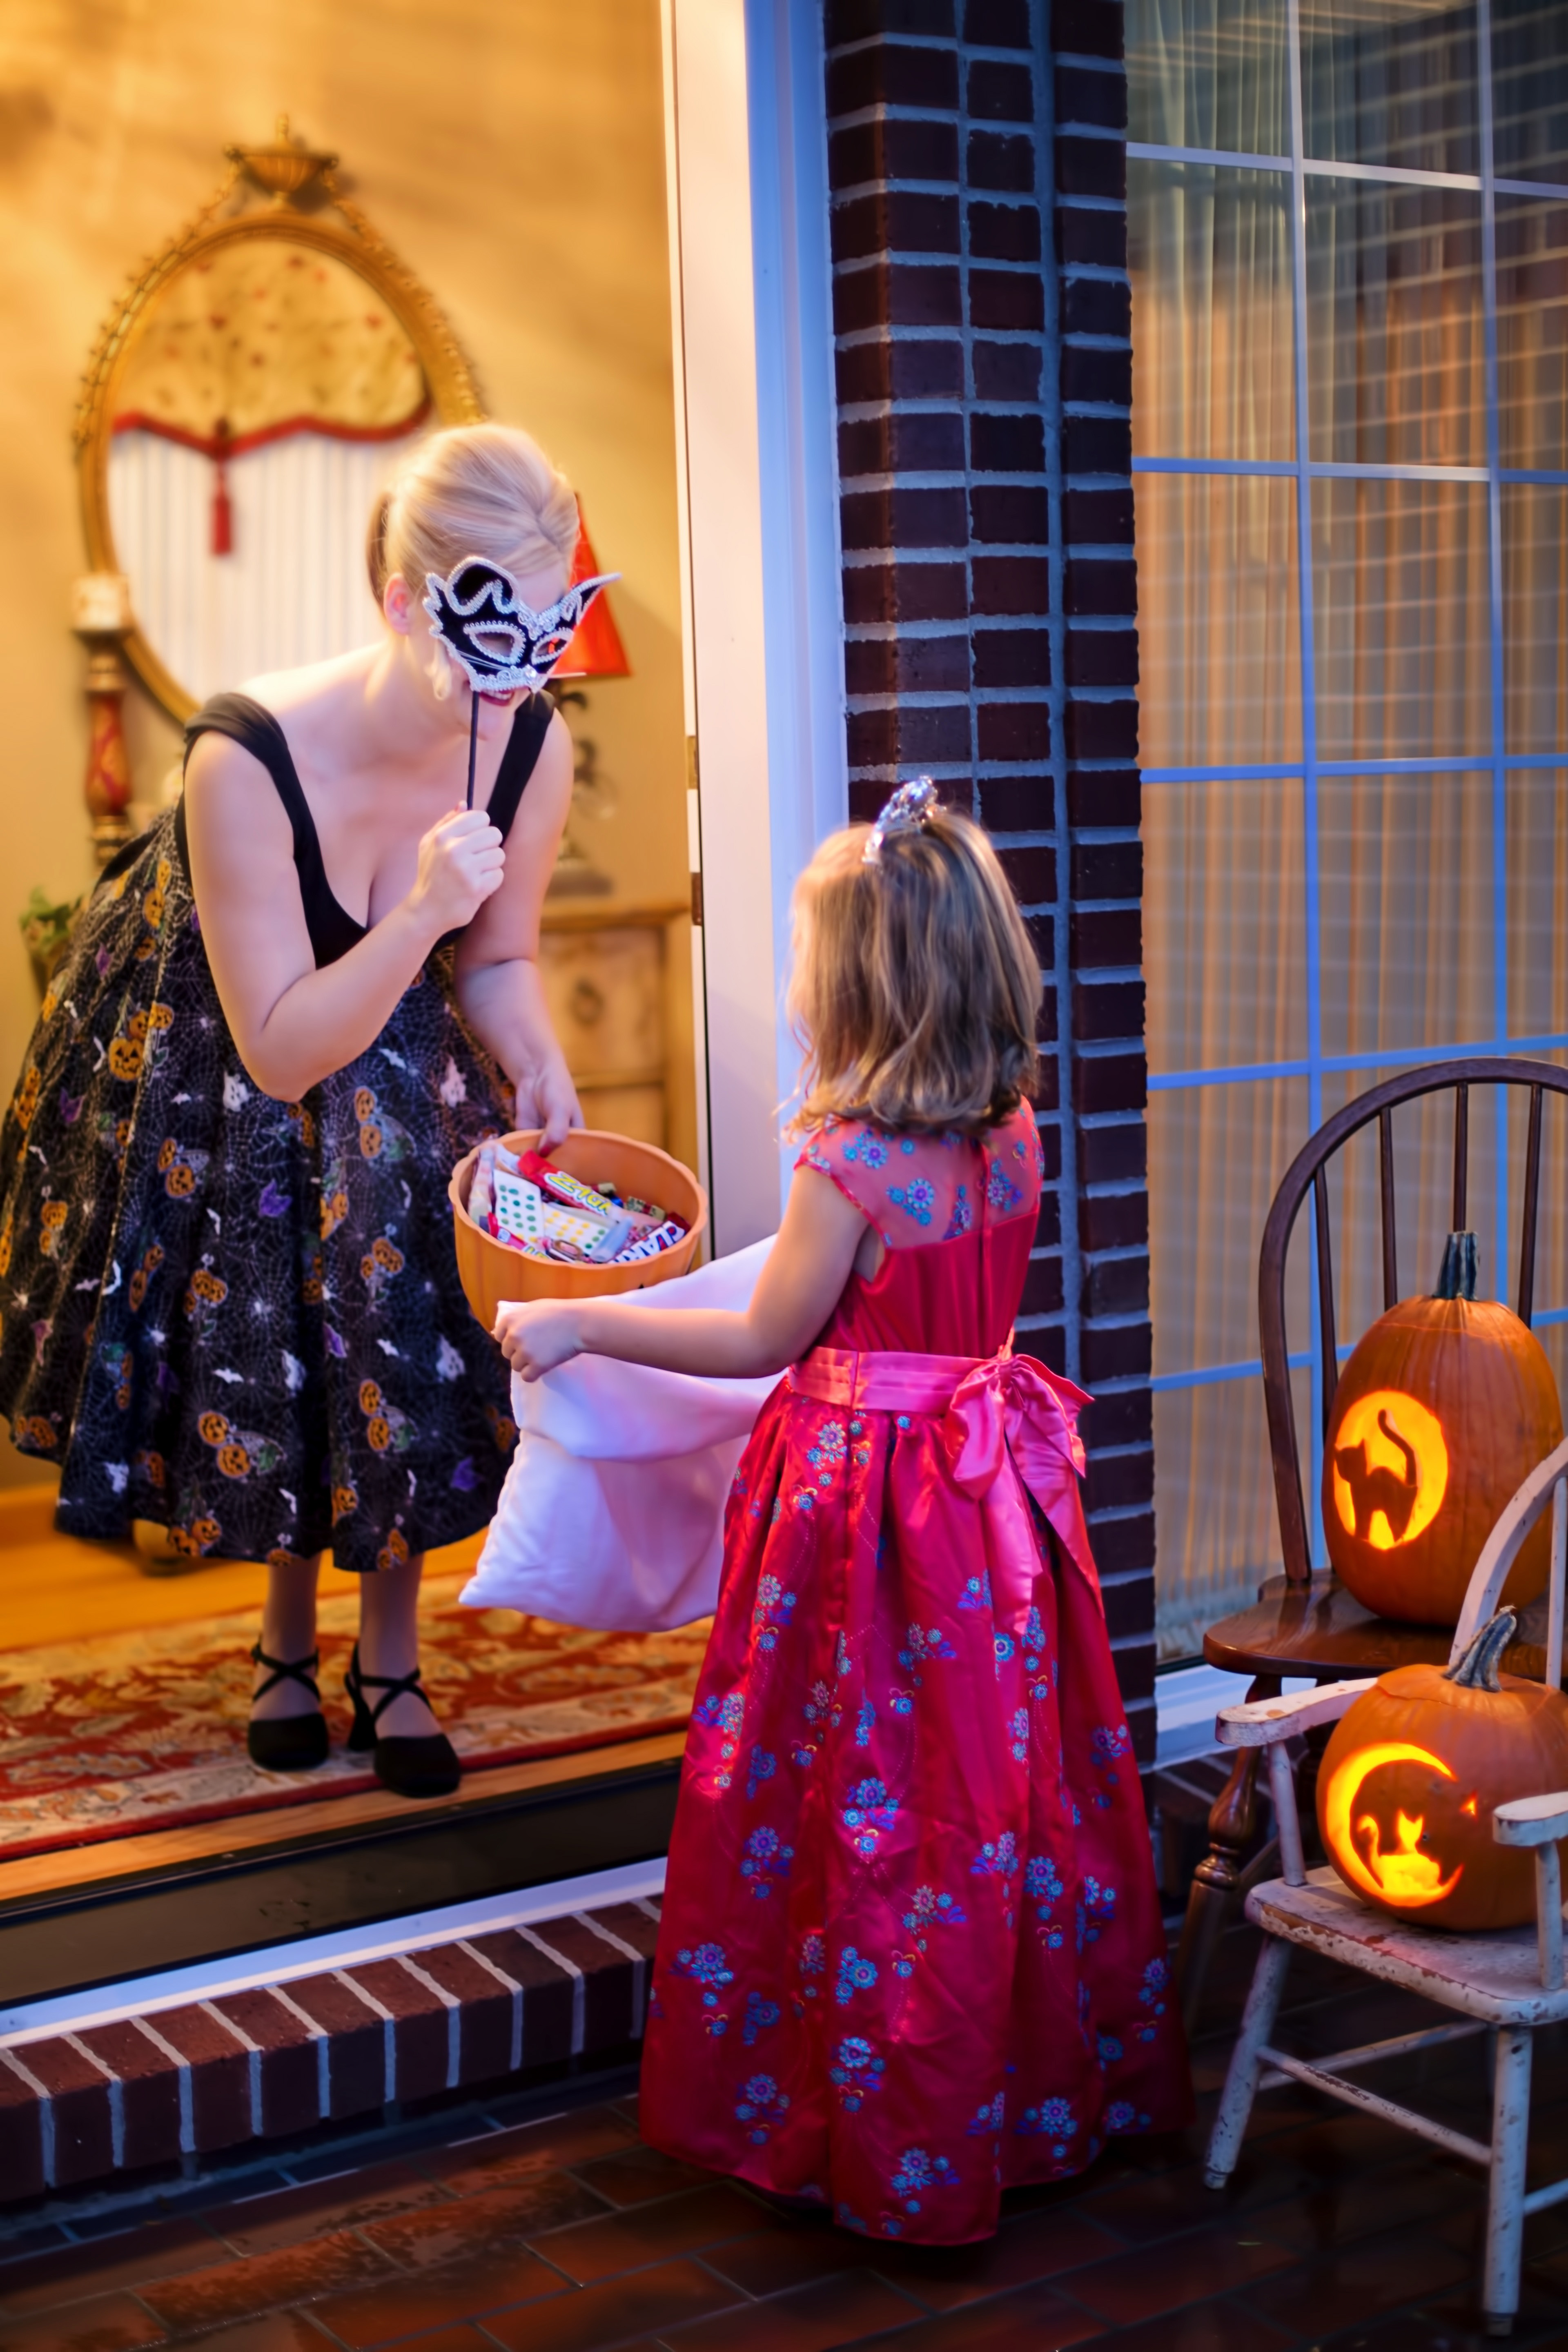
  • Pedalheads. Because of my disability, I’m not able to teach my son to ride a bike, so I love having a bike camp option. They offer everything from 60 minute long camps for 2 – 3 year old beginning riders to full day camps for older kids with strong skills. I know many parents who had a 5 or 6 year old who started the week not knowing how to ride, and was riding independently by the end of the week. My son went for one week at age 5 and ended that week still on training wheels. He went for a week at age 6, he could just barely ride without training wheels. But he still had a great time both weeks. Pedalheads also offers a Heroheads sports camp he has taken twice and greatly enjoyed. (The photo at the top was taken there.)
  • Skyhawks offers many sports camps at many sites. Many are focused on a single sport, but I really like their multi-sports camp. Although we’re a physically active family, we don’t really play team sports, so I like that my son gets to spend a couple weeks each summer being trained in baseball, basketball, and soccer skills so that if a buddy on a playground asks him to play he at least has a clue.
  • Family Camp. With my older kids, we thought about attending a family camp, like the YMCA camps at Camp Orkila and Colman, or Cascades Camp, or North Cascades Institute. But, we never did. Then, four years ago, we started attending Eliot, a week-long family camp for Unitarian Universalists. Partway through that first week, I looked at my partner and said “I guess we know what we’ll be doing for one week every July from now on.” It is a joy to spend a week at camp, singing, tie-dyeing, dancing, listening to Harry Potter under a tree, swimming in the lagoon, and re-connecting with people we see every year at camp, who range in age from birth to 90-something. We love family camp!
  • Some cooperative preschools offer a few summer camps each summer for ages 3 – 5. These can be especially helpful for young ones who are just about to start drop-off preschool or kindergarten to get them used to being without you at class. (I teach a summer STEM camp at Bellevue College for 3 – 6 year olds.)

My older kids did some fabulous camps that I haven’t revisited with my youngest, so I don’t have current info on them. But when my kids attended these camps (between about 1998 and 2013), they were fabulous:

  • Wolf Camp – a wilderness skills camp. Day camp for ages 7 – 13 in Issaquah or Puyallup. Overnight camps for age 9 – 17 around Washington State.
  • Shoo Fly Farm – a day camp which captures everything you would imagine summer childhood on a farm to include – take care of and play with farm animals, making butter and jam, tie-dyeing, and swinging on a tire swing. Registration tends to fill by the end of January.
  • DigiPen Academy – their Project Fun camps for k-12 teach programming skills for video game development. My oldest child did them as a teenager. (He’s now a paraeducator. My middle child who did fashion design camps is now a software developer… it’s interesting how our kids turn out!) They are very pricey.
  • Stone Soup Theatre Camp in Seattle, for ages 5 – 15.

Flexible Options:

  • Arena Sports – these win for the most flexible camp option! 5 locations. Half day OR full day, with extended care options, for ages 3 – 12. They play soccer and active games, they play on the bounce house. As a friend once described an activity: “it sweats ’em up good.” We would attend these on weeks when we had plans on some days but had other days free, and I wanted to have my child to have a chance to burn off some energy while I caught up on projects.
  • Steve & Kate’s Camp – It was held on the campus of Bellevue’s The Little School for many years – they’re now at International Friends School. The advantage is their flexibility. It’s a huge age range from pre-K to 7th grade. You don’t need to sign up in advance – once you’ve registered for the year, you just show up there in the morning, whenever you want to for as many days as you want to. And when kids are there, they have virtually complete freedom to choose from many different activities (film-making, bread-making, games, robotics, sewing). It’s a “free range” approach. Works great for many kids – I have a friend who says it’s an incredible opportunity for his daughter to learn skills and use her creativity! But for my kid, he basically sat in the “lounge” reading books all day. It was fine for days I needed child care, but it’s lot more expensive than Arena Sports.

We’ve also done various one-shot camps that were great but we never happened to return to. Like one year I visited friends in Portland for a week while my kids attended Do Jump circus camp. There were summers where my child’s interests of the moment led to Fashion Design or Nature Illustration camp. We  attended several camps sponsored by the zoo and our local parks departments. So, the ones listed here are just a sampling of what our family has done, but there are SO MANY MORE great options out there.

What have I missed? What other camps in King County have you had a good experience with? Add a comment below. (If possible, include with  your recommendation: what ages it’s for, where it’s located, and what you loved about it.)

And if you’d rather just spend time hanging out at parks with your kid, read my posts about local parks, or if you have a toddler too young for camp and need ideas for activities, check out cheap dates with toddlers.

And, a product recommendation to make every day of summer camp easier for you: I LOVE the Solar Buddies sunscreen applicator! (Amazon affiliate link.) You fill it with your favorite sunscreen and then just roll it on. So much faster for me, so many fewer complaints from my son, and I don’t end up going to work with hands all gunked up with sunscreen.

How Halloween Works

stock photo of child trick or treating

Fifty years ago, my husband’s parents moved to the United States and luckily, a co-worker took Jim aside and explained to him what Halloween was, and how trick or treating works. I had neighbors a few years back who weren’t so lucky, and were very confused when my costumed family showed up on their doorstep calling out Trick or Treat! I now work with many families who are newly immigrated to the U.S. so I thought I’d write a primer on how Trick or Treating works, from choosing a costume to how to trick or treat, where to trick or treat (neighborhood, malls, trunk or treat events or office parties), how to welcome trick or treaters at your house, safety issues, and what to do with all that candy! I also include a few recommendations for movies, books, and songs about Halloween.

Choosing a Halloween Costume

If you’ll be trick or treating outside, think ahead about practical things about what the weather will be (do they need to fit a coat under the costume, or wear something that can get wet) and how to ensure your child will be visible to drivers (if your child chooses an all black costume, consider choosing a white treat bag or other accessory that’s visible in the dark). Check out my other post for lots more thoughts on choosing a costume.

Don’t forget a treat bag or container of some sort for collecting candy in. Make sure it’s easy for your kid to carry, easy for them to open up to put candy in, and not easy for them to spill all the candy out of! (Tip: Don’t choose a giant bag. Choose a smaller container, so it’s easy to say “Oh, it looks like your bag is full. It’s time to go home.” There’s only so much candy you want to collect!)

How to trick or treat:

Look for houses that have their porch lights on – that’s the signal that they welcome trick or treaters. Send the children up to the porch (you hover nearby). They ring the doorbell or knock. (If no one answers, move on. But usually they will.) When the host opens the door, the kids say “Trick or Treat!!” Sometimes the host holds out a bowl of candy – kids can reach in and take candy. (This is a good chance for kids to practice their best manners – make sure they know to take just one!!) Sometimes the host holds out a few pieces of candy – the kids hold their treat bags up for the host to put the candy into. Teach your child to always say “Thank you” and “Happy Halloween.”

Sometimes the host will engage them in a lot more conversation like “Oh, I like your costume? What are you dressed up as?” Encourage your child to participate, or move nearer to help them answer. This is a good time for them to practice social skills. On a very rare occasion, when your child says “trick or treat”, the host will say “trick.” Tell your child they could cross their eyes, roll their tongue, balance on one foot or something else.

People ask “What time is trick or treating?” There’s not usually any set time, just the general trend for an area. In the Seattle area, we find that our earliest kids come by at 5:30, and the latest are around 8:30. Aim for the middle of that window, and you’ll be fine. Make sure your kid eats a good dinner before you start! Note: toddlers may only be up to going to a handful of stops before they’re done. The older kids are, the longer they last.

Choosing Where to Trick or Treat

Neighborhood?

My favorite option is to trick or treat in a neighborhood. It’s a fun opportunity to take your child for a walk around the neighborhood after dark, and a rare chance in modern society to at least briefly meet lots of your neighbors.

Which neighborhood to chooseI think it’s lovely when you can do your own neighborhood. When I was a kid, we knew the families with kids, but this was one of our few opportunities to interact with the other families in the neighborhood. In our current neighborhood, we know some families well (the ones with kids), some families a little (the ones who come to the HOA meetings), and there’s a few families that our only interaction with them has been on Halloween nights. I think when neighbors can recognize each other and have some connection to each other, no matter how small, it makes the neighborhood friendlier and safer for all, as we all look out for each other a little bit more.

But, many people live in neighborhoods that are unsafe, or neighborhoods like my in-laws where over the past several years, fewer and fewer houses had their porch lights on each year, so more kids chose to go elsewhere, so fewer kids came, and my in-laws are about to give up on buying candy and turning their porch light on.

If you’re wondering whether your neighborhood will be busy on Halloween night, or if there is somewhere better to go, ask neighbors, ask parents at the playground, or ask on Nextdoor or your neighborhood Facebook group. As a general rule, upper middle class neighborhoods where young families live may be best – lower income areas or areas with older homes are more likely to have retired folks or younger adults who are at work. (Not to say there can’t be great neighborhoods in all demographics!)

For apartment dwellers – Some apartment communities actively encourage trick or treating (you’ll see signs up in the elevators or by the mailboxes, notices in the newsletter, and so on). Some don’t. Some apartment dwellers host trick or treaters even if the apartment doesn’t specifically encourage it, but some don’t participate even when the community does. Keep your ear out for what it seems to be where you live – on Halloween night, there may be a system like: if there are decorations or a sign you can trick or treat there. (Learn more about apartment Halloweens.)

Candy in a bowlSome people who aren’t able to be home for Halloween leave out a bowl of candy. I generally don’t have my kid take any, just because for me, the whole point of Halloween is human interaction, not more candy.

The Mall (or downtown business district)

Lots of malls host a trick or treating event (at the bottom of this post, I list details for my local malls on the Eastside of Seattle). The events may also include live music, clowns, games, face painting, costume contests, or other activities.

In these, you go store to store (participating stores are typically marked in some way like a balloon at the door), and ask for candy.

I’ve found that at some stores, you get a great reception where you do the whole trick or treat routine and the clerk chats about the costume and so on. At other stores, especially the busy ones, the poor harried clerks just kind of point at the candy dish and grunt “take one” and go back to work.

The advantages to a mall event are that the weather doesn’t matter, they’re well-lit, and can feel a lot safer and more predictable than a neighborhood. The disadvantage is that it can feel a little impersonal and consumerist – you’ll go home with a lot of candy, but not much sense of connection.

Trunk or Treat

Some churches or schools sponsor “trunk or treat” events which are often open to the general public. These are “Halloween tailgating parties” where parents or community members park their cars in a parking lot and decorate their backs of their cars, and the kids walk around to the cars to trick or treat. At some events, kids do an activity, like a carnival game, to earn their candy.

I honestly have never been to one, but it sounds like kind of halfway between the other two options – it’s outdoors and has more personal interactions like the neighborhood, but it may feel safer or more contained, like the mall. Since it’s a short walk between cars, it may be easier with little ones than a neighborhood. Also, parents / community members get a chance to socialize instead of being at home alone waiting for trick or treaters to appear. Events may have rules which ban overly scary or grotesque decor which might frighten kids. Here’s an article about how to organize a trunk or treat event. And Pinterest has hundreds of ideas for how to decorate a car for an event.

Office Parties

Some companies host trick or treating in their offices, where the kids go around to desks or offices. This could be a nice chance for your child to meet your co-workers or a partner’s co-workers and see the workplace. Like mall events, I find that some people are excited to greet the kids, and it’s a nice chance to connect. Some are just trying to finish work before a deadline and just kind of wave at the candy bowl and continue working.

Nursing Homes

Some elder care facilities host Halloween events. It’s a nice chance for your child to experience being around older people in a positive way, and can brighten their day.

Welcoming Trick or Treaters at Your Home

If you live in a neighborhood where there’s lots of trick or treating, then when children are younger, it may be easier to stay home and let the fun come to you. Many people without children may also opt to stay home on Halloween and welcome trick or treaters. Or leave one family member home while the rest go out.

Getting the Goods: Buy candy that you like, in case you have leftovers. Only give away items that are individually wrapped. This is not the time to make your own cookies to share. It can be hard to know how much to get – ask your neighbors what typical traffic is in your neighborhood, or ask on Nextdoor or your neighborhood Facebook group. My in-laws buy 6 full size bars and often don’t give those away. We give out about 50 – 70 items. Other neighborhoods I’ve heard may do 200! Find tips below on allergen friendly and eco friendly options for treats.

On Halloween night: Leave your porch light on – that tells people they’re welcome to come ring your doorbell. Adding a few decorations is even more welcoming. Some families play Halloween themed music too. Or bake pumpkin spice cookies – not to give away, but to make the whole neighborhood smell good! Put your pets away – you don’t want to risk them running out the front door, or frightening a child. (If you’re a dog lover with a sweet dog, it can be hard to remember that many children have no experience with dogs or might have had a frightening encounter in the past.) If you run out of candy, turn off your porch light.

For info on what to expect when you open the door, see how to trick or treat above.

Choosing Low Allergen or Non-Food Treats

Consider offering a couple different kinds of candy. For example, if you’re a huge fan of a candy with nuts, offer that, but also offer a nut-free option. Or if you offer milk chocolate, offer a dairy-free option. Or consider a non-food option, since in the United States, 1 in 13 children has a food allergy, some of which are life-threatening. Many of these children participate in the fun of trick or treating, then go home and sort through their candy with their parents for the few pieces that they can eat.
Food Allergy Resource and Education sponsors the Teal Pumpkin project. It raises awareness of food allergies and promotes inclusion of all trick or treaters. It offers an alternative for kids with food allergies and others for whom candy is not an option. To participate, you provide non-food treats, and place a teal pumpkin at your house to signal your participation and to raise awareness. (If you also offer candy, make sure the non-food treats are in a separate bowl to avoid cross-contamination.)

They offer several ideas for non-food treats, as does the Green Halloween site. You can get glow sticks or stickers or such at your local dollar store – or check out your local thrift store for pre-used items to cut down on environmental impact. We gave away Glow In The Dark Balls for Star Wars year, Dinosaur Toys when my son was a triceratops,  jungle Animal Stickers (including tigers) for Calvin & Hobbes theme, and Pokemon Toys when he was Pikachu. The cost has ranged from about 10 cents to 30 cents an item.

Green Halloween

All of this individually wrapped candy or all those non-food consumer goods have a negative impact on the environment. It’s also a really consumerist holiday that’s all about “getting more stuff.”

You can make your Halloween greener by: buying costumes from second-hand stores or participating in costume swaps, re-purposing clothes or dress-up supplies you already own by adding make-up or a few small accessories, using lead-free face paint instead of masks, choosing decorations you can re-use every year rather than buying new, making decorations from recyclable items, composting your pumpkins, selecting treats that are free trade or organic (Green Halloween has recommendations), giving seashells or polished rocks or seeds to plant, or hosting a party to encourage people not to participate in trick or treating.

Hot Beverages

Our family tradition is a little unusual… years ago, we went trick or treating on a very cold night in Snoqualmie, and a family was giving out hot cider to the parents and it was lovely! Years later, we moved to a neighborhood with trick or treaters, to a house with a front porch, and we started our tradition of sitting on the front porch handing out hot chocolate and hot cider to all the parents who come by. (And non-food treats to kids – we’re a teal pumpkin house.) Our decor theme each year is determined by what our son decided to be for Halloween that year.

Because this is not really a common Halloween tradition, people are often surprised when we offer them a drink, but then we end up having some great conversations with them and they almost always take us up on the offer.

I hear rumor that some parents hand out alcoholic beverages to other parents. We don’t, because I’m not into anything involving potential legal liability.

Leaving out a bowl of candy

Some people feel bad about being away from home on Halloween, so will leave out a bowl of candy so no one is disappointed. This can work out very well – some will report that some candy was taken, or will say that their security cameras recorded lots of sweet little kids coming up and taking one candy each. Some report that not only was all their candy taken by one person – the person took the bowl too. 🙁

Handling Scary Decor and Costumes

Your child may see costumes or decorations that frighten them. There is a trend toward gory, macabre costumes and decorations, like bloody severed hands and rotting corpses.

Some people argue for the scares:

“It’s about the other side, the dark side, the side of life we as parents would like to pretend doesn’t exist—but it does. It’s about going out into the night and confronting your fears, a little more each year. And what’s better than facing your fears and finding out they’re not as scary as you imagined? It’s like going on a roller coaster. First time: terrifying. Subsequent times: totally fun.”  (Source)

But if you’re the one who has to manage your child’s fears in the moment, or their nightmares and anxieties for the next few weeks, you may not feel so enthusiastic about this trend. Some ways to manage this:

  • before Halloween talk about decorations – maybe even go look at them in stores so your child can see that the skeleton is lifeless plastic. Explain that people will dress up in costumes and show pictures of lots of friendly costumes and a couple scary ones, but emphasize that it’s always just another kid underneath the mask.
  • you and your child could preview the neighborhood you plan to trick or treat in the daytime – seeing the decorations in the light of day can make them less frightening
  • teach your child that if there’s decorations that make them uncomfortable, they can skip that house – we use the phrase “it’s OK to say no when your friends say go”
  • if you and your child are welcoming trick or treaters at your own door, you may want to peek out at the costume first to see whether it’s one that will concern your child before calling the child over to see

Safety

You’re out after dark in neighborhoods that may not typically have many pedestrians, so practice really good pedestrian safety. If anything about a neighborhood or a particular house feels wrong to you, trust your instincts and skip it. Explain to your child why you are doing that – it’s good for them to learn to trust their instincts too. (But please try not to let prejudice enter in here… nothing like “we won’t go to that house because I don’t trust people of that race / religion / orientation…”)

Some parents of upper elementary kids will drive slowly along in the car while the kids trick or treat, keeping an eye on them.

Pre-teens.  If you have a tween who wants to trick or treat with friends without you tagging along: Make sure they have a phone with them, know not to enter any building, and know to leave immediately if they are uncomfortable. (You can do an update to the “Tricky People” conversations you had when they were little.) Also have them do regularly scheduled check-ins. If they’re in your neighborhood, ask them to do one block, then stop by to say hi, then another block, etc. If they’re in another neighborhood, you can hang out in your car or at a public place nearby where they can check in from time to time.

Teenagers – How Old is too Old to Trick or Treat?

I personally lean toward following the memes that say teenagers are just trying to be kids for a little while longer, and it’s better for them to be trick or treating than up to other mischief on Halloween. (Like attending a kegger….)

And yes, they might not be wearing a costume, but that’s because the group of friends may have decided at the last minute to do this, and didn’t want to admit to each other that they all still wanted to do this.

When teenagers do come to my door, I treat them as I would anyone. But if they forget to say trick or treat or say thank you, I smilingly remind them to do so the next time.

When I had a teenager who still wanted to trick or treat, I also had a toddler. So, my daughter and her friends took my little guy out. Consider suggesting to your teen that they offer babysitting / Trick or Treating Buddy services to a family you know with younger kids. They can dress up too.

What to do with all that candy

Set up rules and expectations in advanceWhatever the rules will be, tell your child BEFORE the candy is in their hands!!! You don’t want your memories of the evening to be about the whining and yelling that happened when you tried to make up rules in the moment.

Inspect before eating. Many parents have a rule: Don’t eat candy while trick or treating – wait till we get home and can check it out in the light. I personally don’t worry much about things like poisoning or razors in the candy – those things have happened but are really incredibly rare. But I still like to look at what we’re eating first.

Sort the candySorting is a key skill in math and science. Kids can learn a lot by counting, sorting by size, sorting by chocolate / non-chocolate, sorting by favorite to least favorite, comparing who collected the most, and so on.

Do more science! There’s lots of great experiments with candy. Start here, then use google or Pinterest to search for more ideas.

Do more math! There’s lots of math activities with candy. (The more you have, the more you can count. Start here, then use google or Pinterest to search for more ideas.

Trade the candyWe’ve had complicated family exchanges in our family sometimes: “I’ll give you three Milky Ways for that Twizzlers.”

Share the candy.  Encourage kids to share candy with other people who didn’t go trick or treating: “Dad gets all the Reeses’ cups.” “Grandpa really loves butterscotch candies.”

Send candy care packages to troops. Learn how at https://www.operationgratitude.com/express-your-thanks/halloween-candy/ There’s additional donation options here.

Participate in a candy buyback. These may be sponsored by a local dentist office or other organization. They may participate in the www.halloweencandybuyback.com/ program, which supports veterans programs.

Buy it back yourself. Some parents buy the kids’ candy either with money or a promised toy.

Let them eat as much as they want. Some people recommend this. Some, like dietitian Emily Fonnesbeck, say

“trying to control a kid’s candy intake [on Halloween] can backfire, and limits their opportunity to learn about making good food choices for themselves, even when they’ve got a pillowcase full of candy… “If we make candy a big deal, it will be a big deal,” she says. “If we talk about it like any other food, it’s more likely that kids will be able to self-regulate their food choices to include a wide variety of foods instead of feeling preoccupied, worried or shameful for food choices.”

Some parents say they’ve had a time where they let a kid totally gorge on candy till they threw up, figuring they’d “learn a lesson” that way. Personally, my kid learned that lesson on accident once (on an Easter when she was 23 months old, we thought we were supervising her well… till she started vomiting all over my friend’s house, and we could tell that somehow she’d gotten a hold of and eaten LOTS of chocolate). I don’t want to repeat that experience! Here’s our solution:

Eat it. But follow portion rulesIn our family, we tend to have an “all things in moderation” attitude. We don’t ban much of anything. (Read here about a study where kids got a little obsessed with the crackers that they had been temporarily banned from eating, and other effects of denying food to kids.)

One place that plays out is in our “two sweets a day” rule, where the kids get sweet credits. A credit equals one cookie, or a piece of cake, or a piece of candy (like a fun size piece… a whole candy bar would be many credits, with M&M’s there’s about 5 candies per credit). They can spend their credits at any time during the day, as long as they have eaten some real food first (i.e. no candy before breakfast). But once the credits are used, they’re gone… so “if you know grandpa will offer to take you to ice cream tonight, be sure to save a credit for that”. For Halloween, we allow them to eat five candies that day, and the rest gets put away for future use. (And each October 30, I throw away all the old candy leftover from Halloween, Christmas, Easter and summer parades since they never remember to eat it all.)

Halloween Movies, Books, Songs

For some more Halloween fun, in the weeks leading up to the big day:

Check out these posts for Scary (but not too scary) Halloween movies – categorized by age level, and How to Choose a Scary Movie for your Kid. It includes these tips and more:

“Kids under 7 will believe what they see. When picking media, nothing should be more startling than “Boo!” Kids over 5 may like haunted houses, mysteries, and things popping out everywhere, but stick to animation, which helps them realize that it’s fantasy. Be careful with monsters, skeletons, aliens, and zombies.”

Here are recommendations for Halloween Books that are only slightly scary and Best Halloween Books for Kids.

For fun songs, rhymes and crafts for toddlers and preschoolers, check out my Fall Themed Fun for Toddlers. For thousands more craft ideas, just check out Pinterest.

Trick or Treat 2018 – Mall Options on Seattle’s Eastside

Here’s a list of public places that are offering trick or treating on Halloween – Oct. 31:

  • Bellevue Square, 5 – 7 pm. Trick or treat, photobooth, clowns, Mad Science, live music.
  • Crossroads 4 – 6 pm, trick or treat at outside stores, not inside the mall. No masks. Live music 6 – 7:30.
  • Factoria 4:30 – 6:30 pm Trick or treat and games.
  • Kirkland Downtown – Trick or treat at downtown merchants. Typically 3 – 6 pm, but 2018 details not posted as of 10/12.
  • Redmond Town Center, 4 – 7 pm. Trick or treat, face painting, and jumping in the Springfree trampoline, face painting and costume contest.

Seattle area folks, also check out these ParentMap articles on Best Pumpkin Patches in King and Snohomish Counties, and Scary (and Unscary) Haunted House Attractions

Learn about more local Seattle area activities for families, year-round.

Learn about the importance of family rituals.

Photo at top of page from: Good Free Photos.

Bainbridge and the Kids’ Discovery Museum


Are you looking for a great car-free day trip from the Seattle area, perfect for kids age 1 – 7?

Ride the bus to the ferry terminal, then hop on a ferry to Bainbridge Island, check out the Kids’ Discovery Museum, stroll into town for a snack, and catch the ferry and bus back home. (See travel tips below.) From downtown Kirkland, we can do the full trip in as little as 6 hours. Last week, we got on a bus at 11:30 am, and were back home at 7:30 pm after a great leisurely day of travel and fun.

The Kids’ Discovery Museum

The museum is a short walk from the ferry terminal. (directions below) They’re open Monday through Saturday 10 – 4, Sundays 12 -4. Admission is $8 for adults and children (babies under 1 year are free), with discounts for senior and military. The Museums for All rate is $1 per person with proof of participation in EBT, CHIP, Provider One or WIC. (Info current as of July 2018.) You could see / do everything in the museum in an hour. We relaxed and settled in and played for a long time and were there for about 2.5 hours. It is best aimed at 3 – 6 year olds, as are all Children’s Museums, but fine for toddlers and still engaging for my 7 year old.

Entry Zone

Just inside the entrance, you’ll find a small gift shop area and this climber.

Tucked behind it is a dress up zone, currently stocked with firefighter costumes and books.

This is the toddler area, with toys, story books , musical instruments, and a playhouse.

The Bank

The first room is bank themed. It included play money, an abacus, a world map, and clocks set to different world time zones.

There was a memory game where you had to find and match a picture of the front of a type of money with a picture of the back of it.

The bank also included this board for talking about what causes to donate money to,

an “ATM” – I don’t think the screen did anything, but you could pull “money” out of the slots, and re-insert it,

and this “roulette wheel”.

You start with $20, and when you spin, you may earn a few dollars (by gathering recyclables, washing cars, or caring for a cat) or spend a few dollars (buying a gift for a friend, or repairing something you’ve broken). Some of the wedges were about making a choice about whether or not  to buy an optional item, and you spun the middle spinner to decide. Our son was engaged for quite a while, and has talked about this often in the days since the trip as he makes real decisions about whether to spend his allowance or not.

The Doctor’s Office

There are posters and rugs showing the different systems of the body (skeletal, digestive, etc.), a pretend sink and fake teeth with information on the importance of hand-washing and teeth-brushing, and an exam table with a doll patient and pretend medical equipment.

There’s an eye chart, a waiting room chair with books to read, and a food pyramid where there’s play food to velcro to it, which you sort into the correct food group category.

There’s a scale, a lab coat, and an apron your child can put on where you can attach stuffed organs (liver, heart, etc.) to the right place on the apron.

Transportation Zone

This features a small electric car they can climb into and pretend to drive, and little plastic cars they can paddle around in.

Plus a pretend ferry boat to capture the island experience.

Building Zone

This featured Fort Blocks, which I hadn’t seen before. The cool thing about them is they are big, and you can build pretty big structures with them. The down side is that even for our seven year old who has experience with a lot of building tools, they were a little tricky to assemble… he could build a wall of them, but couldn’t really figure out how to get them together to form a 3D cube.

Grocery Shopping and the Mail

My son LOVED the grocery area when he was four. At age 7, he passed it by. But it’s a nice grocery area, with plenty of plastic foods and food boxes to weigh, to load in your bag or cart, and to check out at the cash register.

Outside the store was a mailbox, with pretend letters to put in and take out, and there were several residential style mailboxes on walls nearby so your child could “deliver the mail.” I can see a three year old loving this play opportunity!

Outdoors

They have a climbing wall, gravel to load into buckets and dump trucks and transport around the area, and a water table.

Upstairs

There’s a giant Lite Brite board (where you push the colored pegs into the board and they glow) which appeals to ages from toddler to adult.

At the Magnifying Madness station, you place a card under a microscope and the image is projected on the screen. We had fun bringing up a family photo on our phone and placing that under the microscope to project.

They have a small train table for free building tracks on,

and then a large track layout for playing on.

There’s a puppet theater for putting on a show, with books nearby for inspiration.

And blue foam blocks for building.

Motion Madness

The remainder of the upstairs area is Motion Madness – Fun with Physics where there are several different exhibits to explore motion with golf balls. This is our favorite part! There’s this tower, where you simply place golf balls on the track at the top, and they roll down.

There’s a gravity well, where you drop the balls in and they spin round and round before falling through the hole in the middle.

A skee-ball style ramp game.

Another ramp that has a rotating platform at the bottom, where you have to time your ball drop just perfectly in order to get the ball in the cup.

A ball maze that you can take apart and re-build. (I LOVE ball mazes – I think they are a great place for kids to explore the idea of tinkering – you build it, test it, adjust it till it works, test it more, then re-build it to be even cooler.)

And, my favorite… a tall platform you climb stairs to get to. There’s a basket on a pulley that you can load up with balls at the bottom, then use the rope to haul it up to the top.

From the top, there’s a giant ramp to send the balls down.

Treats in Town

When you finish at the museum, it’s easy to take a short walk into town (Winslow) for treats. We saw a pizza place, many lovely looking restaurants, wine-tasting venues, and a bakery. (Here’s a dining guide.) We decided on ice cream at Mora. There was a huge line outside, but they had seven people on staff, and moved us through quickly. And the ice cream was great! We had the dulce de leche and the strawberry cheesecake. Next door to Mora was a crepe place, and we were tempted to try that… maybe next time. After ice cream, we did the 0.5 mile walk back to the ferry for our trip home.

Other Activities on the Island

Next door to the Children’s Museum is the Bainbridge Island Museum of Art, which offers free admission. In the downtown area, there are also many art galleries and gift shops, which looked quite nice, but we’re not really a shopping family. (Although Eagle Harbor Books was a very tempting option.) If you choose to bring a car and/or stay longer, you’ll find lots of info about lodging and activities at www.bainbridgeisland.com.

Getting There

Use Transit to the Ferry Terminal

Use Metro Trip planner (or Google Maps or whatever) for directions to the ferry terminal in downtown Seattle (Colman dock). In our case, the easiest route is to take a bus to the Pioneer Square station in the bus tunnel, then walk 0.3 miles to the terminal.

The bus fare is $2.75 for adults, $1.50 for kids age 6 – 18, and free for those under 6. If you don’t often take the bus, read How to Ride Metro. Buses can be delayed off schedule, so I also find it helpful to download the One Bus Away app to my phone, which gives up-to-the minute updates on when to expect your bus to arrive.

We usually bring a couple books along in case our child gets antsy on the bus. But often he’s happy to just look out the window for the ride.

Now, obviously you could drive to downtown Seattle and park, but that would be pricey! Or you could drive to Seattle and take your car on the ferry – but then  you have to be there much longer before ferry departure time, and it’s more money and more effort, and makes this trip actually MORE complicated than just walking on the ferry and walking into town.

Taking the Ferry

You can find the ferry schedule here. The ferry runs approximately every hour, but the schedule varies greatly, so be sure to check it if you’re picky about your timing. As a walk-on passenger you only need to arrive ten-ish minutes before a ferry time. There is no need to make a reservation to walk-on, as there’s usually plenty of room for passengers. When you arrive, buy your tickets, or use your Orca card. Fares are $8.35 round trip for adults, $4.15 for kids 6 – 18. Here’s a FAQ with more info.

The ferry trip is a lovely little cruise across Puget Sound. If you want a preview of what the trip will look like, just go to YouTube and search for Seattle to Bainbridge ferry, and you’ll find lots of videos of varying quality.

If you haven’t taken a ferry before, you should! My husband and I had a conversation on this trip, and we think that if someone is visiting Seattle for a few days, the 5 most quintessentially Seattle experience you could have are: Pike Place Market, the Underground Tour in Pioneer Square, seeing the view from the top of the Space Needle, riding the monorail to MoPoP, and taking a ferry. Not that we don’t also love the zoo, and the science center, the aquarium and more, but we think those 5 are the things most unique to Seattle.

The ferry crossing is only 35 minutes. We eat lunch on the ferry (Ivar’s chowder and hot pretzels!) and you pretty much have to go straight to the restaurant as soon as you board, get your food, sit and eat, and you’ve arrived. On a nice day, you might instead opt to stand outside on the deck and enjoy the view. If it’s a rainy day, bring along a deck of cards, or you can often find a public jigsaw puzzle in process somewhere on the boat.

Getting to the Museum

When the ferry arrives, just walk off with everyone else… this puts you on a road walking straight into town. (Here’s a map to orient you.) In about 1/4 mile, you’ll come to the first real intersection. That’s Winslow Way East. Look across the street to the northwest corner of the intersection – you’ll see the art museum there.

There’s a path between the art museum and the building to the west of it. Walk down that path and you’ll come to Ki-Di-Mu.

Costs:

For our family – 2 adults and a 7 year old, it was $7 each way for the bus, ~21 for the ferry, $24 for the museum, plus the cost of lunch on the ferry and ice cream.

More Summer Fun

Looking for other ideas for fun activities with kids in the Seattle area? For another day trip to a museum, read about Mindport in Bellingham or check out KidsQuest in Bellevue. For a unique experience for kids age 5 and up, go build forts with hammers and nails at the Adventure Playground on Mercer Island. Explore parks in Kenmore or Kirkland. See an outdoor play or outdoor movie. Or check out my series on Cheap Dates with Toddlers.

For school year fun and learning (for you and your child), consider taking a parent-child class (for ages birth to 7) sponsored by the parent education program at one of our local community colleges. We offer everything from parent-baby classes to coop preschools to art and science enrichment for elementary age kids.

KidsQuest Children’s Museum

Please note: this post was written at their grand re-opening event in January 2017! Many things at the museum have changed since then, so be sure to go to their website for current information.

The TL; DR: Located in a suburb of Seattle. Features: A climber that’s 25-30 feet tall, a water zone with a magnetic water wall, a vortex, and a stream to dam, a working conveyor belt system, a semi truck cab to climb into, a room for building with recyclables, a farm area and a mercantile from 100 years ago, a huge train table, a “story tree”, art studio with a kiln, and a toddler zone. (Pro Tip: If you’re choosing between a visit to the Seattle Children’s Musuem and KidsQuest, choose KidsQuest! It’s a better experience.)

KidsQuest Children’s Museum in Bellevue, WA has just moved to a new location – from Factoria to downtown Bellevue, into the building next to the library that used to be the doll museum (1116 108th Ave NE Bellevue, WA 98004). The grand opening was today, but we were able to check it out last Thursday night. Here’s what we saw (Note: you can click on any picture for a larger view)

Climbing Sculpture

img_20170126_165839952

When you enter, you pass by the gift shop and the front desk – within moments of entering the building, my son was already trying out the new climber. 

There’s one path for the littler kids (age 4 and under). The entrance looks like this, and it leads to a little path that tucks around the corner into a little nook – I think it’s all walkable by a toddler, and looks like a parent could follow them in. (My 6 year old didn’t spend much time in there, so I don’t know details.)

The main climbing structure is much more adventurous! It says on the bottom that it is a challenging climber for ages 4 and up, and that’s definitely true. When they enter, they have to step onto ropes to make their way up the tower, till they reach the mesh tunnels. The tunnels carry them up to a mesh platform far above the lobby:

img_20170126_165832194
img_20170126_165957994
img_20170126_170105905_hdr
img_20170126_170135308_hdr

My son (a big climbing fan) LOVED this climber! It was hard to get him out of it!

While he was on the climber, I took a quick peek at the classroom / birthday room (I think they called it the learning lab). They had a few toys set out now, and a sensory tub filled with pompoms. It looks like a nice class space.

img_20170126_170500462
img_20170126_170514202

Then it was on to….

The Water Zone.

img_20170126_184359635

Stream Table and the Big Splash. There’s a bucket at the top that fills and dumps, making a giant flood down the chute. The lower part has a stream that you can add dams and such to in order to change the flow of the water. I only played with this for a moment and wasn’t able to get it working well – I look forward to spending more time tinkering there in the future.


img_20170126_184409230_hdr

Magnetic Water Wall – This has lots of chutes, funnels and spinners to channel water through. They are mounted on magnets, so you can take them off and re-arrange them. This is similar to the idea for the Ball Wall in the old museum (see below). One cool thing is that the flow of the water is adjustable. I imagine that will allow for more variation in set-up. It’s another thing I look forward to exploring more.

Water Music: with this exhibit, you press the button, and it shoots a jet of water at the bottom of a drum. Kids who love loud things will love this!

There’s a “Fountain Making Table” – imagine a chocolate fountain, but with water… there’s pictures of it on their website.

These pictures show a ball launcher (insert plastic balls in the blue holes, and fans shoot them out across the water… fairly gently… my son loved this… he loves any ball launcher! There’s a pump which works much better than most other pumps that my son has encountered. There’s a delightfully simple kid activity of a mirror with spray bottles full of water and squeegees – could keep some kids entertained for hours, and a very low basin called the tot splash, which is a great toddler sensory experience of glass rocks embedded in it to feel, and slowly dribbling water to fill the buckets with – didn’t appeal to my 6 year old at all, but the 1 – 2 year olds I work with would LOVE It.

img_20170126_171930838
img_20170126_171940285_hdr
img_20170126_172106824
img_20170126_172111740_hdr

Our favorite water activity was the vortex – at the old museum, they had this, but it was up too high for kids to reach (I had to lift my son up to it MANY times over the years.) Now they’ve put it down within reach. The water in the tank swirls around – you can drop beribboned beads into it, and they swirl and slip through the hole at the bottom, or you can drop balls in and they swirl or they block the opening till you release them… it’s really fun, but hard to explain. I got a bit of video, but it’s a lousy video… we were too busy playing… but at least it will give you an idea:

On The Go

Conveyor System: Oh, this is so cool!! Load the boxes, wind the crank, it carries the boxes up a tall ramp. At the top, they get sorted to either go down one path, or across a ramp high above our heads to the other side of the room. They also have places to weigh the boxes, and an “x-ray” that shows pictures of what’s inside. Love it! It’s not perfect yet, as we did see some boxes get jammed up at the top, and to get them unjammed a parent has to help the kids at the bottom back up the belt while wiggling some boxes out of tight jams. So, tricky. But cool!

img_20170126_173703051
img_20170126_173754649_hdr

There’s a test area for folding paper airplanes, seeing how far they fly and how accurate they are (i.e. can they fly through a hanging hoop), some of the car ramps from the old museum (but not the cool permanently installed one) and the car display case with the variable LED lighting that they’d added to the old museum in the past year, and an exhibit of old toys inherited from the old doll museum.

img_20170126_174833502
img_20170126_174339438
img_20170126_174326371_hdr
img_20170126_174846516


img_20170126_174223302

Big Rig – there’s a new Paccar truck exhibit. My son liked it just as much as the old one, but I liked it SO MUCH better! I didn’t like the truck, because I use crutches and it was hard for me to get in and out of it, and from the outside I could barely even see if my son was in there, and since he could go in and out on either side, there were times where I “lost” him because I didn’t know he had left the exhibit. This one has a window low in the door of the cab so you can see into the cab without getting in! And on the other side, you can step up onto the step by the door to get a good view in. This added visibility would have been a big reassurance to me when he was 2 and 3.

Recycle / Rebuild. This is another party room you can rent. What it had in it that night: Building materials for hydraulics projects:

img_20170126_174922206
img_20170126_174945076
img_20170126_174939544
img_20170126_175018929

Tools, bins of recycled items to build with, and collection bins for recyclables that guests bring in:

img_20170126_174930945
img_20170126_174912340_hdr
img_20170126_175000350_hdr

At least with the materials in here today, this struck me as a room aimed at kids age 6 and up, which is interesting because the old KidsQuest didn’t have a lot for the older kid. My son is 6 and we were thinking he would “age out” of finding the old museum interesting, but there’s definitely some things here that will continue to appeal for a few more years.

Now let’s head upstairs…

Bellevue Mercantile – a farm, yard, and store from 100 years ago.

Cow Wash – you can blow dry this cow with a big hose; Sheep that you can comb the wool of, information about how wool is made into clothing, a Chicken Coop where you can reach in and find wooden eggs, then sort them into the right size hole, and a sign about Bellevue 100 years ago.

img_20170126_172658896
img_20170126_172838393_hdr
img_20170126_172714841
img_20170126_180634469


Mercantile – a big bin of beans to scoop and weigh, fabric ice cream cones and scoops of ice cream, and a display of toys from the period. Many children’s museums have grocery stores with baskets, cash registers and fake plastic food. I liked this twist on that idea where they had wooden trays to gather things in, and wooden milk bottles, and some plastic fruits. Still all the fun of a “grocery store” for pretend play, but a little different.

img_20170126_172818694_hdr
img_20170126_172811295
img_20170126_172803041
img_20170126_180547445

Cityscape.

City and train table: a much bigger train table, with some Seattle specific features (Space Needle), drawbridges and wooden boats, and a great Seattle mural.

img_20170126_172430830
img_20170126_172606890_hdr
img_20170126_181116037_hdr

City wall – with videos of construction and demolition; a mirrored table with Keva blocks to build with, and this really cool tilting table that you can build a maze on and then steer a ball through.

img_20170126_172911706_hdr
img_20170126_172352494

Connections – between Cityscape and Story Tree, there’s a big open space that can be used for gatherings, performances, and temporary exhibits.

Story Tree – This is a lovely space, which really honors the magic of books and reading. I didn’t get a good picture of the whole tree, or the fabulous quotes that are on it. Check out their website for those pictures…. Here you see the really nice reading room at the top of the tree (up an easily climbed flight of stairs, which is more accessible than the ladder access to the old tree house) – this is a great space for relaxing and reading! Downstairs they have a great activity table area… KidsQuest has always done a nice job with developing special activities to go with a book of the week, but in the past, the places these got displayed made them feel like second-class activities… this space will help make it clearer how delightful they are. There’s also a nice book collection there, and a “stage” space with dress-up clothes… a really impressively compact way of achieving a stage environment for pretend play.

img_20170126_181902701
img_20170126_173004719
img_20170126_173014095
img_20170126_173035367

Art Studio – when we were there, this room was being used for food, drinks, and cake, so I was distracted by all of that, and didn’t get the chance to really explore it as an art room. But there was a kiln, and lots of shelves with art supplies.

Tot Orchard – this is the special area for ages 3 and under so I had to sneak in without my son (he was probably on the climber). There were: toy flowers to pick and plant, locks to unlock and latches to latch, wooden apples to pick, a tractor to “drive”, an area for climbing up, sliding down, and hiding in, a train area where you don’t have to compete with the big kids for a train, a picnic table and an outdoorsy / campground type kitchen (if you had a really upscale campground) for kitchen style pretend play, an area with open close doors with fun vegetable faces hiding behind them, and two faces with wooden pieces you can turn around to make various faces – happy, sad, mad. (This exhibit made me laugh, because about two years ago, I pinned this image to my Pinterest page, and it’s been my most often re-pinned pin ever… far more the any of my pins of my own posts, ironically, and now here’s a recreation of it on the wall of KidsQuest. :-))

img_20170126_173415791
img_20170126_173357032
img_20170126_173159286
img_20170126_173115356
img_20170126_173134057
img_20170126_173305013
img_20170126_173315219
img_20170126_173244613
img_20170126_173225869


And, off to the side of the Tot Orchard, in its own quiet little alcove, is the SHHH Station – a quiet space for nursing or cuddling a little one who needs some downtime.

img_20170126_173330431

What was missing

There were some exhibits that did not come over from the old building and were not replaced by a similar exhibit in the new building, such as the giant Lite Brite wall. Sadly, this includes my son’s favorite two exhibits:

  • The Whoosh:
    whoosh
    what we called the “scarf poof” – where you load scarves into tubes, and a fan sucks them up and shoots them out another tube. It also had an area where you could “levitate” a ball above a fan. Luckily Imagine Children’s Museum in Everett has a great scarf poof, and Pacific Science Center has a ball levitator and we’ve made a scarf cannon to use at home which can do both these things. But we’ll still miss the Whoosh.
  • The ball wall
    ballwall1
    ballwall2
    that’s where you load the balls into a pneumatic tube, and it launches them at the top of the wall where they then fall down the wall through the maze that you set up. We’ve made our own ball wall and tried out 
    lots of ball walls / marble mazes in our time, and the water wall at the new KidsQuest will capture some of this tinkering magic. But again, we’ll miss the KidsQuest ball wall, where we spent MANY hours of our son’s childhood.

Summary and Tips for Your Visit

Lots of great stuff at this new facility! As I said, my 6 year old was on the verge of outgrowing the old museum, but now I’m planning to renew our membership for a few more years because there’s plenty to engage him here. If you have a child anywhere between 1 – 5, the whole museum is a great fit.

It’s $12 per person per visit. If you’re attending with one child, you’ll break even on the membership after 4 visits. When my son was younger, we went to KidsQuest easily 3 times every month – it was one of our standard near-weekly activities from September to June and as a toddler, he never tired of it.

Parking might be an issue at the new place, so they give tips in advance on what to do. I think we’ll plan to bus it most of the time. Options are:

  • KidsQuest Parking Lot: Limited space on a first come, first serve basis
  • Ashwood Parking Lot: Free parking off NE 12th St (pass through library lot, but keep in mind the library garage is for library patrons only)
  • 929 Garage: Paid parking 1½ blocks south of KidsQuest at 929 108th Ave NE
  • KidsQuest is also conveniently located near several bus routes. Please visit King County Metro for more information.

For more information about the museum, check out their website.

Check out more KidsQuest reviews at: https://www.parentmap.com/article/kids-eye-review-of-the-new-kidsquest-childrens-museum-Bellevue and http://www.marcieinmommyland.com/home/kidsquest-museum-grand-opening-in-bellevue

Other fun local activities with little ones

If you live in the Seattle area, then check out the programs offered by the parent education departments of your local community colleges! They offer programs for families with children from birth to age 7. Each class offers play-based, developmentally appropriate learning activities for the child which aids them in all areas of development (large motor, small motor, language / literacy, music, art, and social skills). AND they offer parent education and support to guide you in helping your child grow and develop. Programs meet weekly during the academic year – they’re taking registrations for next year already, or you can join a class right now if there’s space available in it! Read more and find links to all the program here: https://gooddayswithkids.com/2016/08/02/parent_education/.

Click on the “Toddler Date” category in the right hand sidebar (or the bottom of the page on mobile devices) for links to reviews of local parks and activities plus my “Cheap Dates with Toddlers” series for ideas of easy, free or cheap activities that kids age 1 – 4 enjoy.

For activities to do at home with your child, check out activities for toddlers based around themes, or read my other blog, www.InventorsOfTomorrow.com for tons of ideas for easy, hands-on science experiments and engineering projects for 3 – 7 year olds that you can do with materials you have at home!

Adventure Playground on Mercer Island

[This is a post from 2017. Note for 2019 – the adventure playground will not be open this year, but they are offering an Adventure Playground Summer Camp!]

overview

At Deane Children’s Park on Mercer Island (part of Island Crest Park – 5801 Island Crest Way) there’s an Adventure playground, where children are given hammers and nails, and encouraged to go build, play, explore, and discover. Here’s how Red Tricycle describes it:

an ever-changing carpentry wonderland that’s completely kid-built, poised to capture the imagination… What’s been created so far will surely inspire your lil’ builder to add her own touches or modify a current design. In fact, the organic, continually-evolving nature of this park is part of its cool-appeal. Each day the park is open, new structures pop up simply by adding, removing or connecting to the existing forts, bridges, ladders, ramps and swings.

This is a land where children build their own playground! They build tree forts, add makeshift slides and swings, and add in fun imaginative details like mailboxes and chairs. When they tire of building, they explore other structures, climbing up high on rickety bridges, ducking low into hideouts, and clambering across the hillside. It’s very fun!!!

There are lots of things I LOVE about the Adventure Playground, which I’ll share below. But, there are some definite safety risks there, and it’s not for a parent who is faint of heart. And it’s NOT appropriate for kids under 4. Be sure to read the cautions below.

When to Go

This Tuesday and Wednesday (Aug 30 & 31), they’re open 1 – 4 pm. Then they’re open on Sundays 9/11, 9/18, and 9/25 from 1 – 4 pm. Admission is free, but please donate! (JayMarc Homes is sponsoring the playground this year, but support from participants is important to showing Mercer Island parks that we appreciate this opportunity!) It can be closed for inclement weather.

What to Expect

It’s ESSENTIAL to wear good, solid, closed toe shoes with sturdy soles!! There are nails and other hazards everywhere you step. It would be best to wear long pants, probably – we were there on a high 80’s day but it’s very wooded, so it doesn’t get very hot. Bringing a water bottle would also be a good idea and many parents bring snacks.

When you arrive, the parent must sign a waiver. You’re given a copy of the rules: basically keep track of your tools, respect others, do not take down existing structures, be safe, and report injuries or emergencies. Kids 12 and under must be accompanied by an adult.

Then they check out a toolbox to your child. It contains items like a kid size hammer, a screwdriver, a level, safety glasses, nails, screws, a big pencil. and a measuring tape. Some might have a saw. You can also pick up a construction helmet. Wood scraps are scattered everywhere on the ground – you scavenge around for what you need. Occasionally there are specialty items: deck railings, bed frames, playground slides. When I went in 2015, I wished there were rope, because it really increases the building possibilities.  In 2016, we found some ropes we were able to use to make a swing.

In the future, I plan to bring an adult size hammer – sometimes we needed more leverage to pound or pull a nail than you can get with a kid size hammer. We could have also used a pocket knife to cut a rope with.

ToolBox

What you’ll Find

The playground opened July 5th, so at this point in the season, you’ll find lots of established structures that have been built by the kids who came before you. The photos below are from 2015 and 2016. Click on any photo for a larger view.

Some of the existing structures are quite impressive: solid, stable, serious pieces of construction:

stable1 stable2 stable3

Some are a little more rickety and haphazard.

rickety4 rickety3 rickety2 rickety1

Some kids have added warning signs, some label their creations, and some create whimsical details:

sign2 sign1

My son loves running around and exploring what’s there – just like any playground he goes to, the first things he wants to do are: climb ladders, run up ramps, slide down slides, get as high up as he can, and swing on the swing. He was having a fabulous time just playing and exploring till we got to the swing… The existing swing he found was really a disappointment – it didn’t hang straight, and didn’t swing well. So, it was time to start building! We worked together to build a swing. (See a video of the swing here.)

ramp slide high swing installation

The Inspiration

The playground is inspired by free play advocates, and advocates for the benefits of risk-taking for kids and the benefits of allowing kids to tinker and build real things with their hands and real tools. There are several adventure playgrounds in England and Europe and the trend is moving to America. Learn more about the movement here:

What Kids Learn

There is so much to be learned in this environment!!

  • Creativity. As a child plays and explores what is already there, they learn about the range of possibilities, and start creating their own vision of what they would like to see in this world, and then set about making that vision a reality.
  • Construction skills. Kids learn about hammers, nails, saws. They learn about measuring, rope tying, adding in shims to stabilize something. So many skills that they discover the need for in the moment of building.
  • Safety assessment. They learn to test their work to see if it’s stable and safe, and re-build as needed.
  • Failure and trying again in a new way. Not everything they attempt works! I was watching a mom and daughter try to fit a bed railing in between two existing uprights. It kept tipping backwards, so they added support boards behind it. But then it was tipping forwards, so they added more boards, and it still tipped, so they had to figure out how to build a better stabilizer to hold it in place.
  • Teamwork. When installing an 8 foot long plank on a 4 foot tall platform, you need help. You can’t do it alone. So, you ask for help, you explain what you’re trying to do. You work together with someone. If they have different ideas, you might need to learn some conflict resolution skills.
  • Satisfaction in a job well done. The kids had just even more fun playing here than they would in any regular playground, but beyond that, they had a whole other layer of pride, sense of competence, and boosted confidence. They all left the playground bragging about what they had created together.

Read more about what kids learn here, where I share more photos, and stories from our trip.

Safety Issues

There are definite safety issues. Many of the ramps are shaky, there are lots of high platforms without rails, and narrow wobbly bridges several feet in the air. There’s lots of potential for falls. Also, the kids are working with hammers, nails, and saws. Some have clearly gotten safety coaching. Others have clearly not.

sawing

When I was there in 2015, if my memory is correct, most of the wood was stacked up in a wood pile near the front gate. This year, the wood was randomly scattered EVERYWHERE across the site. This made it much easier to build… when you had an inspiration, you just searched the ground nearby and you’d find a board you needed, or a branch or a rope. But this means you better pay close attention when you walk! And if you fell, you’d be as likely to land on a board as on the soft ground of the woods. And most boards on the ground have nails sticking up out of them. (Remember those sturdy shoes!)

boards2 boards1 nails2

There were also LOTS of loose nails on the ground. This is what I picked up just from under the platform where we built our handrail and swing.

nails

Another issue is that there’s LOTS of places where kids pounded a 3 – 4 inch nail through a 1 – 2 inch thick board, and that means there’s a section of nail sticking out on the other side… so watch out for protruding nails on the backs of ladders and on the bottoms of platforms.

I believe kids can stay safe there, but only if you emphasize to your child the importance of caution. An article in Seattle’s Child says that there have been few injuries, and most of those have been adults, because the kids are being more cautious.

I certainly taught my child how to be careful there!  I let him explore, but I made sure he knew to watch the ground when he walked (no running), test to be sure something is stable before going on it, check to be sure there’s no nails poking out before you put your hand there, and so on.

I LOVE the free play aspect of this playground, but I also think that with great freedom should come great responsibility. I wish that all parents would give their kids some basic education on the way in, not just about how to move safely through the playground and how to use tools safely, but how to be responsible for keeping it safe for others. I wish they were taught to be sure their structures were as stable as possible before walking away and leaving them for other kids to play on. I wish kids were encouraged to stack all their scrap wood in tidy piles, near worksites, but not directly in the range or where someone could fall. I wish they were encouraged to pick up any nails they drop, and to also scan their worksite for any hazards before leaving for the day. I wish that when kids or parents noticed nails sticking out on the back of a handrail, they take out their hammer and quickly pound it down to keep others safe.

I’m definitely a product of a girl scout / boy scout childhood, and have firmly engrained the idea of “leave the site cleaner than you found it.” I feel the users of the playground could use that message, though maybe here it’s “leave the playground safer than you found it.”

Age Guidelines

I personally would not take any child under the age of four here. I think it would be hard to keep them safe. If you have a little one, it’s much better to stick to the traditional safety-tested playground and Deane park has four fabulous play areas not counting the adventure playground! (Read my full review here.)

I took my son last year when he was four. (And I should note, we spend LOTS of time at playgrounds and hiking outdoors and climbing rocks and climbing trees, so he has a lot of physical skills and learned caution from those environments.) I kept a very close eye on him the whole time as he played, and actively educated him about how to stay safe and we didn’t attempt to build anything because I didn’t want to get distracted. We did carry a hammer around with us, and did pound in some loose nails we found.

This year, he’s five, and my husband came too, so we had two sets of eyes to make sure he was safe. So, this year we were able to balance building and supervising him. But I didn’t really have any “sit down and relax” time.

We observed other parents and grandparents with a range of ages, and definitely the 6 – 9 year olds had an adult working closely with them. For the 10-12 year olds, a few parents would sit on a log and read while keeping a vague eye on the kids and calling out suggestions. There weren’t any kids there alone that I noticed, but 12 and ups are allowed to be there without an adult.

If you’d like a building adventure, check it out soon! They’ll dismantle this year’s constructions on September 25th.