Please note: this post was written at their grand re-opening event in January 2017! Many things at the museum have changed since then, so be sure to go to their website for current information.
The TL; DR: Located in a suburb of Seattle. Features: A climber that’s 25-30 feet tall, a water zone with a magnetic water wall, a vortex, and a stream to dam, a working conveyor belt system, a semi truck cab to climb into, a room for building with recyclables, a farm area and a mercantile from 100 years ago, a huge train table, a “story tree”, art studio with a kiln, and a toddler zone. (Pro Tip: If you’re choosing between a visit to the Seattle Children’s Musuem and KidsQuest, choose KidsQuest! It’s a better experience.)
KidsQuest Children’s Museum in Bellevue, WA has just moved to a new location – from Factoria to downtown Bellevue, into the building next to the library that used to be the doll museum (1116 108th Ave NE Bellevue, WA 98004). The grand opening was today, but we were able to check it out last Thursday night. Here’s what we saw (Note: you can click on any picture for a larger view)
Climbing Sculpture
When you enter, you pass by the gift shop and the front desk – within moments of entering the building, my son was already trying out the new climber.
There’s one path for the littler kids (age 4 and under). The entrance looks like this, and it leads to a little path that tucks around the corner into a little nook – I think it’s all walkable by a toddler, and looks like a parent could follow them in. (My 6 year old didn’t spend much time in there, so I don’t know details.)
The main climbing structure is much more adventurous! It says on the bottom that it is a challenging climber for ages 4 and up, and that’s definitely true. When they enter, they have to step onto ropes to make their way up the tower, till they reach the mesh tunnels. The tunnels carry them up to a mesh platform far above the lobby:
My son (a big climbing fan) LOVED this climber! It was hard to get him out of it!
While he was on the climber, I took a quick peek at the classroom / birthday room (I think they called it the learning lab). They had a few toys set out now, and a sensory tub filled with pompoms. It looks like a nice class space.
Then it was on to….
The Water Zone.
Stream Table and the Big Splash. There’s a bucket at the top that fills and dumps, making a giant flood down the chute. The lower part has a stream that you can add dams and such to in order to change the flow of the water. I only played with this for a moment and wasn’t able to get it working well – I look forward to spending more time tinkering there in the future.
Magnetic Water Wall – This has lots of chutes, funnels and spinners to channel water through. They are mounted on magnets, so you can take them off and re-arrange them. This is similar to the idea for the Ball Wall in the old museum (see below). One cool thing is that the flow of the water is adjustable. I imagine that will allow for more variation in set-up. It’s another thing I look forward to exploring more.
Water Music: with this exhibit, you press the button, and it shoots a jet of water at the bottom of a drum. Kids who love loud things will love this!
There’s a “Fountain Making Table” – imagine a chocolate fountain, but with water… there’s pictures of it on their website.
These pictures show a ball launcher (insert plastic balls in the blue holes, and fans shoot them out across the water… fairly gently… my son loved this… he loves any ball launcher! There’s a pump which works much better than most other pumps that my son has encountered. There’s a delightfully simple kid activity of a mirror with spray bottles full of water and squeegees – could keep some kids entertained for hours, and a very low basin called the tot splash, which is a great toddler sensory experience of glass rocks embedded in it to feel, and slowly dribbling water to fill the buckets with – didn’t appeal to my 6 year old at all, but the 1 – 2 year olds I work with would LOVE It.
Our favorite water activity was the vortex – at the old museum, they had this, but it was up too high for kids to reach (I had to lift my son up to it MANY times over the years.) Now they’ve put it down within reach. The water in the tank swirls around – you can drop beribboned beads into it, and they swirl and slip through the hole at the bottom, or you can drop balls in and they swirl or they block the opening till you release them… it’s really fun, but hard to explain. I got a bit of video, but it’s a lousy video… we were too busy playing… but at least it will give you an idea:
On The Go
Conveyor System: Oh, this is so cool!! Load the boxes, wind the crank, it carries the boxes up a tall ramp. At the top, they get sorted to either go down one path, or across a ramp high above our heads to the other side of the room. They also have places to weigh the boxes, and an “x-ray” that shows pictures of what’s inside. Love it! It’s not perfect yet, as we did see some boxes get jammed up at the top, and to get them unjammed a parent has to help the kids at the bottom back up the belt while wiggling some boxes out of tight jams. So, tricky. But cool!
There’s a test area for folding paper airplanes, seeing how far they fly and how accurate they are (i.e. can they fly through a hanging hoop), some of the car ramps from the old museum (but not the cool permanently installed one) and the car display case with the variable LED lighting that they’d added to the old museum in the past year, and an exhibit of old toys inherited from the old doll museum.
Big Rig – there’s a new Paccar truck exhibit. My son liked it just as much as the old one, but I liked it SO MUCH better! I didn’t like the truck, because I use crutches and it was hard for me to get in and out of it, and from the outside I could barely even see if my son was in there, and since he could go in and out on either side, there were times where I “lost” him because I didn’t know he had left the exhibit. This one has a window low in the door of the cab so you can see into the cab without getting in! And on the other side, you can step up onto the step by the door to get a good view in. This added visibility would have been a big reassurance to me when he was 2 and 3.
Recycle / Rebuild. This is another party room you can rent. What it had in it that night: Building materials for hydraulics projects:
Tools, bins of recycled items to build with, and collection bins for recyclables that guests bring in:
At least with the materials in here today, this struck me as a room aimed at kids age 6 and up, which is interesting because the old KidsQuest didn’t have a lot for the older kid. My son is 6 and we were thinking he would “age out” of finding the old museum interesting, but there’s definitely some things here that will continue to appeal for a few more years.
Now let’s head upstairs…
Bellevue Mercantile – a farm, yard, and store from 100 years ago.
Cow Wash – you can blow dry this cow with a big hose; Sheep that you can comb the wool of, information about how wool is made into clothing, a Chicken Coop where you can reach in and find wooden eggs, then sort them into the right size hole, and a sign about Bellevue 100 years ago.
Mercantile – a big bin of beans to scoop and weigh, fabric ice cream cones and scoops of ice cream, and a display of toys from the period. Many children’s museums have grocery stores with baskets, cash registers and fake plastic food. I liked this twist on that idea where they had wooden trays to gather things in, and wooden milk bottles, and some plastic fruits. Still all the fun of a “grocery store” for pretend play, but a little different.
Cityscape.
City and train table: a much bigger train table, with some Seattle specific features (Space Needle), drawbridges and wooden boats, and a great Seattle mural.
City wall – with videos of construction and demolition; a mirrored table with Keva blocks to build with, and this really cool tilting table that you can build a maze on and then steer a ball through.
Connections – between Cityscape and Story Tree, there’s a big open space that can be used for gatherings, performances, and temporary exhibits.
Story Tree – This is a lovely space, which really honors the magic of books and reading. I didn’t get a good picture of the whole tree, or the fabulous quotes that are on it. Check out their website for those pictures…. Here you see the really nice reading room at the top of the tree (up an easily climbed flight of stairs, which is more accessible than the ladder access to the old tree house) – this is a great space for relaxing and reading! Downstairs they have a great activity table area… KidsQuest has always done a nice job with developing special activities to go with a book of the week, but in the past, the places these got displayed made them feel like second-class activities… this space will help make it clearer how delightful they are. There’s also a nice book collection there, and a “stage” space with dress-up clothes… a really impressively compact way of achieving a stage environment for pretend play.
Art Studio – when we were there, this room was being used for food, drinks, and cake, so I was distracted by all of that, and didn’t get the chance to really explore it as an art room. But there was a kiln, and lots of shelves with art supplies.
Tot Orchard – this is the special area for ages 3 and under so I had to sneak in without my son (he was probably on the climber). There were: toy flowers to pick and plant, locks to unlock and latches to latch, wooden apples to pick, a tractor to “drive”, an area for climbing up, sliding down, and hiding in, a train area where you don’t have to compete with the big kids for a train, a picnic table and an outdoorsy / campground type kitchen (if you had a really upscale campground) for kitchen style pretend play, an area with open close doors with fun vegetable faces hiding behind them, and two faces with wooden pieces you can turn around to make various faces – happy, sad, mad. (This exhibit made me laugh, because about two years ago, I pinned this image to my Pinterest page, and it’s been my most often re-pinned pin ever… far more the any of my pins of my own posts, ironically, and now here’s a recreation of it on the wall of KidsQuest. :-))
And, off to the side of the Tot Orchard, in its own quiet little alcove, is the SHHH Station – a quiet space for nursing or cuddling a little one who needs some downtime.
What was missing
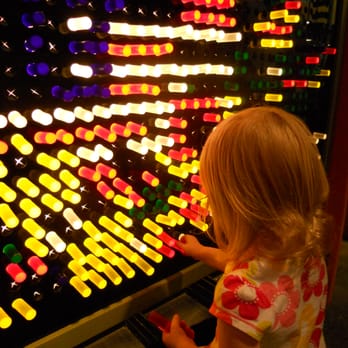
There were some exhibits that did not come over from the old building and were not replaced by a similar exhibit in the new building, such as the giant Lite Brite wall. Sadly, this includes my son’s favorite two exhibits:
The Whoosh: what we called the “scarf poof” – where you load scarves into tubes, and a fan sucks them up and shoots them out another tube. It also had an area where you could “levitate” a ball above a fan. Luckily Imagine Children’s Museum in Everett has a great scarf poof, and Pacific Science Center has a ball levitator and we’ve made a scarf cannon to use at home which can do both these things. But we’ll still miss the Whoosh.
The ball wall – that’s where you load the balls into a pneumatic tube, and it launches them at the top of the wall where they then fall down the wall through the maze that you set up. We’ve made our own ball wall and tried out lots of ball walls / marble mazes in our time, and the water wall at the new KidsQuest will capture some of this tinkering magic. But again, we’ll miss the KidsQuest ball wall, where we spent MANY hours of our son’s childhood.
Summary and Tips for Your Visit
Lots of great stuff at this new facility! As I said, my 6 year old was on the verge of outgrowing the old museum, but now I’m planning to renew our membership for a few more years because there’s plenty to engage him here. If you have a child anywhere between 1 – 5, the whole museum is a great fit.
It’s $12 per person per visit. If you’re attending with one child, you’ll break even on the membership after 4 visits. When my son was younger, we went to KidsQuest easily 3 times every month – it was one of our standard near-weekly activities from September to June and as a toddler, he never tired of it.
Parking might be an issue at the new place, so they give tips in advance on what to do. I think we’ll plan to bus it most of the time. Options are:
KidsQuest Parking Lot: Limited space on a first come, first serve basis
Ashwood Parking Lot: Free parking off NE 12th St (pass through library lot, but keep in mind the library garage is for library patrons only)
929 Garage: Paid parking 1½ blocks south of KidsQuest at 929 108th Ave NE
KidsQuest is also conveniently located near several bus routes. Please visit King County Metro for more information.
For more information about the museum, check out their website.
If you live in the Seattle area, then check out the programs offered by the parent education departments of your local community colleges! They offer programs for families with children from birth to age 7. Each class offers play-based, developmentally appropriate learning activities for the child which aids them in all areas of development (large motor, small motor, language / literacy, music, art, and social skills). AND they offer parent education and support to guide you in helping your child grow and develop. Programs meet weekly during the academic year – they’re taking registrations for next year already, or you can join a class right now if there’s space available in it! Read more and find links to all the program here: https://gooddayswithkids.com/2016/08/02/parent_education/.
Click on the “Toddler Date” category in the right hand sidebar (or the bottom of the page on mobile devices) for links to reviews of local parks and activities plus my “Cheap Dates with Toddlers” series for ideas of easy, free or cheap activities that kids age 1 – 4 enjoy.
For activities to do at home with your child, check out activities for toddlers based around themes, or read my other blog, www.InventorsOfTomorrow.com for tons of ideas for easy, hands-on science experiments and engineering projects for 3 – 7 year olds that you can do with materials you have at home!
We’ve travelled to many children’s museums around the country, and our son’s favorite exhibits are always the ones where fans or pneumatic tube systems shoot balls or scarves through tubes, like the Air-mazing Laboratory at Imagine in Everett, and this one at MOXI in Santa Barbara, CA.
We started with the fan. Exploratorium mentioned that they had made a wind tube using a squirrel cage fan. I researched those, but they need wiring skills I don’t have. So, we chose a utility fan, specifically the Lasko Blower. (That model is no longer available, but Lasko has two similar ones: this cheaper one is not quite as powerful as mine, the other is more powerful.)
Or you could choose a different utility fan – you just want something that kind of shoots air out, not a big oscillating fan that is designed to move air all around.
This video shows what the fan does with a scarf on its lowest setting – all the other videos have the fan on the highest setting. (In class, I start with just the fan and some scarves to blow up into the air, and even that simple game elicits gleeful giggles.)
We bought a ten-foot long flexible ventilation hose The challenge was: how do we connect this round hose to the oblong opening on the fan?
We built a couple of boxes from cardboard and cut door flaps in them where you can push a scarf in. [Note: you can find a pattern for these boxes in a more recent post on my other blog.] These made the fan more fun, because it focuses the air, so scarves shoot a little higher.
And check out what happens when we sent a little plastic “bowling ball” through the door.
We mounted a poster tube through the box. You could stuff scarves into a tube, hold your hand over one end, then let go, and they’d shoot into the air. You could shoot a lightweight ball too – like a cannon ball.
Then it was time to figure out how to attach the hose to the box. We tried taping the hose to the box but that didn’t work. So, I bought a hose connector for the end of the hose, figuring we could attach that more easily.
Then we assembled it. Put the cardboard box over the fan, mounted the hose on the box, and we were good to go. When I tested this at home, with just one child, it worked great. We had a fabulous time with it, shooting scarves into the air, shooting balls so they rolled across the floor for the dog to chase, shooting balls into a box for improvised “golf” game. Tons of fun for both of us.
But, then we tested it in a class full of kids. The first problem was that it kept falling apart. The fan tilts in its base, and if you tilt it too far, it pushes the cardboard box right off. When kids put their hands in and pulled them out quickly, that pulled the cardboard box off quickly. Just the weight of the hose could pull the box off. So, there was a lot of work involved in just keeping it together, and the kids weren’t that excited by the results even when it worked.
So, before the next time we’d use it in class, we did some tinkering. We used a ratchet strap to hold the hose onto the box and the box onto the fan. We turned it so the hose fed off the other side of the fan, over the handle, which helped to stabilize the box. This solved the falling apart problem.
We had discovered that kids like it better when the scarves shoot vertically up into the air instead of shooting out horizontally, so we wove the hose through the legs of a stool to get that upward angle.
Check out the video at the top of this post to see the scarf cannon in action.
We took it back to class, and this time, we had a hit on our hands! Lots of kids loved feeding through scarves, and balls.. We discovered that kids liked it even better when we set the stool up on top of the cubbies, so the scarves were shooting out from 4′ up in the air. The three biggest fans of this toy were a team of a 5 year old boy and a 4 year old boy, and a 2.3 year old girl. They discovered that if you sent through a balloon that was just the right size, it makes a really funny rumbly noise. The little girl was just as successful at using this invention as the older kids. She clearly learned from them. The boys had been having fun catching the scarves in a bin as they floated down toward the ground. When they walked away for awhile, she picked up the bin and tried to catch the scarves.
My next step is to try to re-create this thing we saw at a bounce house place… it was a batting cage, where a ball floated above a cone and the kids could hit it with a nerf bat. Right now, with a 4″ wide stream of air, my scarf cannon holds the ball right above the tube outlet. But I’m thinking if I got a traffic cone type shape that really focused the air, we might get enough lift to do this…
In our Inventors class, we are encouraging kids to tinker, and try things they’ve never done before. We tell them to build something, test it, re-build it, and so on. I am intentionally doing the same thing as I design activities for the class. Experimenting, failing, and trying again. This scarf cannon is still a work in progress, but it’s definitely a fun exploration!
Since I wrote this post in 2015, we’ve updated our design. To find the most recent design and see more videos of our scarf cannon in action, check out this post on my other blog (Inventors of Tomorrow) about Fun with a Fan.
In Bellingham, WA, there’s a fascinating place called Mindport.
It’s a little like an art gallery full of beautifully crafted exhibits… but unlike art galleries, you get to touch and interact with everything! It’s a little like a children’s museum where children are welcomed and can explore and play with everything… but the exhibits are intriguing enough that all the adults in the room were as engaged as the kids. It’s like a science museum with exhibits that illustrate scientific concepts – and binders that explain the details… but it’s prettier, and somehow more soothing and meditative, than any science museum I’ve been in.
Here’s how their website defines what they are:
MINDPORT (mind port) n.: 1. a museum of phenomena; 2.) a provocative blend of art and interactive exhibits; 3.) a place to spark your awareness and stimulate your thinking; 4.) a place to play and to observe.
Before going to Mindport, I read a review that said “everything about them is amazing… except their website.” I have to agree. The website only includes brief descriptions of a few of the exhibits, and a brief description of “what are we” is buried way down in the blog archives. Not enough to give you a good sense of what to expect. So, I’m going to give some detailed descriptions here of the experience and some of the exhibits, then offer a few more photos as “teasers” of what else you’ll discover here.
The Location
Mindport is in downtown Bellingham, WA. It’s in a retail storefront space, about the size of two typical stores, so not huge. Admission is only $2. There are lots of restaurants and other museums within walking distance. It was fairly busy for the first hour or two we were there (on July 3), but never crowded and never loud. By the end of our time there (mid-afternoon), we were the only family, and had some nice chats with a very friendly and helpful docent, and our son got to play the pipe organ, which they ask that only skilled musicians play when it’s crowded, as you can hear it throughout the museum.
The Exhibits
The first exhibit we came to (#1 in the photos above) was the deep sea divers. Pump a hand bulb and plastic divers descend down the tube toward you. Stop pumping, and they pop back up to the surface. Our four year old had a hard time pumping effectively, but a 6 year old did great. They both liked seeing the divers come down.
They had a ball wall (#2). As people who frequent children’s museums and science museums across the country, we are connoisseurs of ball walls, also known as marble runs. (For ideas on how to build your own, check out my post here.) I really liked this peg board system, and all the different sizes of tracks available (notice the rack to the left with all the tracks organized and ready to use.) It was very adjustable and we found lots of fun ways to build it then re-engineer it. (Which is why I love ball walls. I think they’re a fabulous way to teach your child the engineering method: build something – test it – adjust it so it works – test it – adjust it again to make it even better – test it again. Read my post here on how willingness to fail and try again is a key to success.) Only downside – they only had three marbles. I understand not having too many, because then kids don’t chase them down when they escape the ball run and other people step on them. But 5 would be nice so me and a couple kids could play at the same time.
The Aerotrack (#3) allows you to put a ball in a pneumatic tube, then air shoots it along a track and returns it to you. You can choose three tracks. One is very short and very fast. One takes the ball all the way up to ceiling height, then around several loops before returning it to you. My engineering-minded husband enjoyed figuring out where the switching point was and how it changed which track it went on. (I won’t tell you – we’ll leave that as an exercise for the reader.) This was one of our son’s favorite exhibits. The museum was small enough and mellow enough that we were able to leave him here playing while we explored other exhibits nearby, which I appreciated. (Unlike other times where I’ve been stuck at a ball wall or other exhibit for an hour while he played and I read Facebook on my phone… I mean, I like playing with him at an exhibit and all… but this boy has a LONG attention span and a greater joy in repetition than I apparently have…)
#4 is the Diabalique, a table that you tilt side to side to run balls through a maze. Read a short article on it here, or watch the “Making of” video.
#5 is “Burl Ives”, a piece of burl wood that when you rock it gently from side to side, it plays musical tones. So hard to explain – I wish I’d made a video, but very intriguing to play with, probably even more so for a very musically oriented person.
#6 and 7 are the Pneumatic Ping Pong. The majority of the exhibits have signs that explain how they work and binders that talk about either the design process or the scientific principles. The sign on this one says “Note: we only added instructions here because a visitor asked why there weren’t any. Please feel free to pretend there still aren’t. 1. Press the on button. 2. Play.” Here’s a brief video:
Playing with lightweight objects floating on air currents is just an on-going source of fun for kids (and yes, for me). We’ve built a wind tube (see more here), and what I call a “scarf poof” – like all those exhibits at children’s museums where you feed a scarf into a tube, and the air shoots it through and out the other end. (Some day I’ll write a blog post on how we built this…. it’s still a work in progress in our tinkering process.) And now this pneumatic ping pong is on my list of possible future projects…
This next video shows an exhibit with 100 compasses mounted on a lazy susan with a magnet suspended above… watch how the compass needles respond to the magnet:
This video shows a marble elevator. You turn the crank and the marbles go uphill, then roll down ramps. Like so many other exhibits, this and the compass exhibit show the melding between beautiful art – their woodworking is fabulous – and interactive experience.
But wait… there’s more.
They do have plenty of art on the walls, like GIANT TASKS / tiny people, which are quite nice. I’m a very kinesthetic, non-visual person, so I confess that I spent more time with the hands-on interactive items.
The joy of this place is when you see something and think: “that doesn’t look like much of anything”, your next thought is “hmmm…. maybe I should interact with it and see what it does.” On the left below, you’ll see a table that’s perfectly lovely, but a bit dull. But then when you spin it, you see wave patterns form inside it – see middle photo – you can click on the photos to see them full screen. (On their blog, Swirl is “a stand-alone sculpture featuring rheoscopic fluid under glass, [which] evokes air and ocean currents.”)
There’s also a picture with colored glass tiles in it, which again is lovely enough, but a little dull. But the video shows what happens when you wave a hand in front of it.
Here’s some more photos of other exhibits to inspire you to travel up to learn what they do! (Click on the pictures to see a full screen version.)
Learn more:
There are more details about some of their exhibits in their blog archives: http://mindportexhibits.blogspot.com/, which also include some interesting long articles on the nature of things like science education (STEAHM… putting the Arts and Humanities into STEP education) and insights into the training and mindset of a tinkerer / inventor / maker: director Kevin Jones.
I enjoyed the place so much, I wanted to give them more money on the way out, but they didn’t have a donations box. When I got home, I looked at their website for a “donate here” button, but they didn’t have one. I did find a note in their blog archives that they are not a registered non-profit. But I would still be happy to contribute more to their work, and would suggest that they offer an easy opportunity to pay more than $2. I don’t know how many people would do it, but there’s probably other “crazy” people like me who would.
The trip to Bellingham
Overall, it’s a nice day-trip from the Seattle area. It’s well worth the 80 minute drive we did from Kirkland. It’s not an “all day” activity. Our family spent a little over two hours there and were actively engaged the whole time, but had explored it all by the end of that time. But since it’s so cheap, even if you just dropped by for an hour, there’s plenty more to explore in downtown Bellingham. I’d recommend it for children and adults, and particularly for students of my Family Inventors class. (Note: it’s great for age 4 on up. 3 year olds would likely do OK, but probably not worth a road trip if you have a toddler)
MIndport doesn’t open till noon on Fridays (and isn’t open at all on Mondays and Tuesdays, FYI), so we had a lunch beforehand at Mount Bakery a block away. The brie, apple, and pear crepe was fabulous, and they had great service. Our waitress saw that our son was really hungry, and brought his food out early, but held it up high where he couldn’t see and mouthed to us: “OK to give this to him now?” I appreciated having the chance to give the idea a thumbs up.
After Mindport, we stopped by the Comics Place, across the street, and picked up a comic book for our son to read in the car on the way home. There’s also lots of used book stores nearby, if you prefer.
On our next road trip to Bellingham, we look forward to a quiet morning exploring the FIG (Family Interactive Gallery) at Whatcom Museum, then a loud and exciting afternoon at the MegaZapper electrical show at the Spark Museum of Electrical Invention – only held on Saturdays and Sundays. (We LOVE the Theater of Electricity at the Boston Museum of Science.) We also plan to return to Mindport someday – I want to play with the ball wall some more!


 The challenge was: how do we connect this round hose to the oblong opening on the fan?