Category Archives: Fun Activities

Rainbow Science and Art Activities

rainbowHere are just a few fun ideas for learning about rainbows.

Make a black and white drawing of the arches of a rainbow, and put one dot of color in each section and then the kids paint in the rest of each section.

Create rainclouds in a jar by filling cups of water, spraying shaving cream on top, and using pipettes to drip liquid watercolor onto the shaving cream clouds. It drips through, creating colorful rainfall below. Here are some pictures from Pinterest… check out the original posts here, here and here for more ideas for activities, and thoughts on talking to kids about the science of rain

rainYou can also use pipettes to drip liquid watercolor onto coffee filters, which creates some beautiful color mixing. Then turn them into butterfly decorations with a clothespin and a pipe cleaner. (Source for idea.)

Picture from Thoughtful Spot Day Care

Picture from Thoughtful Spot Day Care

In our classroom, we have a light table with lots of colorful objects on it, rainbow crayons, rainbow colored blocks, a rainbow colored tumbling mat with colored hoops to jump into for some big motor play, and color mix playdough.

You could buy diffraction grating peepholes. (When you hold these up to your eye, then look at a light, the light is broken up into rainbows. Different lights produce different patterns… when I look at my ceiling light at home, I see circular rainbows, when I look at the LED flashlight on my cell phone, I see six rays of rainbows radiating out.)  (If you want to learn more about how prisms separate “white” light into colors, watch this video. Here’s a simple, low equipment experiment to do with your child. And here‘s more activities and a little info about Inventor Isaac Newton and his discovery that light is made up of 7 colors.)

Books to check out:

There are also lots of rainbow songs. Check out my YouTube playlist.

We always have more ideas than we have time and space for, but if you’d like more ideas for rainbow-themed activities, look on our Pinterest page: https://www.pinterest.com/bcparented/rain-and-rainbows/

Fun with Toddlers: Transportation Theme

transportThis month’s theme was Transportation: Boats, Planes, Trains, and Automobiles. Always a favorite theme, especially with the boys! Here are some ideas for transportation activities that toddlers and preschoolers love.

Learning Activities / Crafts

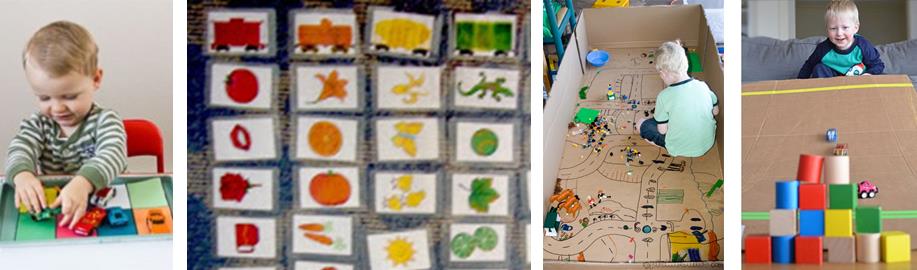
Sorting Cars. Make cardboard garages (or use colored paper to make “parking spaces”) for your child’s cars. Encourage your child to sort the cars by color. Sorting into categories is a great foundational skill for later learning.

Train Car Sort. Make colored train cars, or print a picture of a colorful train, and have your child sort objects by color into the right car.

Shape collage: Make cut-outs of truck bodies and tires they assemble littlefamilyfun.com/2014/01/build-truck.html

Sponge Printed Trains: Use sponges to print colorful rectangles for train cars, then use a black dot marker for the wheels. See on Buggy and Buddy.

Free Play Activities – You Prep, They Play

Draw a City. Use a big box your child can climb into, or flatten out a smaller box. Draw roads and buildings on it. They can drive cars around the roads. You can also build cardboard tunnels to drive through and bridges to go over. You could also try out PlayTape which is tape you stick to the floor which has an image of a road on it.

cars-and-roads2-opt

Ramps. Take a flat piece of cardboard. Tilt it by propping on a piece of furniture. Race cars down it. Even better, put a tower of blocks at the bottom to crash the cars into. You can play with angles – the steeper the inclined plane, the faster the car goes.

Magnet Car. Draw a road on a paper plate. Make a paper car with a magnet on it. Use a magnet wand under the paper plate to drive the car around.

Bubble Popping Car: Tape bubble wrap to a table. They can drive a toy car or truck over it to pop the bubbles. This is a good strength builder as they have to press hard to pop.

Taped Road Pretend Play: Use masking tape on the floor to mark out roads (or train tracks) wide enough that your child can crawl along them, pretending to be a car (or train). Add cardboard boxes for tunnels, garages, and more. Toddler Approved has great pictures for this idea.

Shoe Box Train: String together shoe boxes and kleenex boxes to make a pull toy train. The child can load up the cars and pull it behind them.

Family Project

Build a Cardboard Car and Have a Drive-In Movie: Use a box big enough for your child to sit in comfortably, and decorate it to look like a car. This can be very simple, or as complex a project as you want. Find the tutorial for making a cardboard car.

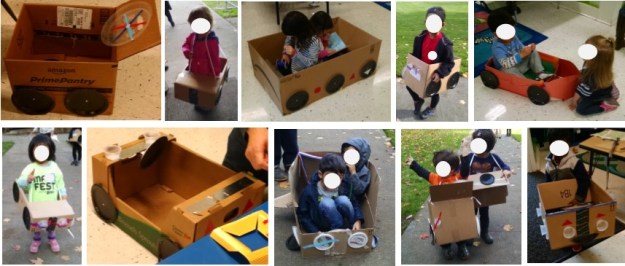
Once the car project is complete, celebrate with a drive-in movie. Watch your favorite movie – you can sit on the couch, they sit in their car. Serve popcorn!

An Activity for Outside the Home

Counting Cars. Any time you find yourself with time to kill, count the cars going by. (Great counting practice!) Label them: blue car, red truck, gray car, delivery truck, and so on. (Great for building vocabulary and the idea of categories!)

Songs to Sing about Transportation

The Wheels on the Bus. https://kcls.org/content/wheels-on-the-bus/
(Also, search on YouTube for lots of fun videos of this song!)
The wheels on the bus go round and round, Round and round, round and round,
The wheels on the bus go round and round, All through the town.

Down by the Station https://kcls.org/content/down-by-the-station/
Down by the station early in the morning. See the little puffer bellies all in a row.
See the engine driver, pull his little lever. Puff puff! Toot toot! Off we go!

Drive the Fire Truck. https://kcls.org/content/hurry-hurry-drive-the-fire-truck/
Hurry, hurry! Drive the fire truck! Hurry, hurry! Drive the fire truck!
Hurry, hurry! Drive the fire truck! Ding, ding, ding, ding, ding!

Motorboat.  https://kcls.org/content/motorboat-motorboat/
Motorboat, Motorboat go so slow (set your child in front of you, their feet against yours… hold their hands, and rock back and forth as you sing)
Motorboat, Motorboat go so fast (rock faster!)
Motorboat, Motorboat step on the gas! (go really fast!)
(Repeat, but this time, end it with “run out of gas” and putter to a stop.)

Games to Play / Circle Time Activities

Motorboat Activity: Do the song above, but have them walk when you say slow, jog when you say fast, run when you say step on the gas, and fall down on run out of gas.

Train rhyme: I’m a choo-choo train; (walk in circle)
Chugging down the track. (rhythmically move arms)
First I go forward,  Then I go back. (walk forward and back)
Now my bell is ringing, (pretend to pull bell)
Hear my whistle blow. (cup hand to ear)
What a lot of noise I make (cover ears)
Everywhere I go!

Red Light, Green Light. When you say green light, they can walk. When you say red light, they need to stop. (Advanced version: when you say yellow light, they can keep walking, but need to slow down.) This is a fun game, but also great safety training. When your child is headed out into the street, you say “red light” and they know to stop!

Sensory Activities

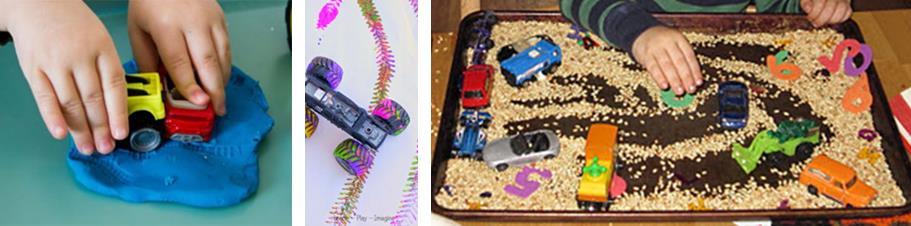
Tire Tracks. Drive toy cars on play-dough to make tire tracks. Or, squirt paint on a big piece of paper, and drive cars around. Or, drive them in a sensory bin full of dried rice, grains, or beans.

transport2

Bulldoze the Beans: Add toy bulldozers to a bin of beans.

Car Wash: A tub of soapy water and some toy cars is lots of fun.

Books to Read

Freight Train by Donald Crews. Teaches colors and names of train cars.

My CarTrucks, Planes, Boats, Machines at Work by Byron Barton.

Don’t Let the Pigeon Drive the Bus. by Mo Willems. Very silly. Best for 3 years and up.

There are many different illustrated books featuring The Wheels on the Bus lyrics (I like the Pete the Cat: The Wheels on the Bus) and Row Your Boat (I like Row, Row, Row Your Boat by Cabrera.)

More ideas (and source citations) at: www.pinterest.com/bcparented and https://gooddayswithkids.com/songs-and-activities/fun-with-toddlers/

Check out this article on: “Obsessions with trucks, trains, or cars make kids smarter.”
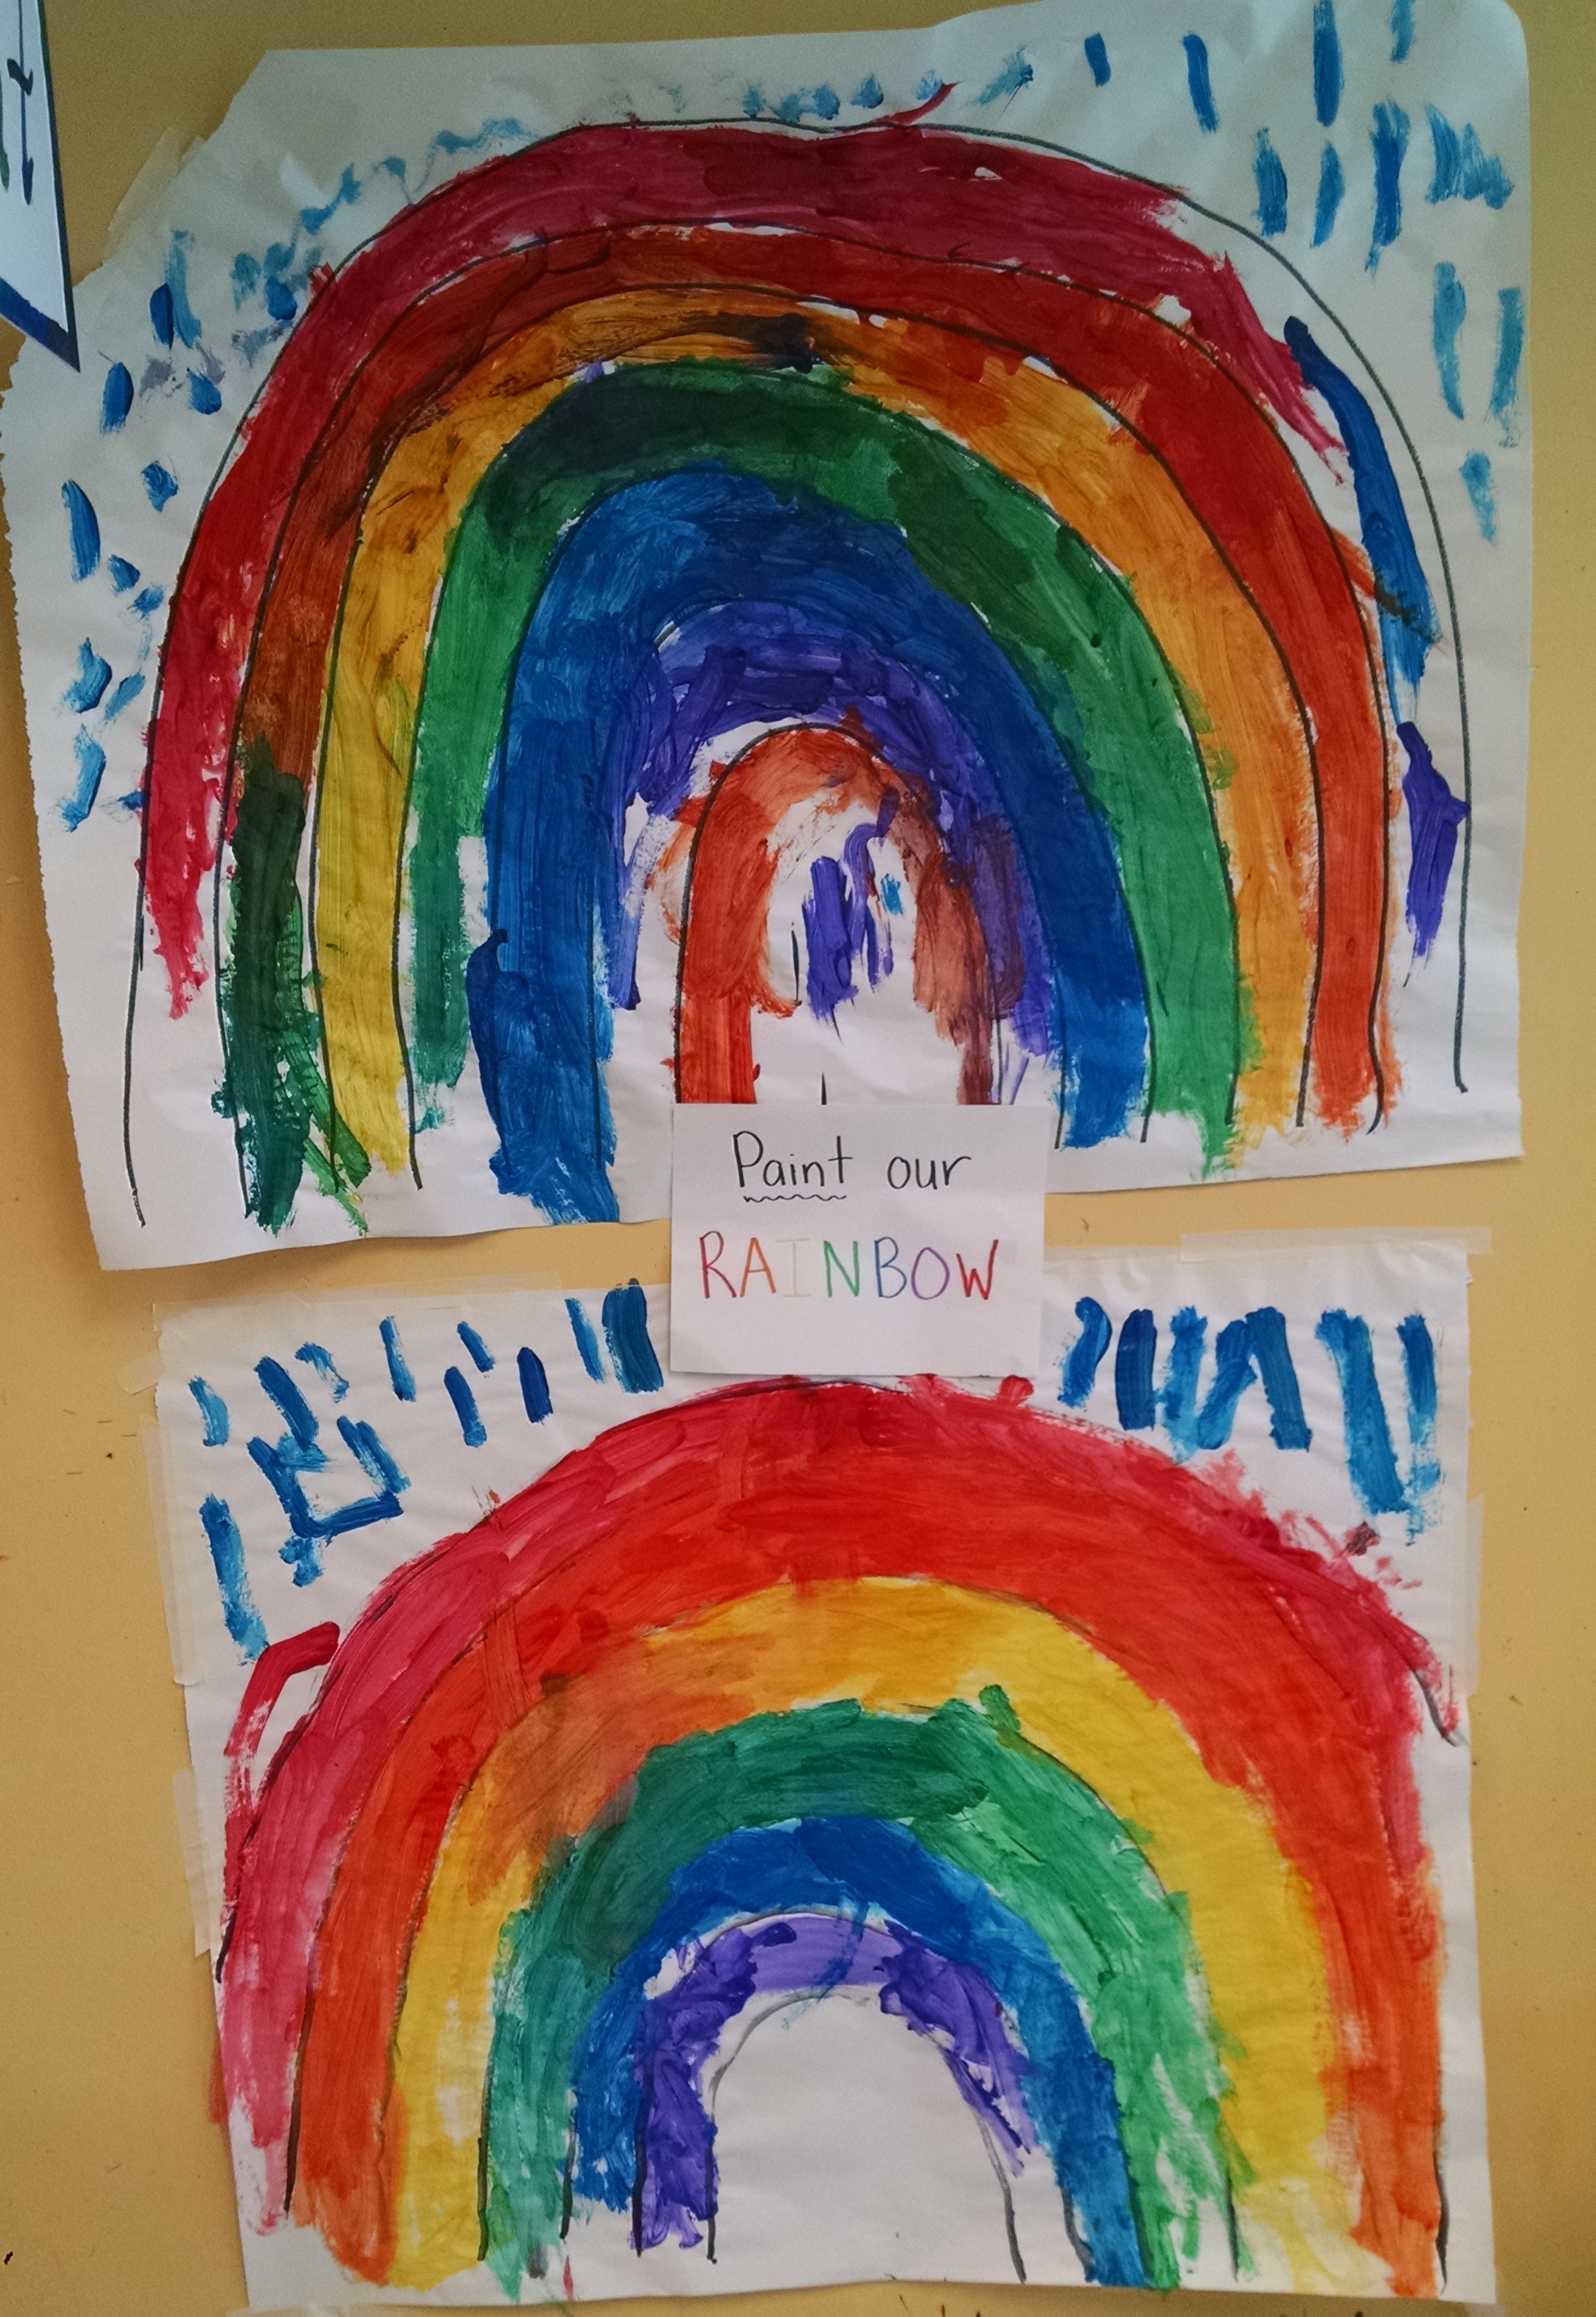
Building a Wind Tube

Wind Tube For our Family Inventors’ Lab class (a STEM class for preschool and kindergarten age), we have built a fun tool, which encourages the kids to tinker – see my last post for how kids play with a wind tube. This post is about the tinkering process we used to build and refine our DIY wind tube.

Supplies

We started with the directions from Exploratorium. We ordered from Amazon:
    • a big, powerful fan – we use the Honeywell HF-910 Turbo Force. (My colleagues tried using a smaller Honeywell, and smaller hoops to save money, and their version can just barely lift a scarf up and out of the tube. It’s just not nearly as fun.) The HF-910 is no longer available but the Air Monster and the Comfort Zone Powrcurve look like they’d work. You need a big fan that can be tilted so it’s horizontal to the floor.
    • TWO 14″ embroidery/quilting hoops and
    • an acetate sheet  Ours is 40″ tall. It comes in a 12 foot roll, you’ll only need about 4 feet of it. Exploratorium’s directions called for .0075 ml thickness, we used .01. It’s a little pricier but it’s been very durable which is important to us because we transport it to several sites and has survived ten years of small children banging on it. (Other builders have used 1/32″ thick polycarbonate, but I haven’t found that in large sheets.)
    • spacers – see below

Assembly

We cut the acetate sheet, rolled it to make a tube, and assembled the tube with the hoops. Definitely a two person job. You can clamp the plastic between the inner and outer layer of the hoop, just like you would fabric. We then used clear packing tape to tape the seam. (We also taped over the metal clamps on the hoops, and the edges of the acetate sheet on one end, just so kids wouldn’t scrape themselves while playing.)

Spacers

You need spacers to lift the tube up off the fan. Exploratorium recommends wooden spacers that you cut a notch in. We built spacers with Duplos and set the tube on those. (You can see them in the videos in this post.) For our family, that worked fine, because it was easy to rebuild them if they got knocked off. For class, I wanted something I didn’t have to rebuild. I found some giant clothespins, which worked great. (You can find 6″ or 9″ options. Nine is better.)
For kids over age 5 or so, that’s all you need. You just set the tube on top of the fan, and you’re fine. They may knock it off a couple times, but quickly learn to be more careful. If it does get knocked off and lands on someone’s head, it’s startling but does not hurt.

Tie the Tube Down?

For kids under 5, you’ll want to tie the tube to the fan so it doesn’t get knocked off as much. Exploratorium recommended drilling holes in the spacers, disassembling the fan, and fastening the spacers on with zip ties. We decided it would be much easier to just thread pipe cleaners through the springs on the clothes pins, and loop those down under the fan and back up again (no dis-assembly required) and twist together to tighten. It was easy to do, worked great to tie them down, and is easy to undo later if desired. An advantage to the clothes pins is that it’s easy to clamp the tube onto the fan, then easy to un-clamp it for transport. ClipMeshTie

Cover with Mesh?

If you will be using the tube with young children, be aware that they may try to put small items into the fan openings (beans, coins, toys, etc.) I usually avoid this issue by putting the wind tube in a hallway or in a large motor play area where there just aren’t any small items to put in. But, if you’re in a classroom full of small smare parts, you may want to cover the fan so they can’t drop things into it. I bought 1.5 yards of black tulle with pretty sparkles (like this), and we wrapped it over the fan, tying it off below with a twisted pipe cleaner. The tulle does work great as safety proofing and looks fine, but it definitely does diffuse the air flow from the fan, so some of the heavier things that would fly without the mesh on just don’t fly well with the mesh on.

Play Value

I’ve watched countless children age 1 – 10 play with this for hours. The under-one-year olds love just watching things fly up and out of the tube. The two-year-olds love shoving things into the tube and watching them fly. The three-year-olds start to make observations on which items flew best. The four-and-ups experiment with building things, tying things together, trying to put things in from the top, and so on. Some of the parents get caught into the experimenting too, folding paper helicopters and such to test what will fly. The kids play really well together – part of the point of this game is to put something in and LET GO, so there aren’t many issues with having to share something that someone was holding on tight to. They all play happily side by side. They don’t really need to take turns, as it works fine to have four or five things flying at the same time. Here’s some of the items we have launched: scarves, ribbons, pipe cleaners twisted into spirals, dixie cups, plastic dishes, and paper cut into a variety of shapes. (See more video in my Wind Tube post.) I have also flown silk leaves for a fall theme, felt snowflakes in the winter. Toy parachutes are also great – if there’s ANY chance the plastic paratrooper will get caught in the fan, just cut him off and use the parachute alone. objects

Alternatives to our DIY wind tube

There is a DIY wind tube tutorial on Instructables. It requires that you own real tools, which I don’t. 🙂 babbledabbledo describes building a simple “vortex” by just rolling a tube of poster board and setting it directly on the fan. Kids put a scarf or a balloon above the tube where it gets caught up in the rush of air. Super simple! I like that with our tube, the kids can put the item in at the bottom and see it travel up the tube, but this simple alternative may meet your needs just as well Kodo Kids makes a wind tunnel that looks fabulous! And I know their materials are very high quality. I’d love to have it, but it costs $499 plus a $50 fan, versus the materials for my DIY tube are around $176 before tax. [Fan ~$55; hoops $20; acetate sheet $82; clothespins $19; optional tulle fabric.] Or you can buy the science museum version for $13,500. For lots of ideas for STEM enrichment activities with kids, check out my blog www.InventorsOfTomorrow.com.

The Wind Tube

We’ve built a fun science exploration tool, which we use in our Family Inventors’ Lab class.

The Exploratorium shared a project idea for building a Wind Tube. (Also check out the Kodo wind tunnel.) It’s basically a clear tube mounted over a fan. Kids can place items into the tube and see what happens. Heavy items just sit there. Lightweight items shoot out the top of the tube. Other items may float, spin, or rattle back and forth. The video at the the top of this post shows some of our initial experiments. (If you want to learn how to make a DIY wind tube, check out my next post.)

Dave Stroud says this about how kids (and adults!) play with a wind tube.

The Wind Tubes intrinsically encourage a particular type of play that helps guests experience the way science works. The intent is for guests to internalize a science based mindset – do something, measure the outcome, make changes, do something, measure the outcome, compare the outcomes, make changes, do something, measure the outcome, compare the outcomes – repeat this process until you run out of time. The user experiences the phenomena by exploring it, rather than being shown an outcome and having it explained. (Source)

I have definitely seen this in action. Toddlers and preschoolers love to launch the same items over and over. Four to five year olds start experimenting more, looking around the room and deciding what to try next! As they experiment, I hear them talking: “I wonder what this will do?” “What can I try next?” “What do you think will happen this time?” “That didn’t work, I wonder if I could combine it with this?” It’s “tinkering” at its finest! Older kids, teens, and adults enjoy engineering items to achieve different goals – lifting up heavy materials, designing a neutral buoyancy item that will float in the tube forever, or creating items that spin on their way up.

As Stroud says, this activity results in:

• Making guests [child] less reliant on “authority” to answer questions
• A higher level of engagement and deeper investigation
• Guests defining their own success and making their own meaning (user defined outcomes)
• Generating a particular category of questions such as: How can I get it to…? What if I…? Instead of: Why does it…? What makes it…?

Here are some of the experiments my family developed just in a few hours of play when we first built our tube:

Scarves. An easy peasy thing is scarves – they catch the wind so nicely, then gently flutter to the ground.

The Frisbee. (really a plastic lid)  It gets caught in the air currents and will float forever. My son learned that if you put your arm over the fan to block some of the air flow, the Frisbee will sink down the tube.

Cardboard boat. This cardboard snack tray will float easily on its own. The small plastic monster will not – it’s too heavy and not aerodynamic. But, put the monster in the boat and it floats!

Parachutes. This plastic pterodactyl won’t fly even though it has wings. But, if you build it a parachute out of a plastic bag and a pipe cleaner, it soars. Note: you can also make parachutes with coffee filters or use these parachute party favors. (Amazon affiliate link)

Pipe cleaner spinner. My personal favorite is this twirled-up pipe cleaner that spins and spins as it floats in the air.

Tops. And speaking of spinning, watch these plastic tops. They don’t float, but they definitely respond to the wind!

Other materials to try: scarves, balloons, rubber gloves blown up and tied, dixie cups with coffee filter parachutes, whiffle balls, strawberry baskets, etc. I also really like these three projects… these pictures were from the wind tube activity at the Orlando Science museum.

flyers

Here is a printable template for the helicopter shown above.

Here are ideas from the Cincinnati Museum of Natural History:

As kids play, they learn hands-on about aerodynamics, wind currents, how lightweight things fly better than heavy things, but even heavy things can fly if they have a parachute or an “air ship” that can catch the wind currents. Having the ability to play hands-on with this will allow them to internalize the learning much more than when they cover all this stuff in high school physics class someday!

Challenges for Kids:

For older kids, you could make a poster to accompany this activity with challenges like these from MOTAT:

  • Can you build something that will leave the tunnel in a particular direction?
  • Can you build something that will hover above the wind tunnel?
  • Can you make something that spins clockwise as it rises in the tunnel?

Learn more:

If you want to read more about “transactivity” and what makes this such a cool learning activity, check out Stroud’s post: http://www.exhibitfiles.org/vertical_wind_tubes. This is a great “case study” post, which shares observations on how people play with the tubes.

Here are links to some other people’s experiments with and thoughts about Wind Tubes

Fun with Toddlers: Pet Theme

This month’s theme was Pets, especially dogs and cats. Here are some fun pet-related things to do with your toddler:

Outings to Go On: Visit a pet store. Look at the fish, or the rodents, or the birds or reptiles. The pet store is just as educational as the zoo, and it’s free! It’s a great chance to talk to your child about animals, and to practice observation skills: “Can you find a yellow fish?” “Which is the biggest bird?” “These are all reptiles. What makes them different from the rodents we just looked at?” If you don’t have a pet at home, don’t feel like you have to buy anything. Most pet stores are used to parents coming in and hanging out with their children for a while. If you want, you could buy a bag of pet food to donate to the store’s pet food drive. (Look for a donation bin at the front of the store.)

Toys to make for your child

Balloon Puppies. Take a balloon. Blow it up. Draw animal features on, add a string and you have an instant pet for your child to take on a walk! If you want to be fancy, you could use a helium balloon and fasten on “legs” made of accordion-folder paper – the home made version of the toy pictured.

petsDoggy ears (or kitty ears). Make a circle of paper that fits around your child’s head and add ears, or turn a child’s headband into the base for ears.

Imagination Games to Play

The Dog House. Take a big cardboard box. Cut an arched doorway in it. Decorate it like a dog house. Add things to represent dog food dishes, dog bones, dog toys and more. Add stuffed puppies if you have them, and then let the play begin.

Pet Store. Set up a pet store with stuffed animals, and accessories for animals (food bowls, collars, treats, toys, and so on, and go shopping.

Songs to Sing / Rhymes to Say

Where has my little dog gone?
Oh where, oh where has my little dog gone?
Oh where, oh where can he be?
With his ears cut short and his tail cut long,
Oh where, oh where can he be?

How Much is that Doggie in the Window
How much is that doggie in the window? The one with the waggly tail?
How much is that doggie in the window? I do hope that doggie’s for sale.
[Search on YouTube for many videos of this song!]

I have a cat
I have a cat (stroke your fist); My cat is fat (arms form a stomach)
I have a cat (stroking); My cat wears a hat (hands on head)
I have a cat (stroking); My cat caught a bat (clap hands together above head)
I have a cat (stroking) Purrrrrr, Meowwww

Circle Time Ideas

Poor Kitty. There is a game that elementary school aged children love called “Poor Kitty”. One person pretends to be the kitty and goes around a circle, trying to make the other kids laugh (by purring rubbing against them, licking them…). The others are supposed to keep a straight face and just pet the “cat” and say “poor kitty” without laughing. You can adapt this for a one-on-one game with toddlers or preschoolers. (Though they probably won’t get the whole “you’re not supposed to laugh” idea.)

Puppy puppet. Bring a puppy puppet and some dog treats (or dog toys.) Give a treat to each child. Bring the puppy around the circle and have each child give the dog a treat. Have fun with pretending to be a happy puppy.

Purple cat, what do you see. Make a felt board collection of pets – brown dog, black cat, yellow bird, gold fish, etc. Give one animal to each child. Do the rhyme, similar in style to Eric Carle’s Brown Bear. Go around the circle to each child in turn, having them place their animal on the felt board. So, if you started with brown dog, and the first child has a black cat, you’d say “Brown Dog, Brown Dog, what do you see? I see a black cat looking at me.”

Books to Read

Roly-Poly Puppies by Elaine Moore. A counting book with a nice rhyming structure.

Pete the Cat by James Dean. There are lots of fun Pete books, but the best is I Love My White Shoes. (Check out our Pinterest page for lots of activities to go with Pete books!)

Aggie and Ben by Lori Ries. Ben’s dad takes him to the pet store to pick out a pet.

More ideas (and source citations) at: www.pinterest.com/bcparented

For my full collection of theme-based “Fun with Toddlers”, click on “Fun with Toddlers series” in the right hand side bar. Or if you would like them in printable handout form to share with students, click here.