
I teach STEM classes for kids age 3 – 8 (at Eastgate Co-op in Bellevue, WA)
We built a fun tool, which encourages the kids to tinker – see my last post for how kids play with a wind tube. This post is about the tinkering process we used to build and refine our DIY wind tube.
Supplies
We started with the directions from Exploratorium. We ordered from Amazon:
- Fan: a big, powerful fan that can be tilted so it’s horizontal to the floor. We use the Honeywell HF-910 Turbo Force. (My colleagues tried using a smaller Honeywell, and smaller hoops to save money, and their version can just barely lift a scarf up and out of the tube. It’s just not nearly as fun.) The HF-910 is no longer available but the Air Monster and the Comfort Zone Powrcurve look like they’d work.
- TWO 14″ embroidery/quilting hoops and
- an acetate sheet Ours is 40″ tall. It comes in a 12 foot roll, you’ll only need about 4 feet of it. Exploratorium’s directions called for .0075 ml thickness, we used .01. It’s a little pricier but it’s been very durable which is important to us because we transport it to several sites and has survived ten years of small children banging on it.
- spacers – see below
Assembly
We cut the acetate sheet, rolled it to make a tube, and assembled the tube with the hoops. Definitely a two person job. You can clamp the plastic between the inner and outer layer of the hoop, just like you would fabric. We then used clear packing tape to tape the seam. (We also taped over the metal clamps on the hoops, and the edges of the acetate sheet on one end, just so kids wouldn’t scrape themselves while playing.)
Spacers
You need spacers to lift the tube up off the fan. Exploratorium recommends wooden spacers that you cut a notch in. We built spacers with Duplos and set the tube on those. (You can see them in the videos in this post.) For our family, that worked fine, because it was easy to rebuild them if they got knocked off. For class, I wanted something I didn’t have to rebuild. I found some giant clothespins, which worked great. (You can find 6″ or 9″ options. Nine is better.)

For kids over age 5 or so, that’s all you need. You just set the tube on top of the fan, and you’re fine. They may knock it off a couple times, but quickly learn to be more careful. If it does get knocked off and lands on someone’s head, it’s startling but doesn’t hurt.
Tie the Tube Down?
For kids under 5, you’ll want to tie the tube to the fan so it doesn’t get knocked off as much.
Exploratorium recommended drilling holes in the spacers, disassembling the fan, and fastening the spacers on with zip ties. We decided it would be much easier to just thread pipe cleaners through the springs on the clothes pins, and loop those down under the fan and back up again (no dis-assembly required) and twist together to tighten. It was easy to do, worked great to tie them down, and is easy to undo later if desired. An advantage to the clothes pins is that it’s easy to clamp the tube onto the fan, then easy to un-clamp it for transport.

Cover with Mesh?
If you will be using the tube with young children, be aware that they may try to put small items into the fan openings (beans, coins, toys, etc.) I usually avoid this issue by putting the wind tube in a hallway or in a large motor play area where there just aren’t any small items. But, if you’re in a classroom full of small smare parts, you may want to cover the fan so they can’t drop things into it. I bought 1.5 yards of black tulle with pretty sparkles (like this), and we wrapped it over the fan, tying it off below with a twisted pipe cleaner. The tulle does work great as safety proofing and looks fine, but it definitely does diffuse the air flow from the fan, so heavier things that would fly without the mesh just don’t fly well with the mesh on.
Play Value
I’ve watched countless children age 1 – 10 play with this for hours. The under-one-year olds love just watching things fly up and out of the tube. The two-year-olds love shoving things into the tube and watching them fly. The three-year-olds start to make observations on which items flew best. The four-and-ups experiment with building things, tying things together, trying to put things in from the top, and so on. Some of the parents get caught into the experimenting too, folding paper helicopters and such to test what will fly. The kids play really well together – part of the point of this game is to put something in and LET GO, so there aren’t many issues with having to share something that someone was holding on tight to. They all play happily side by side. They don’t really need to take turns, as it works fine to have four or five things flying at the same time.
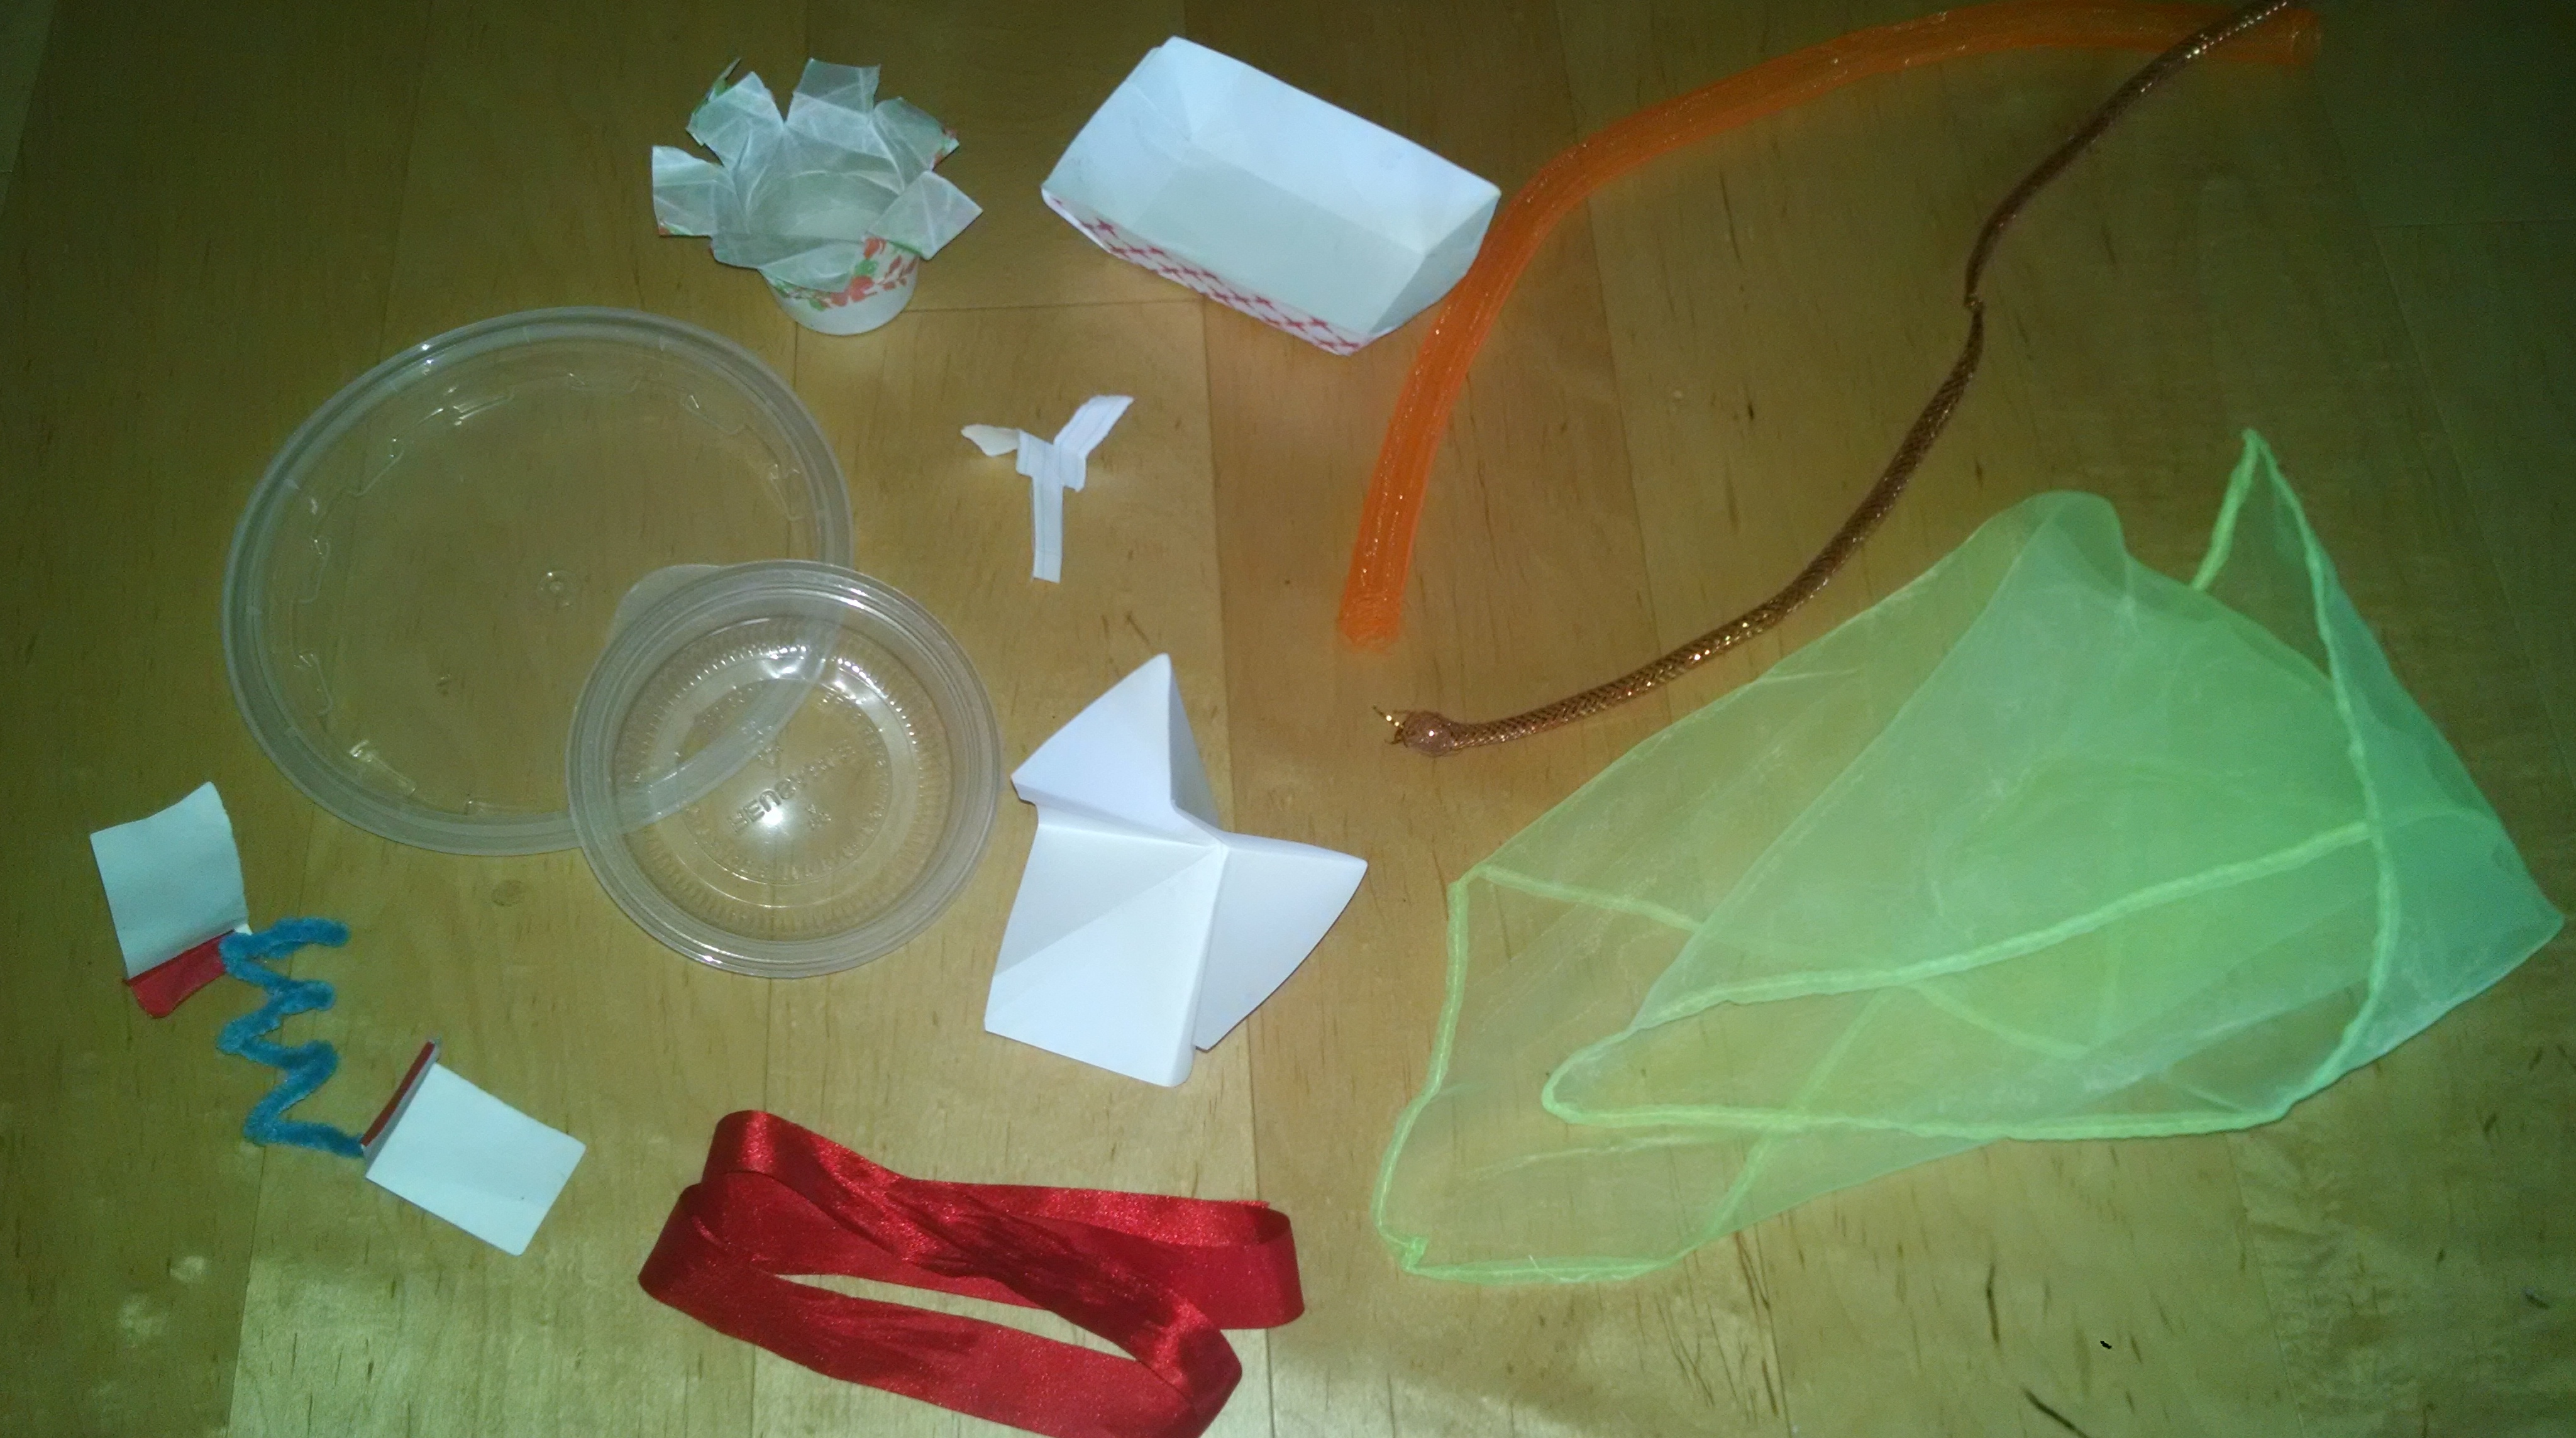
Here’s some of the items we have launched: scarves, ribbons, pipe cleaners twisted into spirals, dixie cups, plastic dishes, and paper cut into a variety of shapes. (See more video in my Wind Tube post.) I have also flown silk leaves for a fall theme, felt snowflakes in the winter. Toy parachutes are also great – if there’s ANY chance the plastic paratrooper will get caught in the fan, just cut him off and use the parachute alone.
Alternatives to our DIY wind tube
There is a DIY wind tube tutorial on Instructables. It requires that you own real tools, which I don’t. 🙂
babbledabbledo describes building a simple “vortex” by just rolling a tube of poster board and setting it directly on the fan. Kids put a scarf or a balloon above the tube where it gets caught up in the rush of air. Super simple! I like that with our tube, the kids can put the item in at the bottom and see it travel up the tube, but this simple alternative may meet your needs just as well.
KiwiCo (Kiwi Crate) has a wind play lab with a mini wind tube.
Kodo Kids makes a wind tunnel that looks fabulous! And I know their materials are very high quality. I’d love to have it, but it costs $499 plus a $50 fan, versus the materials for my DIY tube are around $176 before tax. [Fan ~$55; hoops $20; acetate sheet $82; clothespins $19; optional tulle fabric.]
Or you can buy the science museum version for $13,500.
For lots of ideas for STEM enrichment activities with kids, check out my blog www.InventorsOfTomorrow.com.


