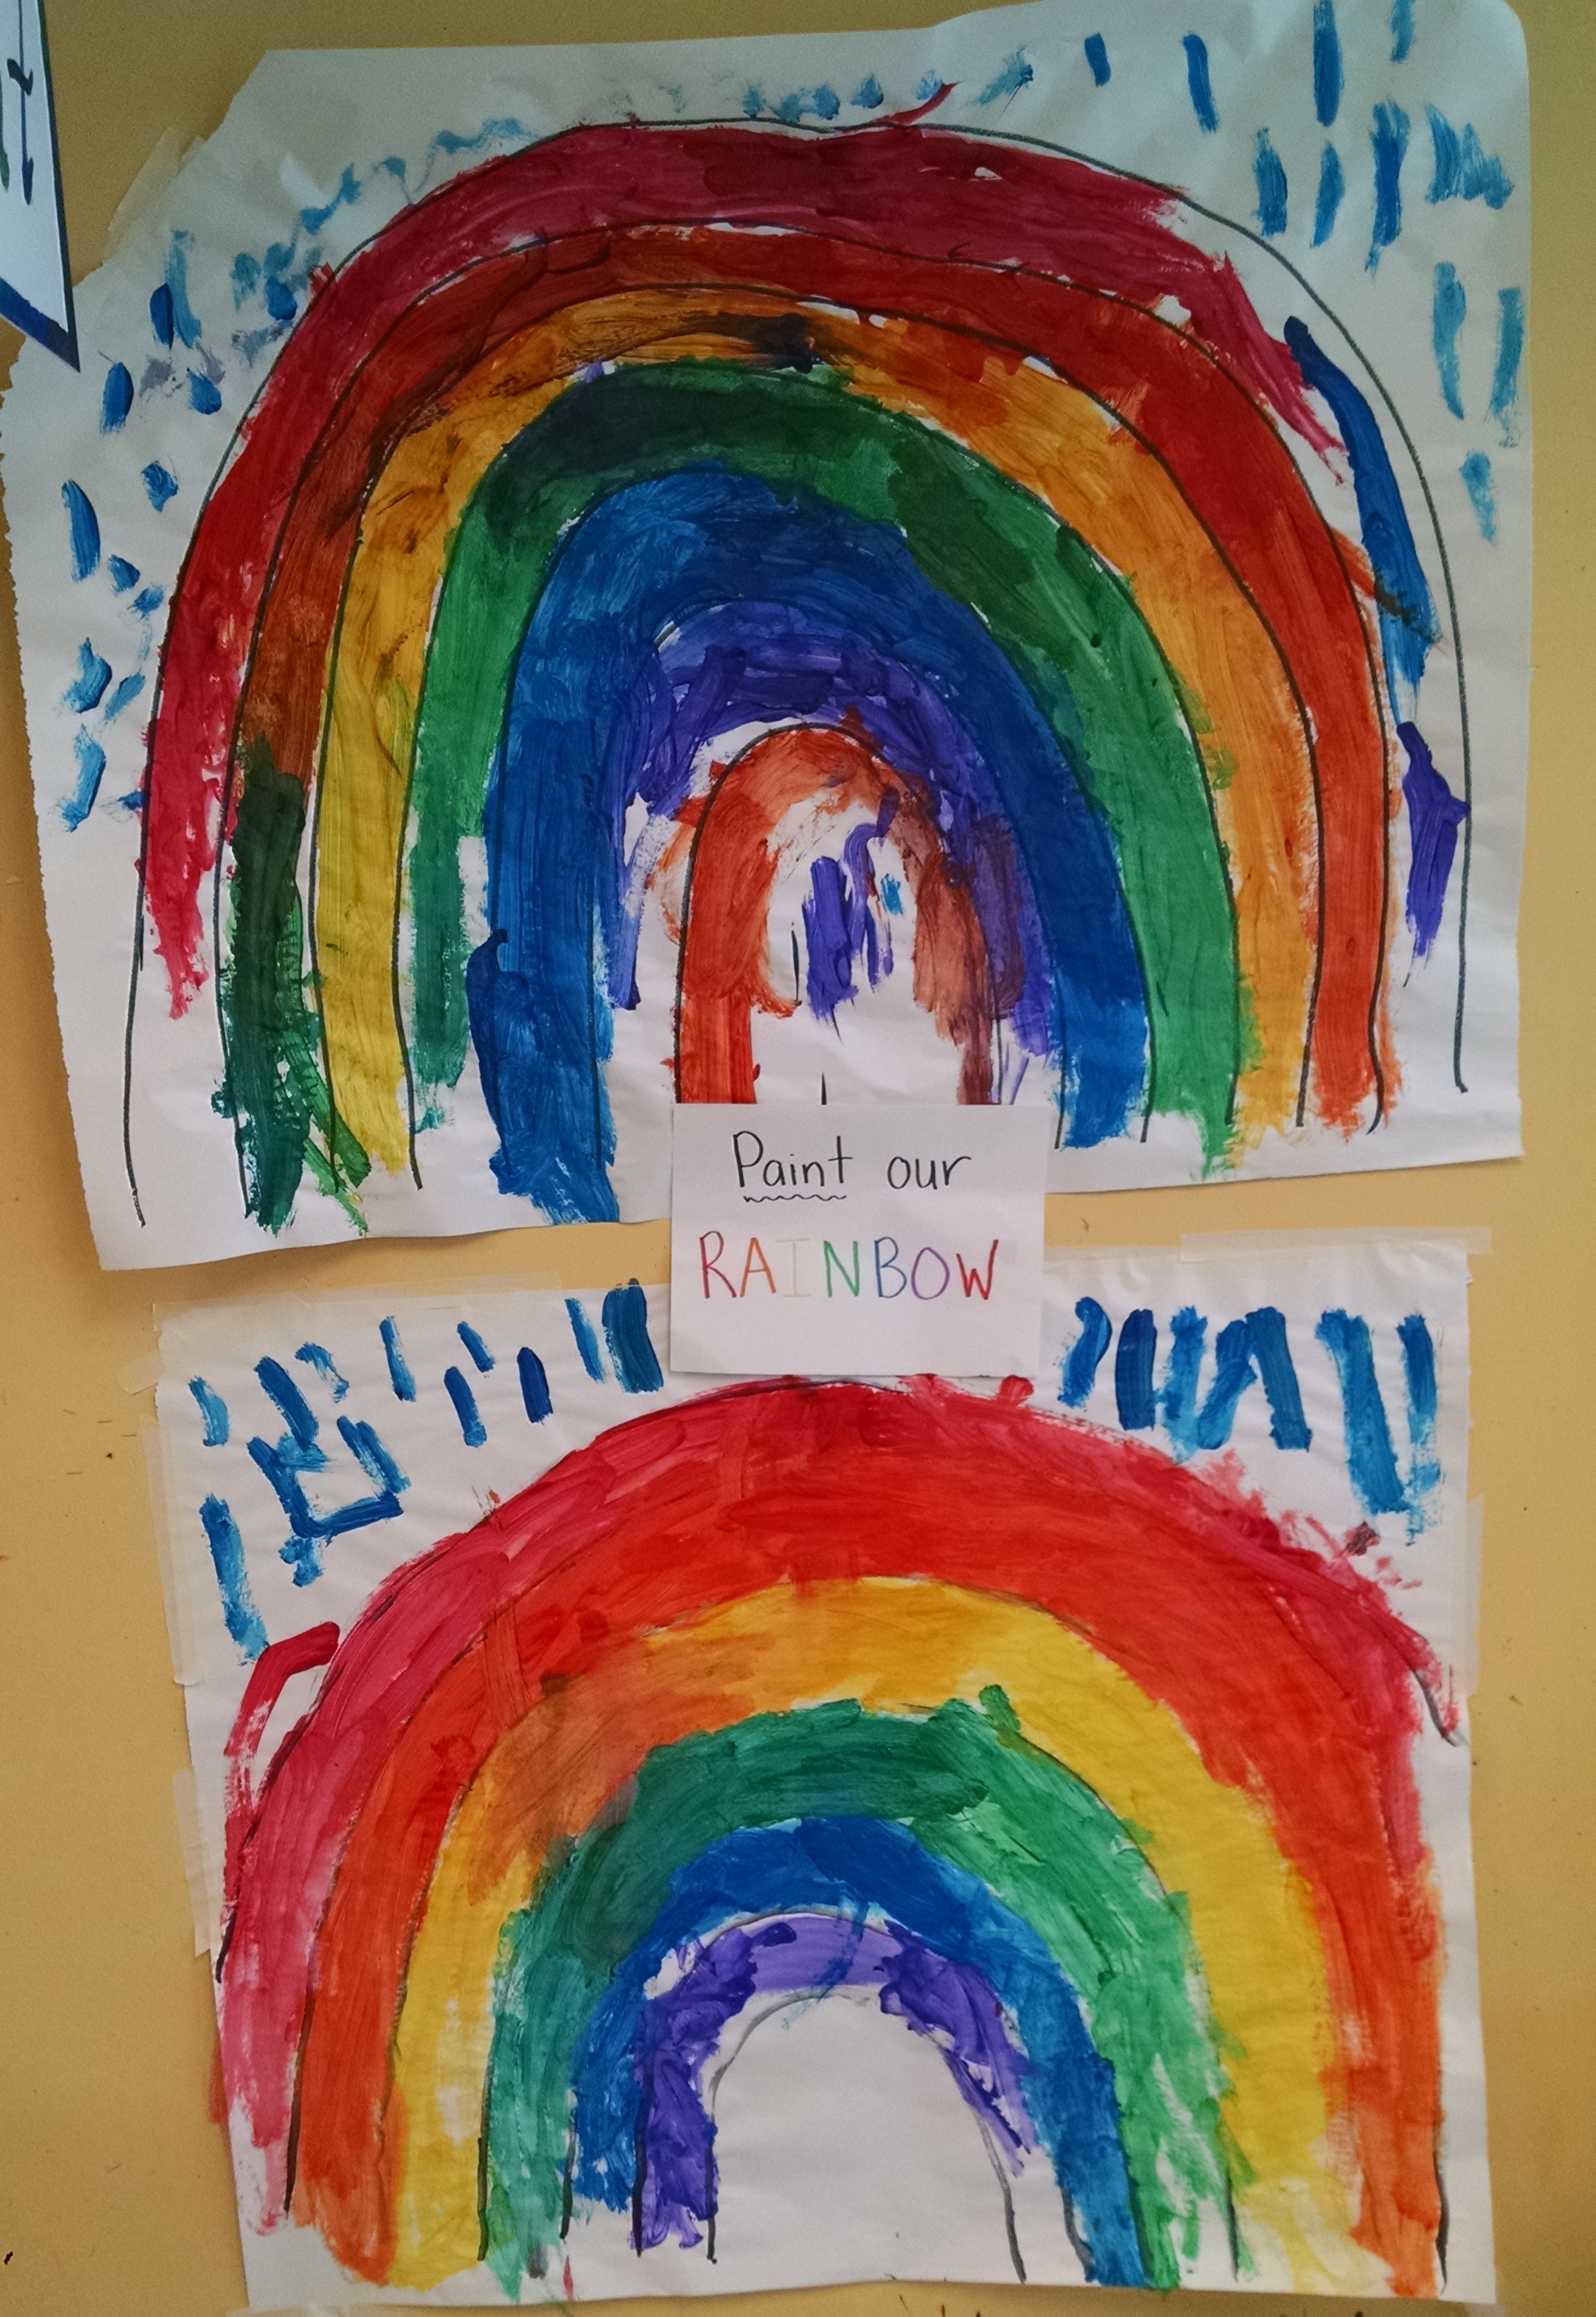
Here are just a few fun ideas for learning about rainbows.
Make a black and white drawing of the arches of a rainbow, and put one dot of color in each section and then the kids paint in the rest of each section.
Create rainclouds in a jar by filling cups of water, spraying shaving cream on top, and using pipettes to drip liquid watercolor onto the shaving cream clouds. It drips through, creating colorful rainfall below. Here are some pictures from Pinterest… check out the original posts here, here and here for more ideas for activities, and thoughts on talking to kids about the science of rain
You can also use pipettes to drip liquid watercolor onto coffee filters, which creates some beautiful color mixing. Then turn them into butterfly decorations with a clothespin and a pipe cleaner. (Source for idea.)
Picture from Thoughtful Spot Day Care
In our classroom, we have a light table with lots of colorful objects on it, rainbow crayons, rainbow colored blocks, a rainbow colored tumbling mat with colored hoops to jump into for some big motor play, and color mix playdough.
You could buy diffraction grating peepholes. (When you hold these up to your eye, then look at a light, the light is broken up into rainbows. Different lights produce different patterns… when I look at my ceiling light at home, I see circular rainbows, when I look at the LED flashlight on my cell phone, I see six rays of rainbows radiating out.) (If you want to learn more about how prisms separate “white” light into colors, watch this video. Here’s a simple, low equipment experiment to do with your child. And here‘s more activities and a little info about Inventor Isaac Newton and his discovery that light is made up of 7 colors.)
I Am a Rainbow by Dolly Parton. A feelings book. Talks about when we’re tickled pink, seeing red, feeling blue, green with jealousy, scared yellow and when everything is rosy.
For our Family Inventors’ Lab class (a STEM class for preschool and kindergarten age), we have built a fun tool, which encourages the kids to tinker – see my last post for how kids play with a wind tube. This post is about the tinkering process we used to build and refine our DIY wind tube.
a big, powerful fan – we use the Honeywell HF-910 Turbo Force. (My colleagues tried using a smaller Honeywell, and smaller hoops to save money, and their version can just barely lift a scarf up and out of the tube. It’s just not nearly as fun.) The HF-910 is no longer available but the Air Monster and the Comfort Zone Powrcurve look like they’d work. You need a big fan that can be tilted so it’s horizontal to the floor.
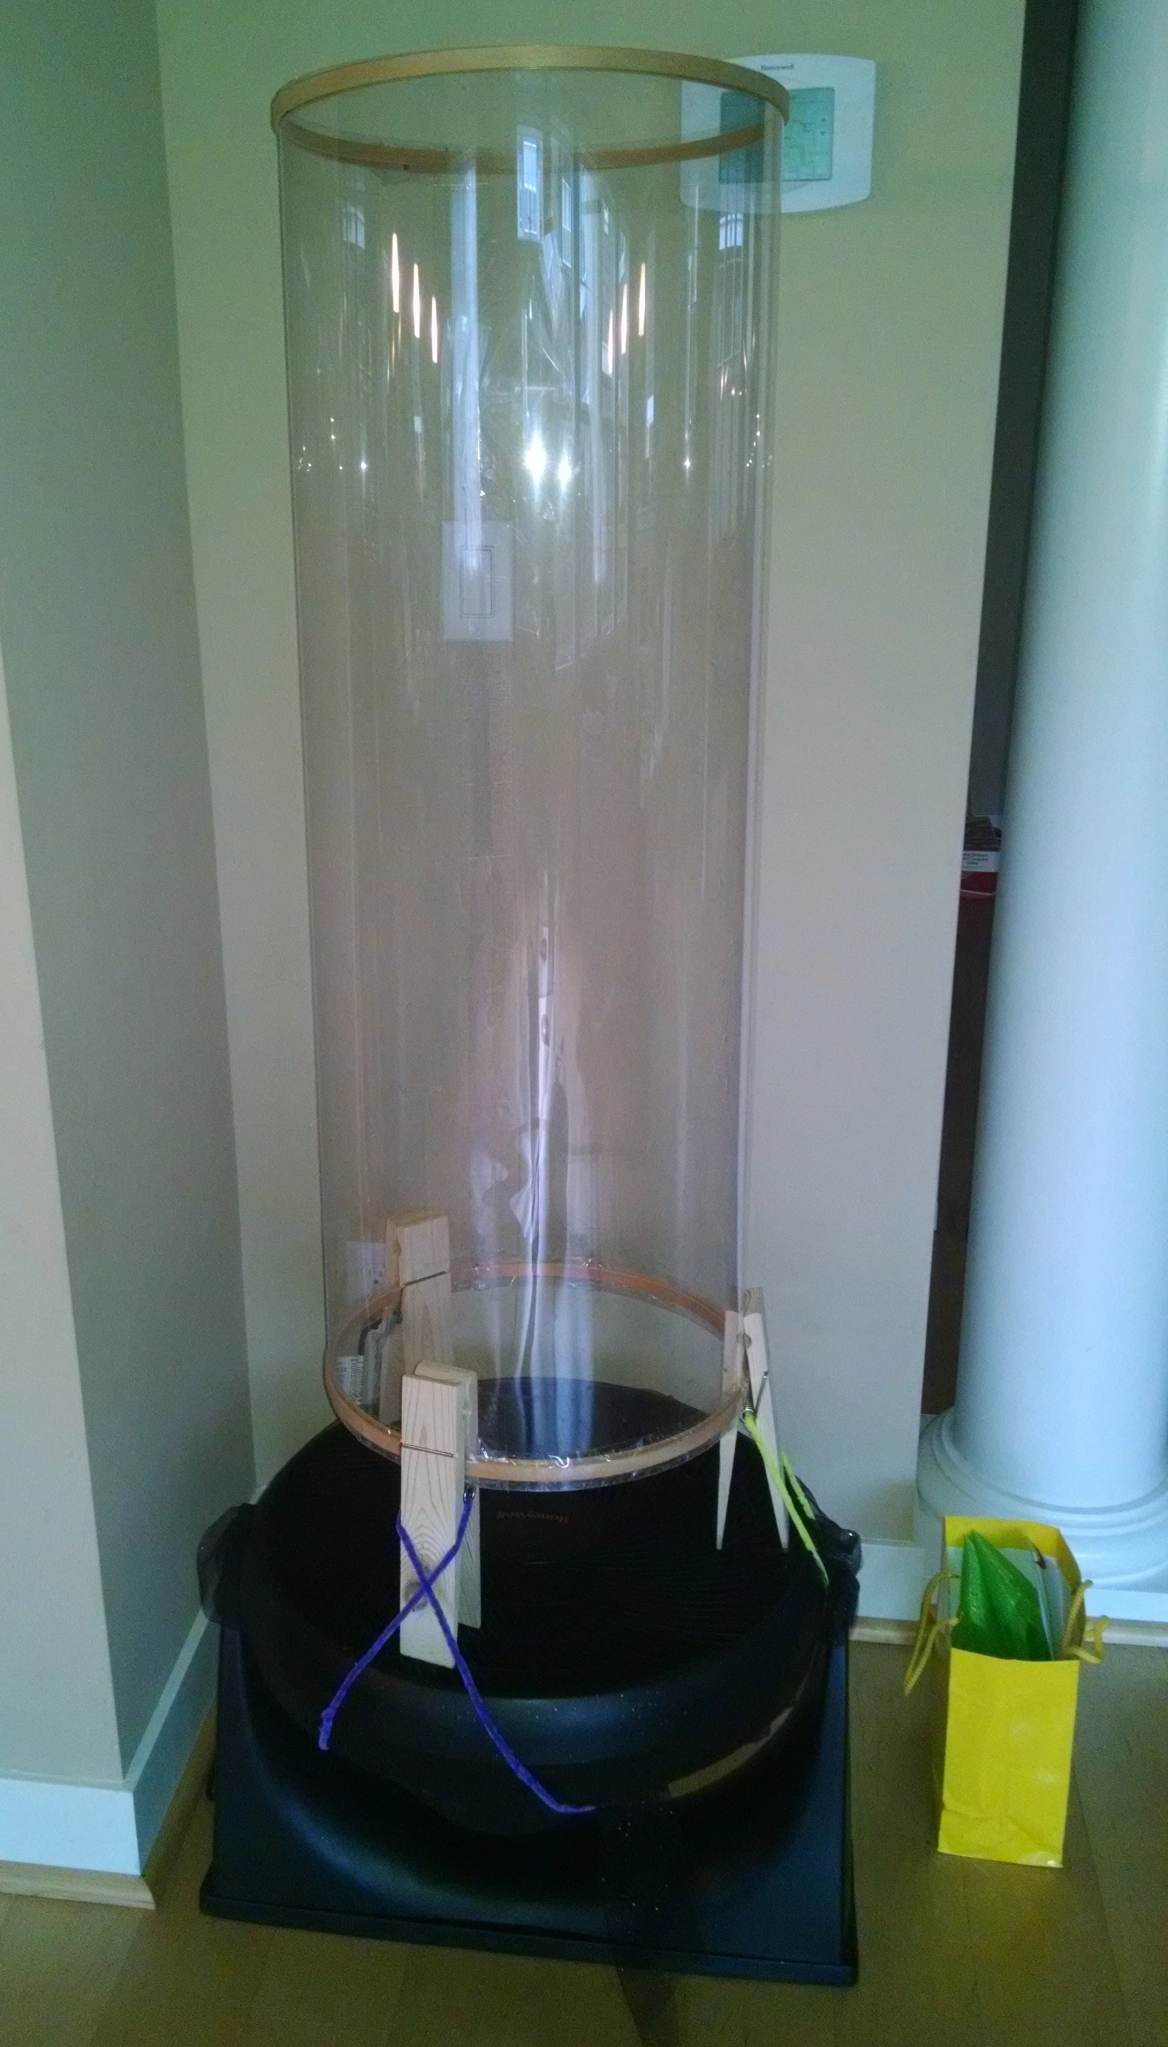
an acetate sheet Ours is 40″ tall. It comes in a 12 foot roll, you’ll only need about 4 feet of it. Exploratorium’s directions called for .0075 ml thickness, we used .01. It’s a little pricier but it’s been very durable which is important to us because we transport it to several sites and has survived ten years of small children banging on it. (Other builders have used 1/32″ thick polycarbonate, but I haven’t found that in large sheets.)
spacers – see below
Assembly
We cut the acetate sheet, rolled it to make a tube, and assembled the tube with the hoops. Definitely a two person job. You can clamp the plastic between the inner and outer layer of the hoop, just like you would fabric. We then used clear packing tape to tape the seam. (We also taped over the metal clamps on the hoops, and the edges of the acetate sheet on one end, just so kids wouldn’t scrape themselves while playing.)
Spacers
You need spacers to lift the tube up off the fan. Exploratorium recommends wooden spacers that you cut a notch in. We built spacers with Duplos and set the tube on those. (You can see them in the videos in this post.) For our family, that worked fine, because it was easy to rebuild them if they got knocked off. For class, I wanted something I didn’t have to rebuild. I found some giant clothespins, which worked great. (You can find 6″ or 9″ options. Nine is better.)
For kids over age 5 or so, that’s all you need. You just set the tube on top of the fan, and you’re fine. They may knock it off a couple times, but quickly learn to be more careful. If it does get knocked off and lands on someone’s head, it’s startling but does not hurt.
Tie the Tube Down?
For kids under 5, you’ll want to tie the tube to the fan so it doesn’t get knocked off as much.
Exploratorium recommended drilling holes in the spacers, disassembling the fan, and fastening the spacers on with zip ties. We decided it would be much easier to just thread pipe cleaners through the springs on the clothes pins, and loop those down under the fan and back up again (no dis-assembly required) and twist together to tighten. It was easy to do, worked great to tie them down, and is easy to undo later if desired. An advantage to the clothes pins is that it’s easy to clamp the tube onto the fan, then easy to un-clamp it for transport.
Cover with Mesh?
If you will be using the tube with young children, be aware that they may try to put small items into the fan openings (beans, coins, toys, etc.) I usually avoid this issue by putting the wind tube in a hallway or in a large motor play area where there just aren’t any small items to put in. But, if you’re in a classroom full of small smare parts, you may want to cover the fan so they can’t drop things into it. I bought 1.5 yards of black tulle with pretty sparkles (like this), and we wrapped it over the fan, tying it off below with a twisted pipe cleaner. The tulle does work great as safety proofing and looks fine, but it definitely does diffuse the air flow from the fan, so some of the heavier things that would fly without the mesh on just don’t fly well with the mesh on.
Play Value
I’ve watched countless children age 1 – 10 play with this for hours. The under-one-year olds love just watching things fly up and out of the tube. The two-year-olds love shoving things into the tube and watching them fly. The three-year-olds start to make observations on which items flew best. The four-and-ups experiment with building things, tying things together, trying to put things in from the top, and so on. Some of the parents get caught into the experimenting too, folding paper helicopters and such to test what will fly. The kids play really well together – part of the point of this game is to put something in and LET GO, so there aren’t many issues with having to share something that someone was holding on tight to. They all play happily side by side. They don’t really need to take turns, as it works fine to have four or five things flying at the same time.
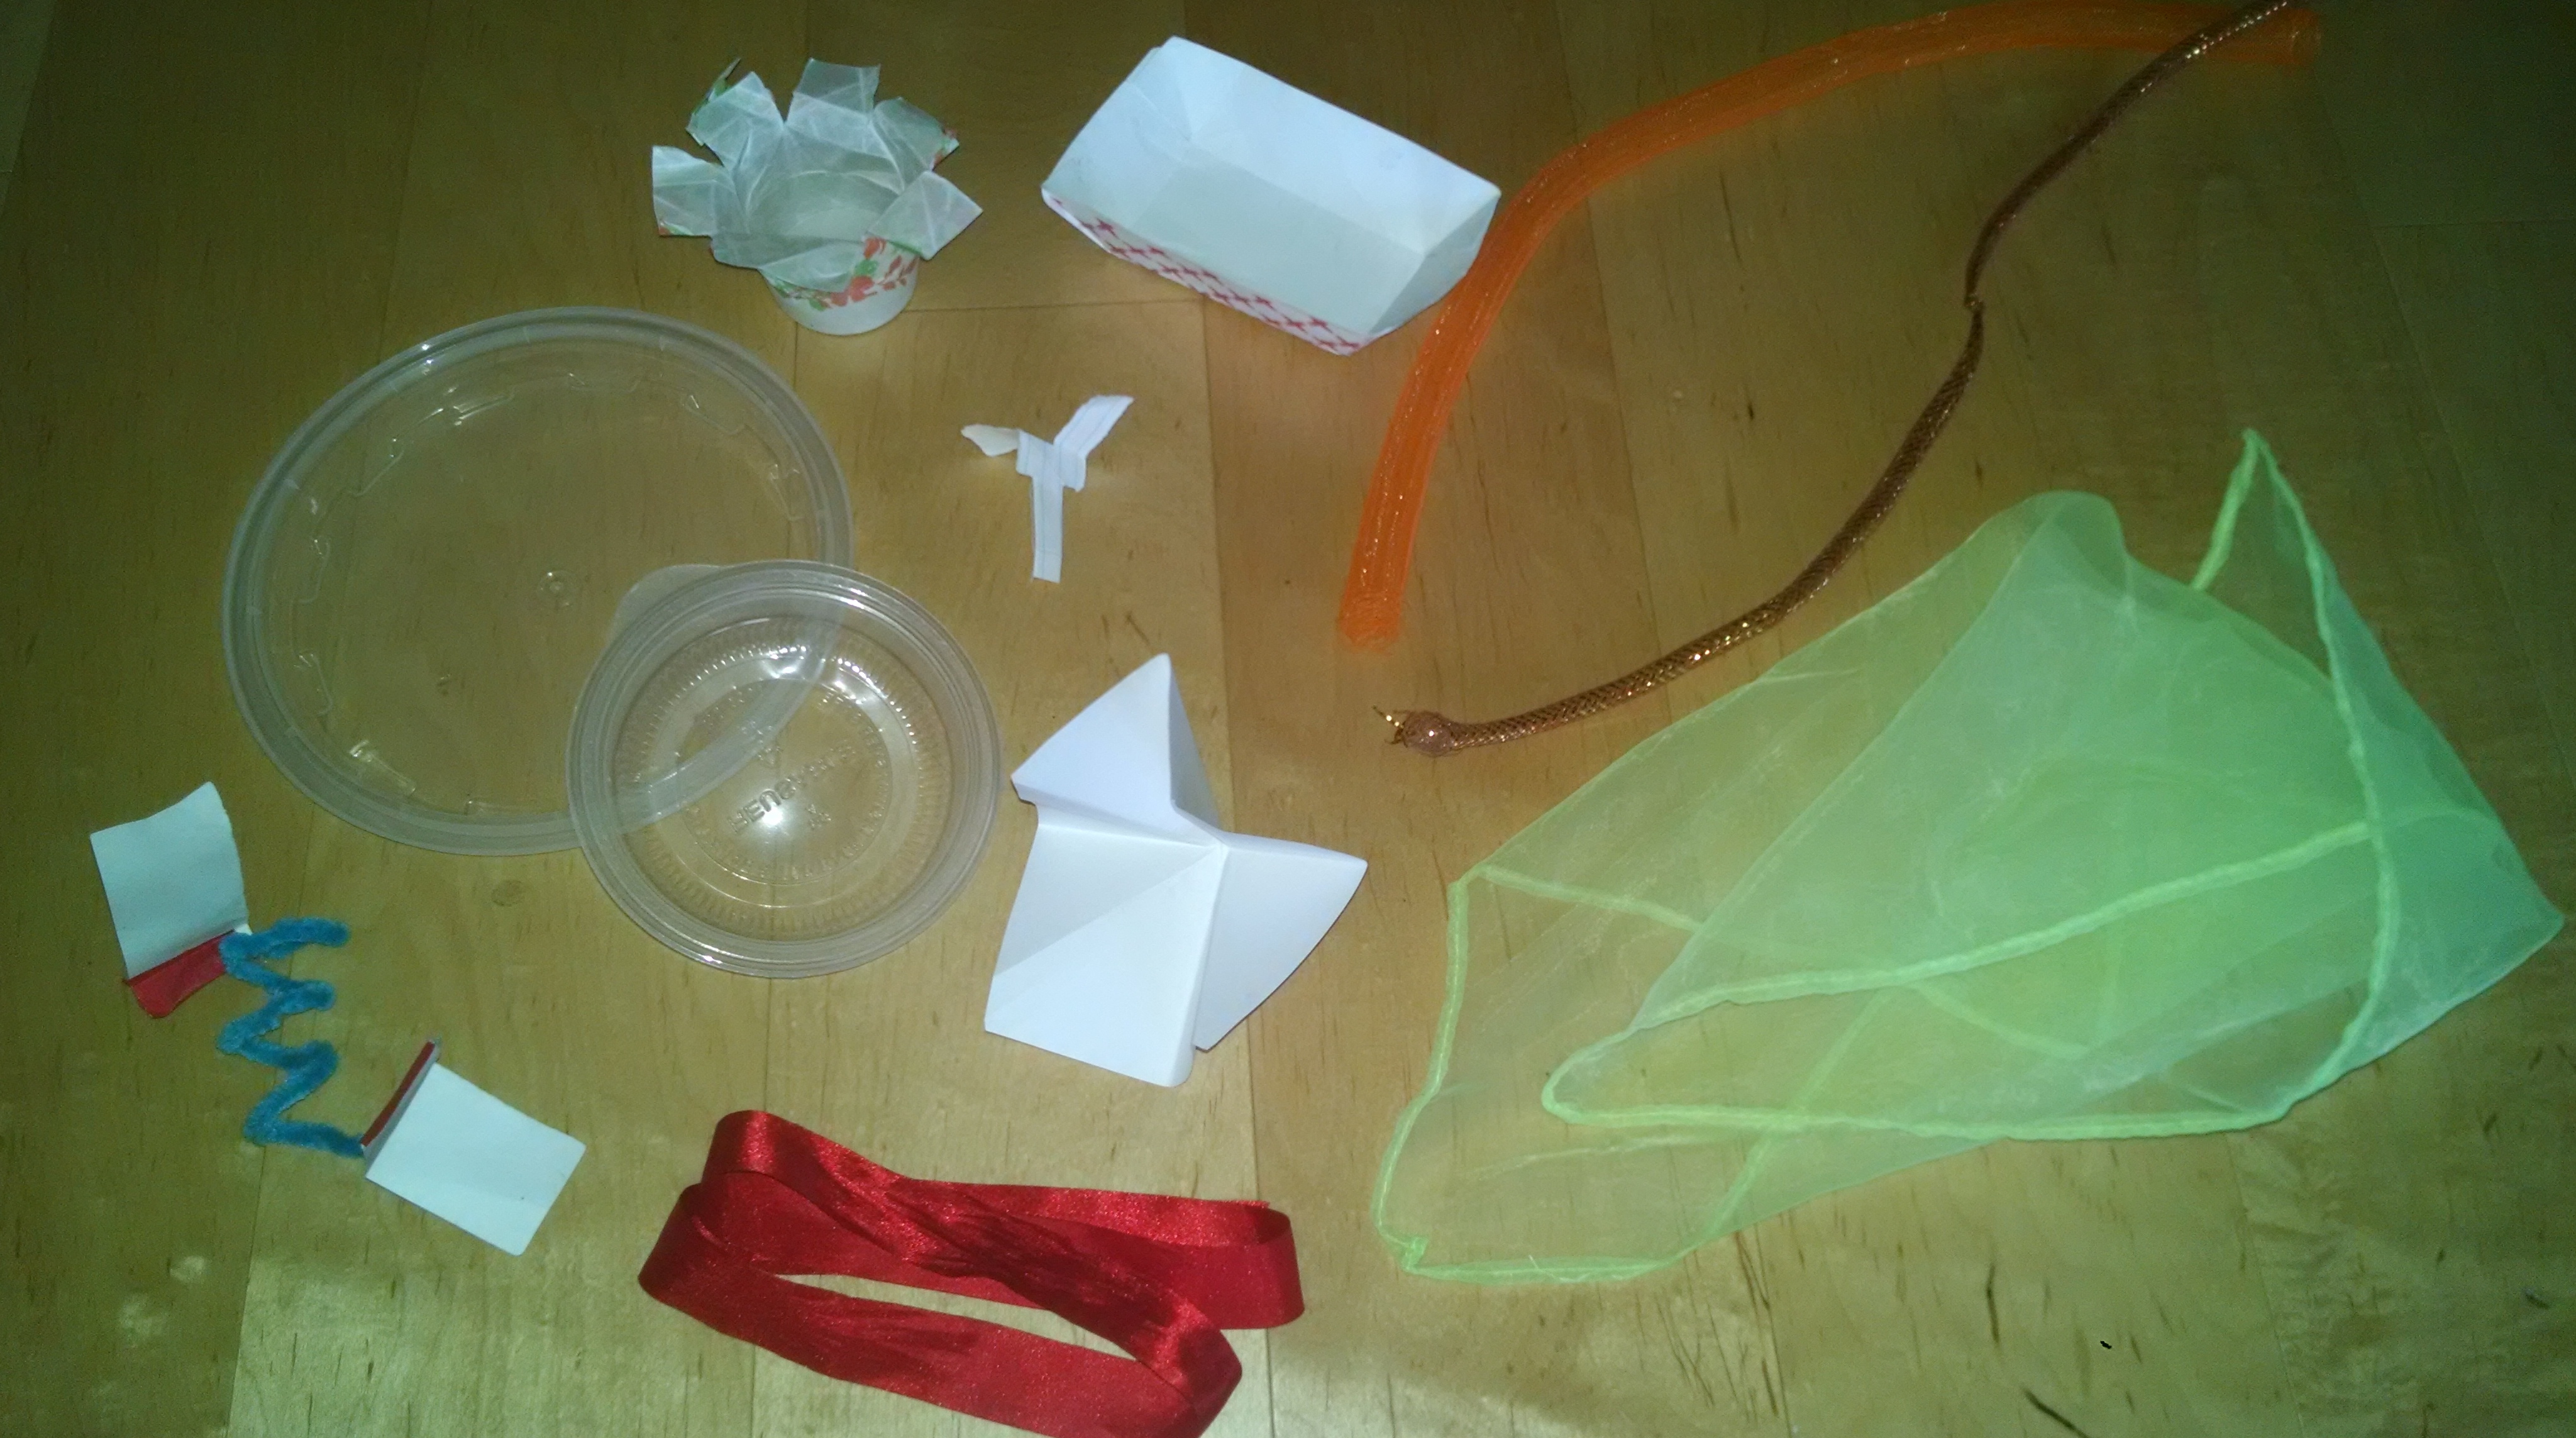
Here’s some of the items we have launched: scarves, ribbons, pipe cleaners twisted into spirals, dixie cups, plastic dishes, and paper cut into a variety of shapes. (See more video in my Wind Tube post.) I have also flown silk leaves for a fall theme, felt snowflakes in the winter. Toy parachutes are also great – if there’s ANY chance the plastic paratrooper will get caught in the fan, just cut him off and use the parachute alone.
Alternatives to our DIY wind tube
There is a DIY wind tube tutorial on Instructables. It requires that you own real tools, which I don’t. 🙂
babbledabbledo describes building a simple “vortex” by just rolling a tube of poster board and setting it directly on the fan. Kids put a scarf or a balloon above the tube where it gets caught up in the rush of air. Super simple! I like that with our tube, the kids can put the item in at the bottom and see it travel up the tube, but this simple alternative may meet your needs just as well
Kodo Kids makes a wind tunnel that looks fabulous! And I know their materials are very high quality. I’d love to have it, but it costs $499 plus a $50 fan, versus the materials for my DIY tube are around $176 before tax. [Fan ~$55; hoops $20; acetate sheet $82; clothespins $19; optional tulle fabric.]
Or you can buy the science museum version for $13,500.
For lots of ideas for STEM enrichment activities with kids, check out my blog www.InventorsOfTomorrow.com.
We’ve built a fun science exploration tool, which we use in our Family Inventors’ Lab class.
The Exploratorium shared a project idea for building a Wind Tube. (Also check out the Kodo wind tunnel.) It’s basically a clear tube mounted over a fan. Kids can place items into the tube and see what happens. Heavy items just sit there. Lightweight items shoot out the top of the tube. Other items may float, spin, or rattle back and forth. The video at the the top of this post shows some of our initial experiments. (If you want to learn how to make a DIY wind tube, check out my next post.)
Dave Stroud says this about how kids (and adults!) play with a wind tube.
The Wind Tubes intrinsically encourage a particular type of play that helps guests experience the way science works. The intent is for guests to internalize a science based mindset – do something, measure the outcome, make changes, do something, measure the outcome, compare the outcomes, make changes, do something, measure the outcome, compare the outcomes – repeat this process until you run out of time. The user experiences the phenomena by exploring it, rather than being shown an outcome and having it explained. (Source)
I have definitely seen this in action. Toddlers and preschoolers love to launch the same items over and over. Four to five year olds start experimenting more, looking around the room and deciding what to try next! As they experiment, I hear them talking: “I wonder what this will do?” “What can I try next?” “What do you think will happen this time?” “That didn’t work, I wonder if I could combine it with this?” It’s “tinkering” at its finest! Older kids, teens, and adults enjoy engineering items to achieve different goals – lifting up heavy materials, designing a neutral buoyancy item that will float in the tube forever, or creating items that spin on their way up.
As Stroud says, this activity results in:
• Making guests [child] less reliant on “authority” to answer questions
• A higher level of engagement and deeper investigation
• Guests defining their own success and making their own meaning (user defined outcomes)
• Generating a particular category of questions such as: How can I get it to…? What if I…? Instead of: Why does it…? What makes it…?
Here are some of the experiments my family developed just in a few hours of play when we first built our tube:
Scarves. An easy peasy thing is scarves – they catch the wind so nicely, then gently flutter to the ground.
The Frisbee. (really a plastic lid) It gets caught in the air currents and will float forever. My son learned that if you put your arm over the fan to block some of the air flow, the Frisbee will sink down the tube.
Cardboard boat. This cardboard snack tray will float easily on its own. The small plastic monster will not – it’s too heavy and not aerodynamic. But, put the monster in the boat and it floats!
Parachutes. This plastic pterodactyl won’t fly even though it has wings. But, if you build it a parachute out of a plastic bag and a pipe cleaner, it soars. Note: you can also make parachutes with coffee filters or use these parachute party favors. (Amazon affiliate link)
Pipe cleaner spinner. My personal favorite is this twirled-up pipe cleaner that spins and spins as it floats in the air.
Tops. And speaking of spinning, watch these plastic tops. They don’t float, but they definitely respond to the wind!
Other materials to try: scarves, balloons, rubber gloves blown up and tied, dixie cups with coffee filter parachutes, whiffle balls, strawberry baskets, etc. I also really like these three projects… these pictures were from the wind tube activity at the Orlando Science museum.
Here is a printable template for the helicopter shown above.
Here are ideas from the Cincinnati Museum of Natural History:
As kids play, they learn hands-on about aerodynamics, wind currents, how lightweight things fly better than heavy things, but even heavy things can fly if they have a parachute or an “air ship” that can catch the wind currents. Having the ability to play hands-on with this will allow them to internalize the learning much more than when they cover all this stuff in high school physics class someday!
Challenges for Kids:
For older kids, you could make a poster to accompany this activity with challenges like these from MOTAT:
Can you build something that will leave the tunnel in a particular direction?
Can you build something that will hover above the wind tunnel?
Can you make something that spins clockwise as it rises in the tunnel?
Learn more:
If you want to read more about “transactivity” and what makes this such a cool learning activity, check out Stroud’s post: http://www.exhibitfiles.org/vertical_wind_tubes. This is a great “case study” post, which shares observations on how people play with the tubes.
Here are links to some other people’s experiments with and thoughts about Wind Tubes
Info from the Exploratorium: directions on how to make a wind tube include ideas for what materials you can “fly” in it. They have thoughts on materials to fly in the tube. There’s a debrief from facilitators, sharing their observations of how visitors played with the tubes.
Here’s a slightly different design, and observations from using it.
being introduced to new ideas and activities (novelty)
having the chance to experiment, explore, test & re-test (repetition to achieve mastery)
In play-based learning, a parent or teacher’s role can be to set the stage with new materials, or with familiar materials combined in new ways. Then it’s the child’s role to play: experiment, explore, test and re-test.
“Invitations to play” is one way of approaching these tasks. Parents often say “my child has so many toys that they don’t even play with.” If all the toys are tidily put away in baskets, it’s hard for a child to decide what basket to pull off the shelf. If all the toys are randomly scattered about the floor, it’s hard to decide what to play with first.
We can better engage the child with a little intention. Like instead of just a box of magna-tiles sitting next to a box of toy cars on the shelf, I could set up a magna-tile garage on the table with supplies nearby to build more garages. Instead of just having a toy kitchen with all the things that are there every day, I could create new play ideas by scribbling out a menu for a cat cafe, and place a couple stuffed cats there. Even just setting a puzzle on the table with one piece sitting loose next to the puzzle is more engaging than seeing an assembled puzzle sitting there. When you look at the table, you know what to do!
about the teacher (or parent’s role) once the play space is set up, on Teacher Tom
Today, I set up an invitation to play for my 3 year old.(I knew I had a busy day with lots of work to do, so wanted something ready to go that would keep him busy for a while.)
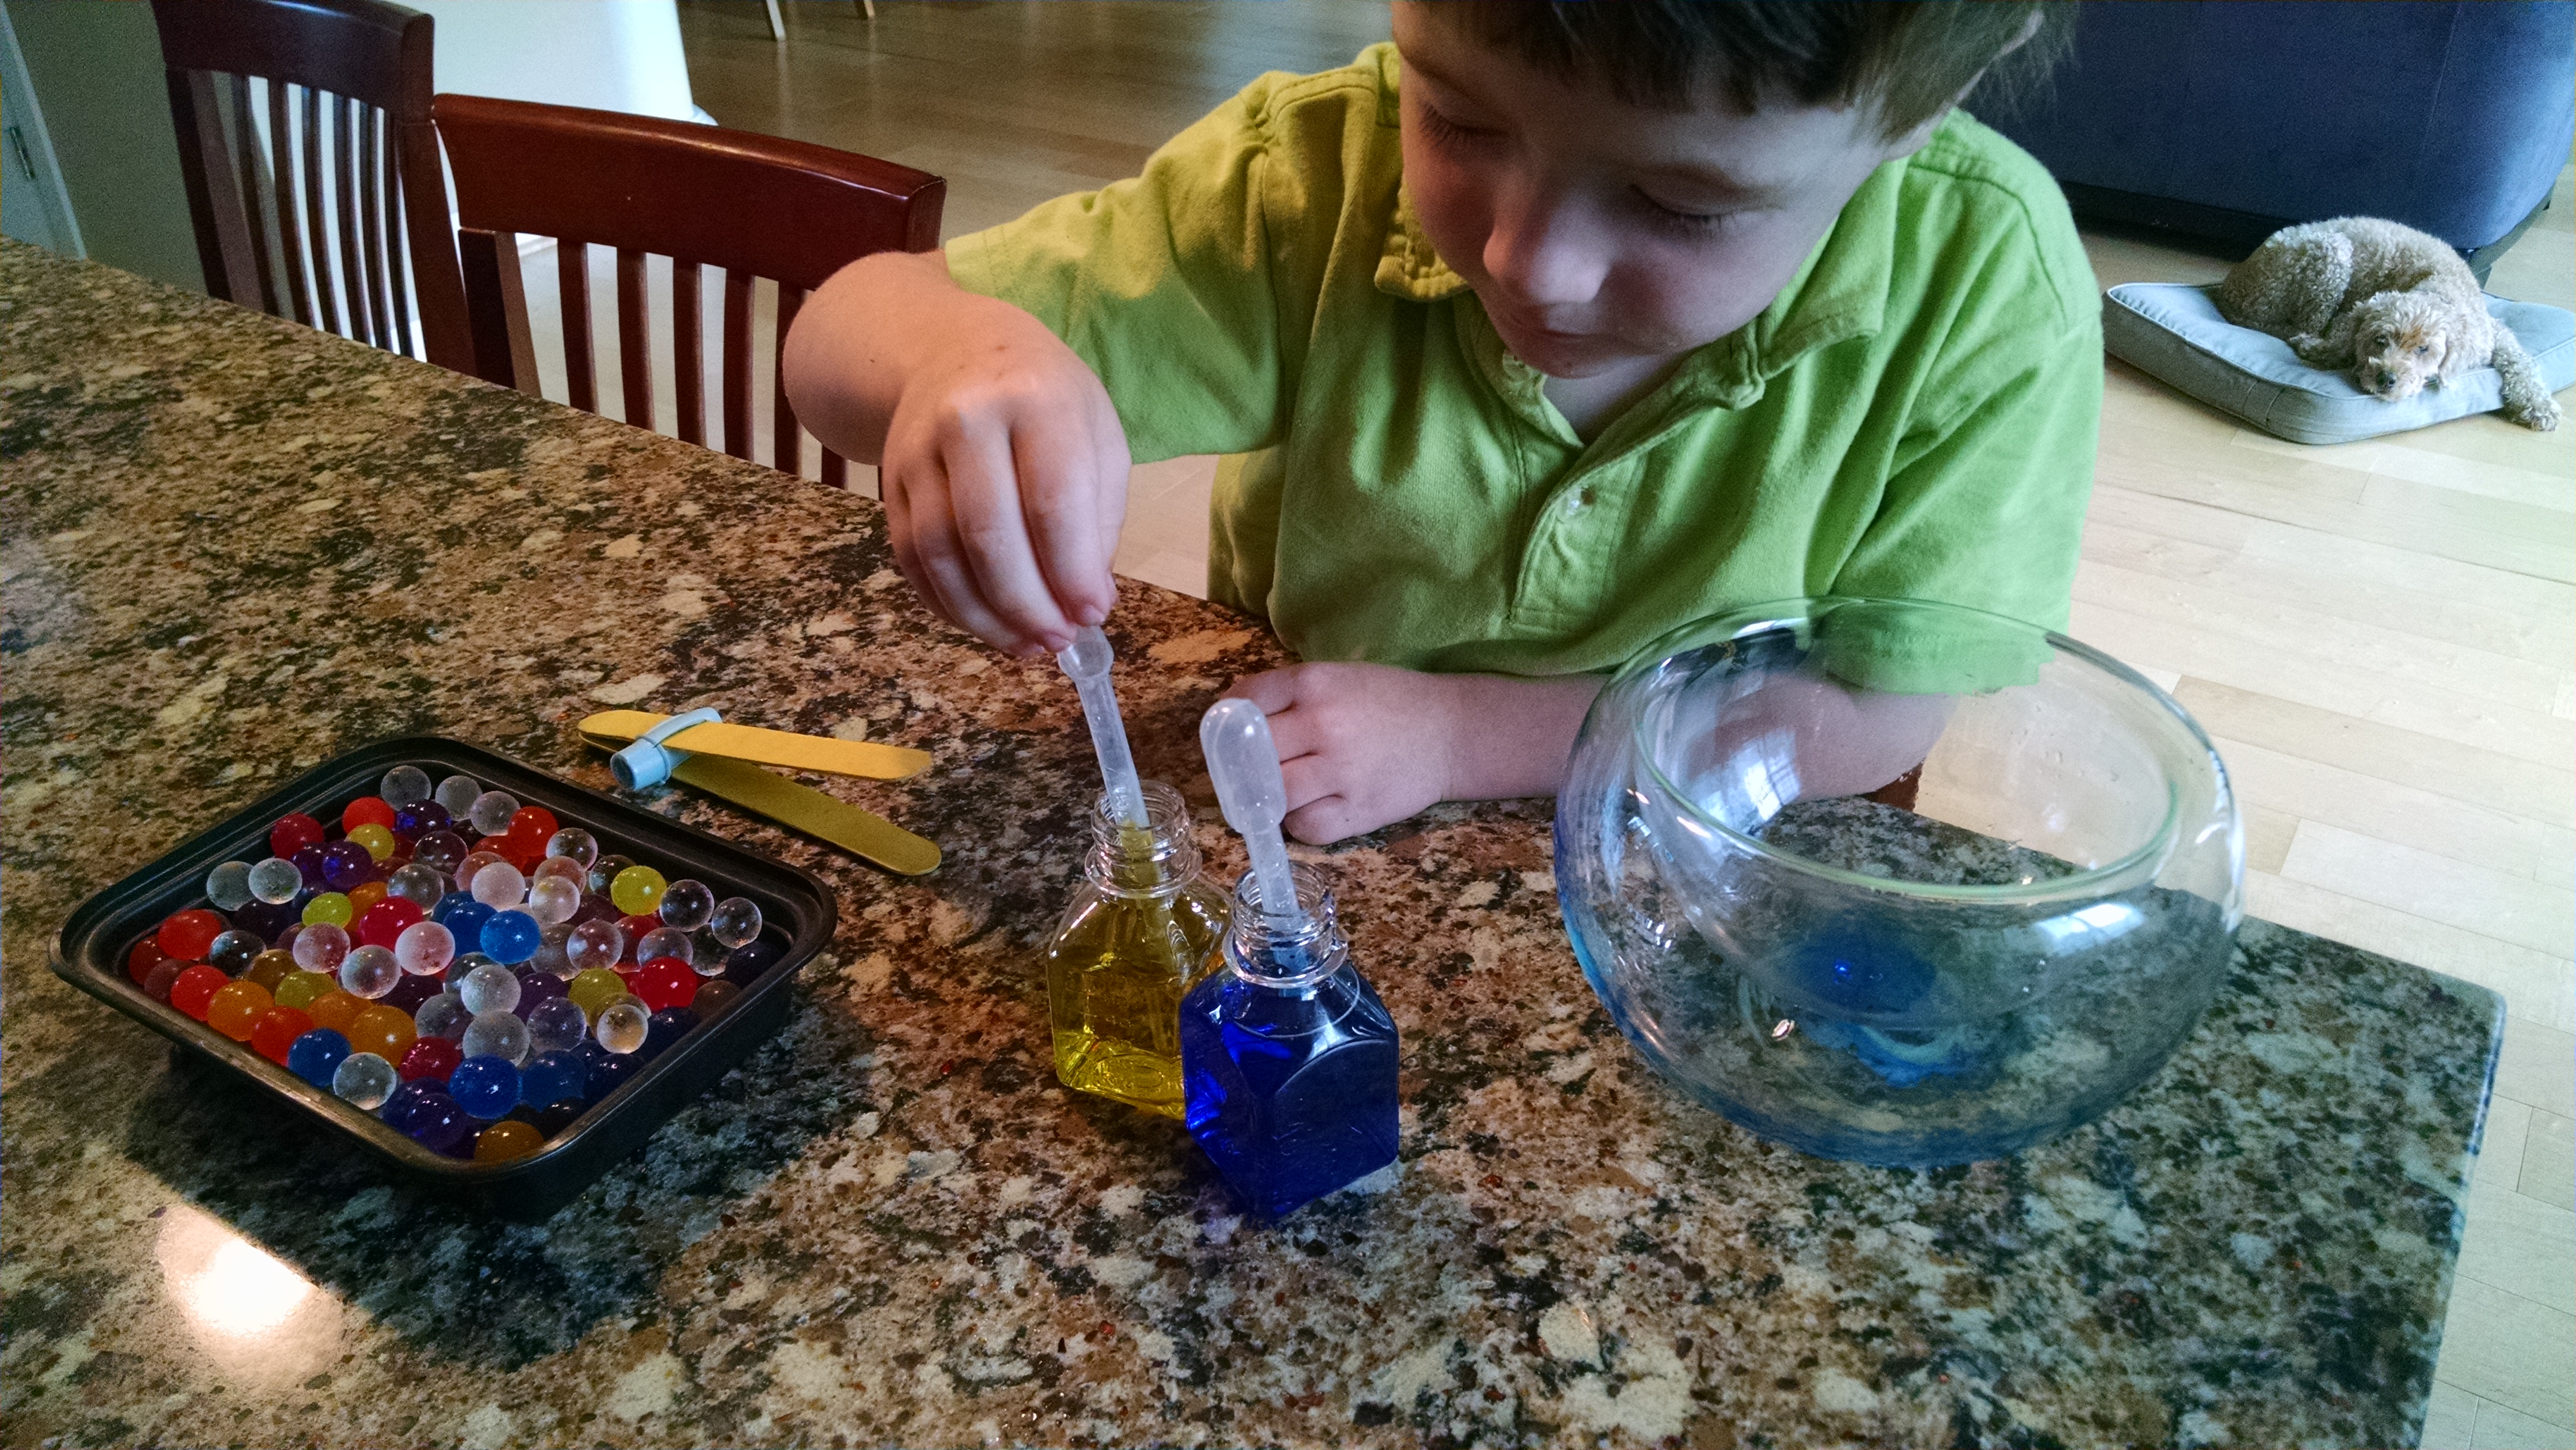
Yesterday, we did “science experiments” with a new set of tools: pipettes and water mixed with liquid watercolors. We would give him two containers of colored water, with pipettes, and a glass vase to mix the colors in.
,Today I set out two colors of water, pipettes, and a glass bowl to mix them in, instead of the vase. I had his container of water beads nearby. When he came into the room, he immediately settled into playing with the pipettes and water, which occupied him for quite a while. When his interest started to wane, I pulled over the water beads and tongs. I didn’t even need to say anything. He immediately started adding water beads. After he’d added them all and taken them all back out, he said “I’ll never do that again.” Apparently he prefers his water beads as a separate activity.
When he ran out of yellow water in his container, I said “Well, you put lots of yellow water in the bowl. Let’s just take some yellow back out of the bowl.” When the pipette pulled up green water from the bowl, I said “Hey! Where’s my yellow water!” That then led to a long play time of trying to pull up blue water or yellow water, and him learning that once things are mixed, they often can’t be unmixed.
This activity gave him chances to further explore materials he’s learned about recently, and combine them in new ways, thus deepening his knowledge of all the materials, and gaining a new insight about color mixing. And, it gave me a chance to get some work done…. Wins all around.
My 3 year old is crazy about planets. He talks about the solar system continuously. We read lots of books about planets, and watch videos of science shows. In doing this, he gets exposed to lots of other assorted science concepts.
Yesterday he was talking about solids, liquids, and gas. Today, as I was unloading the dishwasher, he was stacking plastic cups, saying “this one’s solid, this is a liquid, this is a gas.” I tried to tell him they were all solids.
Then, I had a sudden flare of inspiration. I grabbed a pot, and told his I was going to put some solid water in the pot. I asked him what solid water was, and he knew that was ice and that we kept that in the freezer.
So, I scooped up a bunch of ice, dumped it in the pot, and asked if we should turn the solid water into liquid water. He liked that idea, so I put it on the stove and sat him next to it (with safety warnings, of course!). We watched the ice melt, and talked about how solid water was changing to liquid water. Then it boiled and we talked about liquid water changing to gas water and spreading out through the room (yes, the new word I used with my three year old today was ‘dissipate.’)
We threw in more ice so we had solid, liquid, and gas all in the pot at the same time. .
We repeated this several times, having a great time together. We talked about it, I was sure he understood it. I was feeling like Genius Mama!
After our experiment, he went right back to playing with his plastic cups, saying “this one’s solid, this is a liquid, this is a gas.”
With my first child, I would have been so discouraged. I would have gone from feeling like Genius Mama to feeling like Foolish Mama. I would have thought that because he went back to the same game that he had learned nothing from our little experiment.
But now, with child # 3, and many years of learning about parenting, and learning about how children learn as their brains develop, I’m still feeling good about our experiment.
Did I manage to completely teach my child all there is to know about states of matter in one ten minute game so that he’ll understand and apply it for the rest of his life? Nope.
But, did we have fun? Yep. Did he see that we can explore ideas together that he has heard about in books? Yep. Did he see, and understand in the moment, that ice turns to water and then to steam when you heat it? Yep. Did he learn, at least in the moment, that you can call ice solid water, what we normally just call water is liquid water, and steam is water as a gas? Yep. With the plastic cups, did he show that he understands things can be sorted into three categories of matter? Yep. Some day he’ll get that plastic cups are solids. He’s got plenty more years to figure that out.
The best part? We had some fun, engaged quality time together. And there was no mess to clean up when we were done!
 Here are just a few fun ideas for learning about rainbows.
 You can also use pipettes to drip liquid watercolor onto coffee filters, which creates some beautiful color mixing. Then turn them into butterfly decorations with a clothespin and a pipe cleaner. (Source for idea.)
by Dolly Parton. A feelings book. Talks about when we’re tickled pink, seeing red, feeling blue, green with jealousy, scared yellow and when everything is rosy.
by Lyon and Anderson.


