Category Archives: STEM activities

Catapults

Catapults are a huge hit with kids… being able to launch things into the air and across the room is always exciting!

There are LOTS of ideas online for how to build catapults. I want to present a simple series of catapults that show the evolution of an idea.

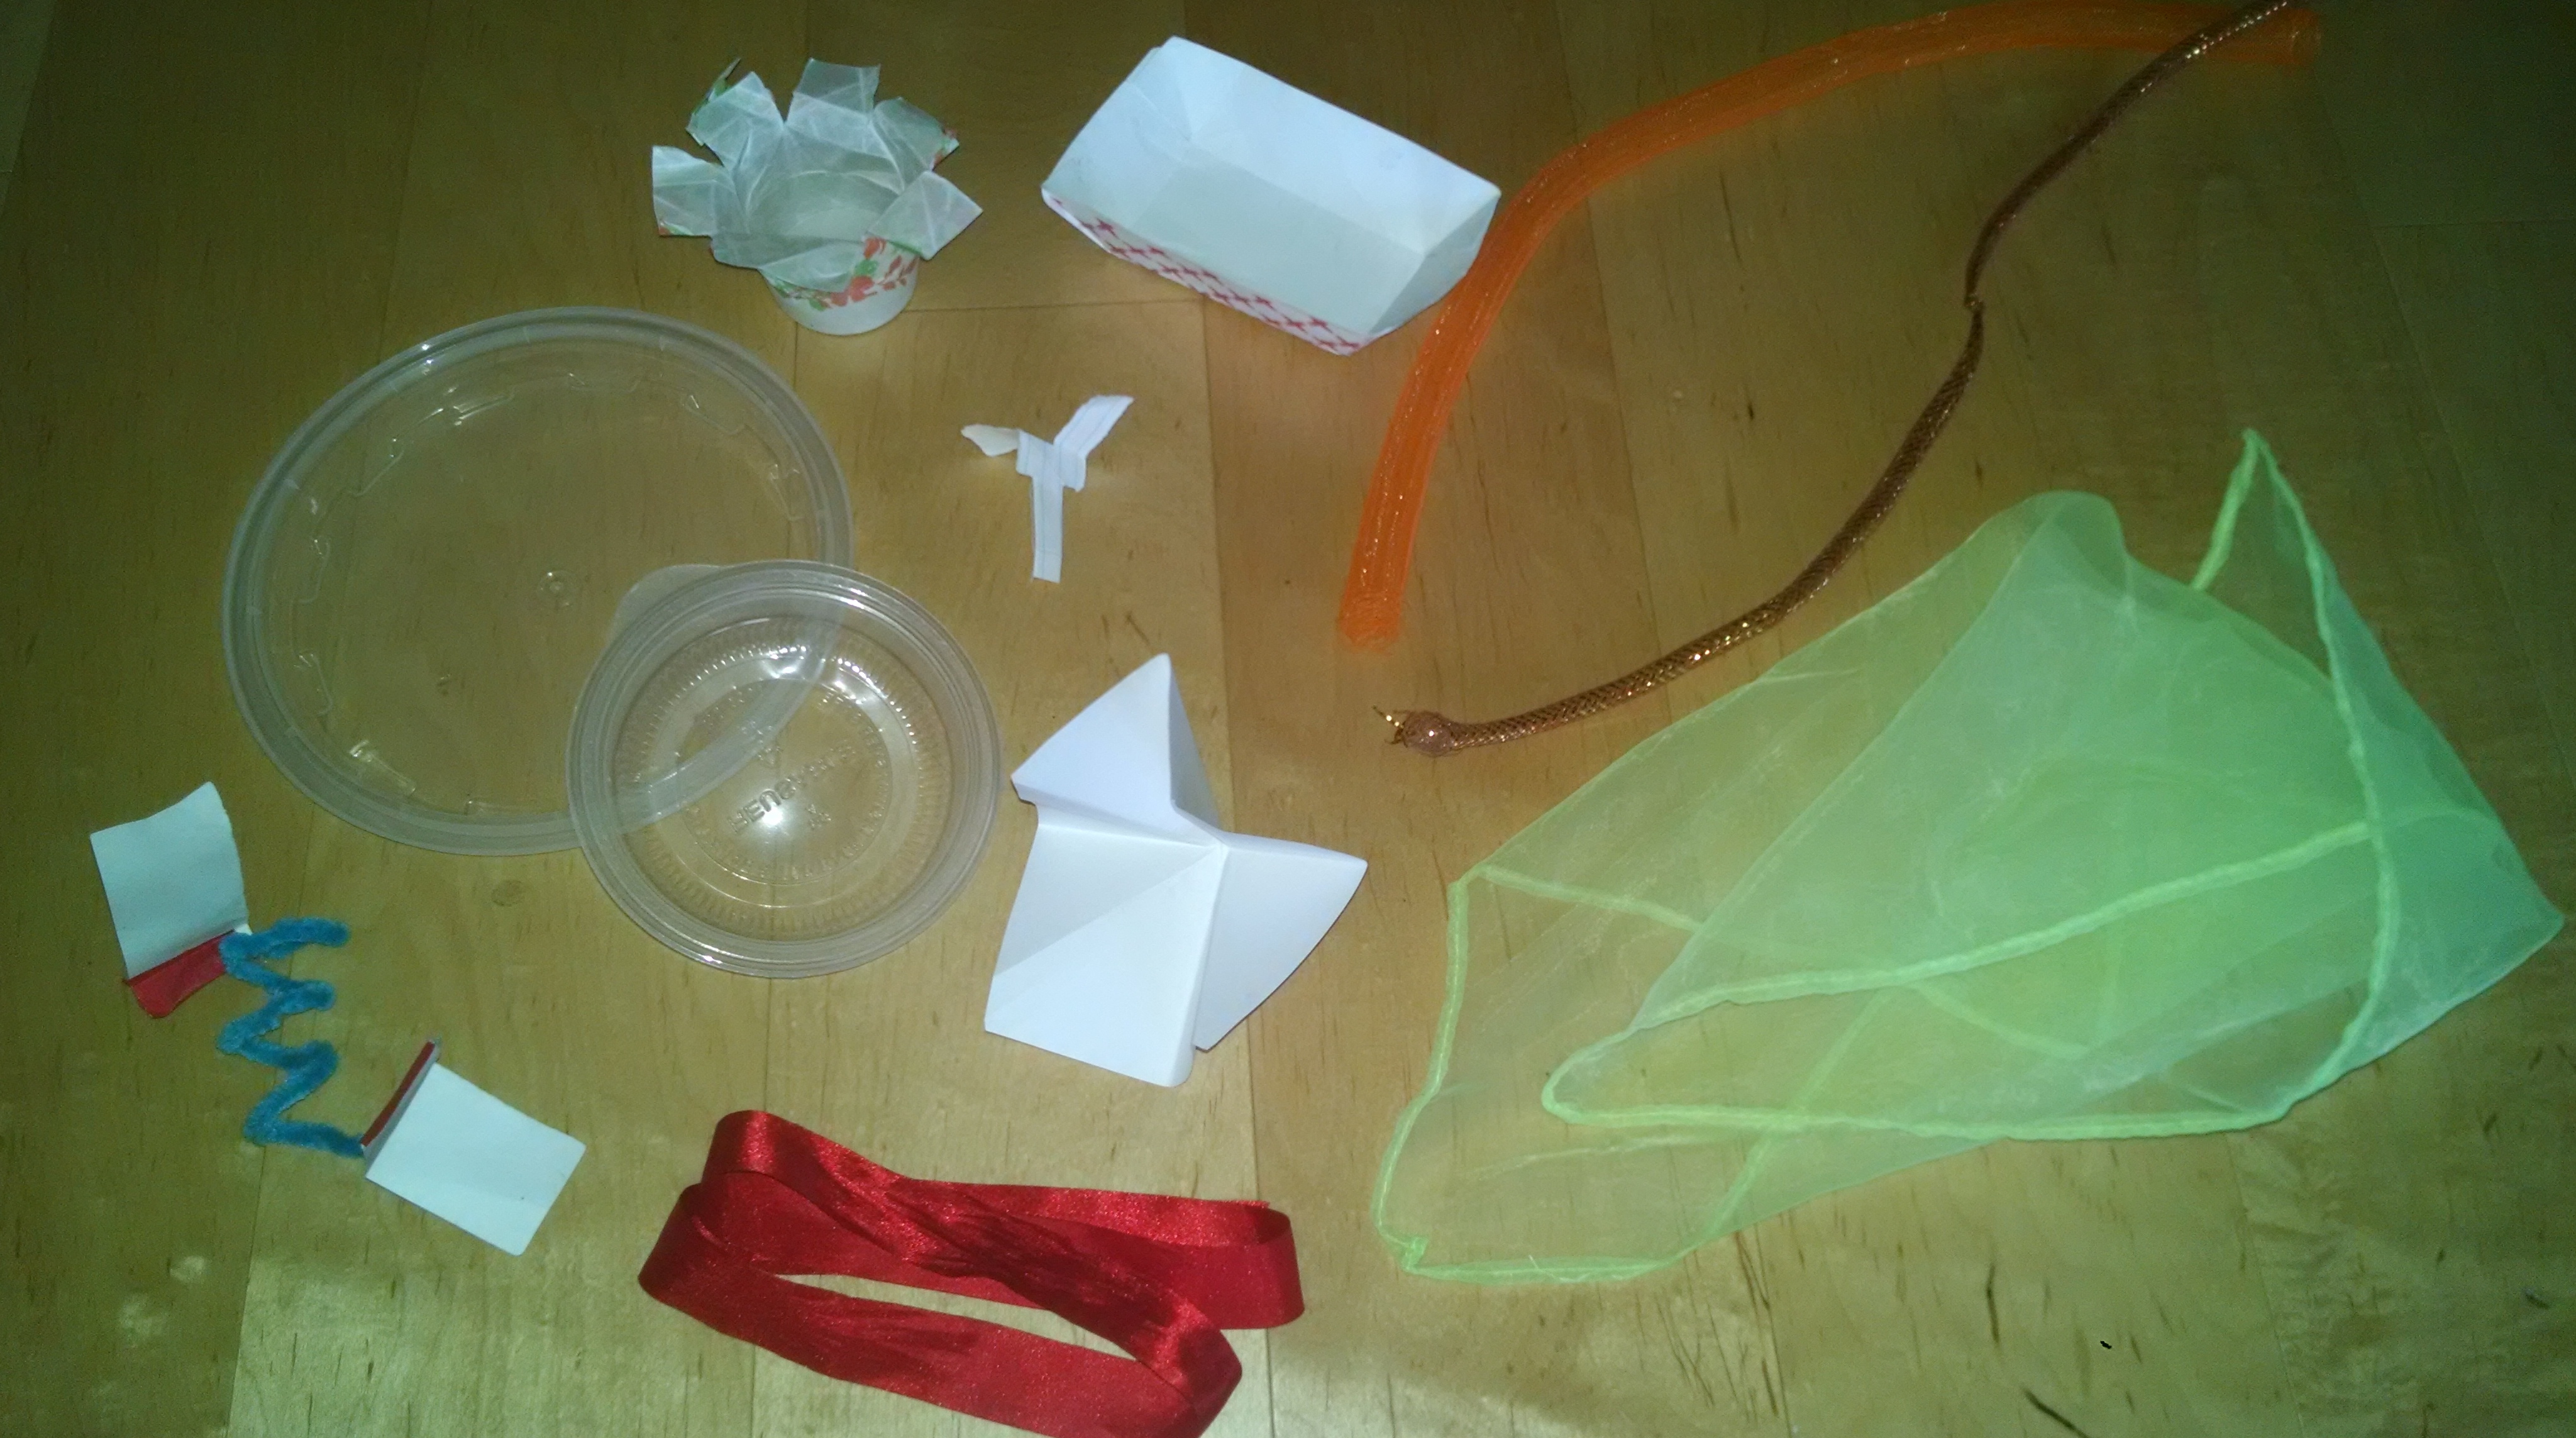
Supplies needed: pencil, popsicle / craft sticks, rubber bands, a plastic spoon, an object to launch (e.g. pompom or mini marshmallow or coins)

Stage 1

First, take a popsicle stick (the bar of your lever), balance it over a pencil (your fulcrum). Put an object (your load) onto the end that’s laying on the table. Hit the high end of the stick, the object launches. This is an easy depiction of the simple machine concept of levers (learn more about Levers here.)

IMG_20151003_094219761

You can also play with this idea – use a bigger fulcrum – use a longer lever. Like try a large spoon balanced over a rolling pin, or a ruler balanced over a marker.

Kids will have plenty of fun with this. Launching things is fun. But, they’ll soon discover that this is a weak catapult – we can get a lot better launch by evolving it.

Stage 2

Now, take two popsicle sticks: Use a rubber band to fasten them together at one end. Then slide a pencil (or three craft sticks bundled together) between the sticks until it pushes up against the rubber band. Set it down. Put your pompon (or coin) on the raised end, then use your finger to press down and release. The pom pom will fly much higher!

IMG_20151010_231735673

If the coin / pompom keeps sliding off the end of the bar, you can glue a lid to the end of the bar so you have a “bucket” to put your coin / pompom into.
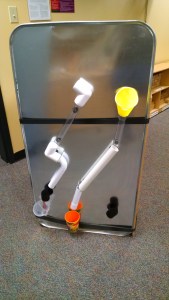
Stage 3

After they’ve had a good time with this one, you can take this simple design to the next level by creating a spoon catapult. You’ve already got your two popsicle sticks banded together. Use a rubber band to attach a plastic spoon on one. (Here’s a picture from www.devincollier.com/how-to-build-a-simple-small-marshmallow-catapult/. to show you where to fasten it.)

Slide your pencil in between the sticks, as before (or use two or three popsicle sticks rubber-banded together). Now launch items from the spoon – your launch arm is longer, and you added the springiness of the spoon – does this increase the strength of the launch (i.e. does your object travel farther?)
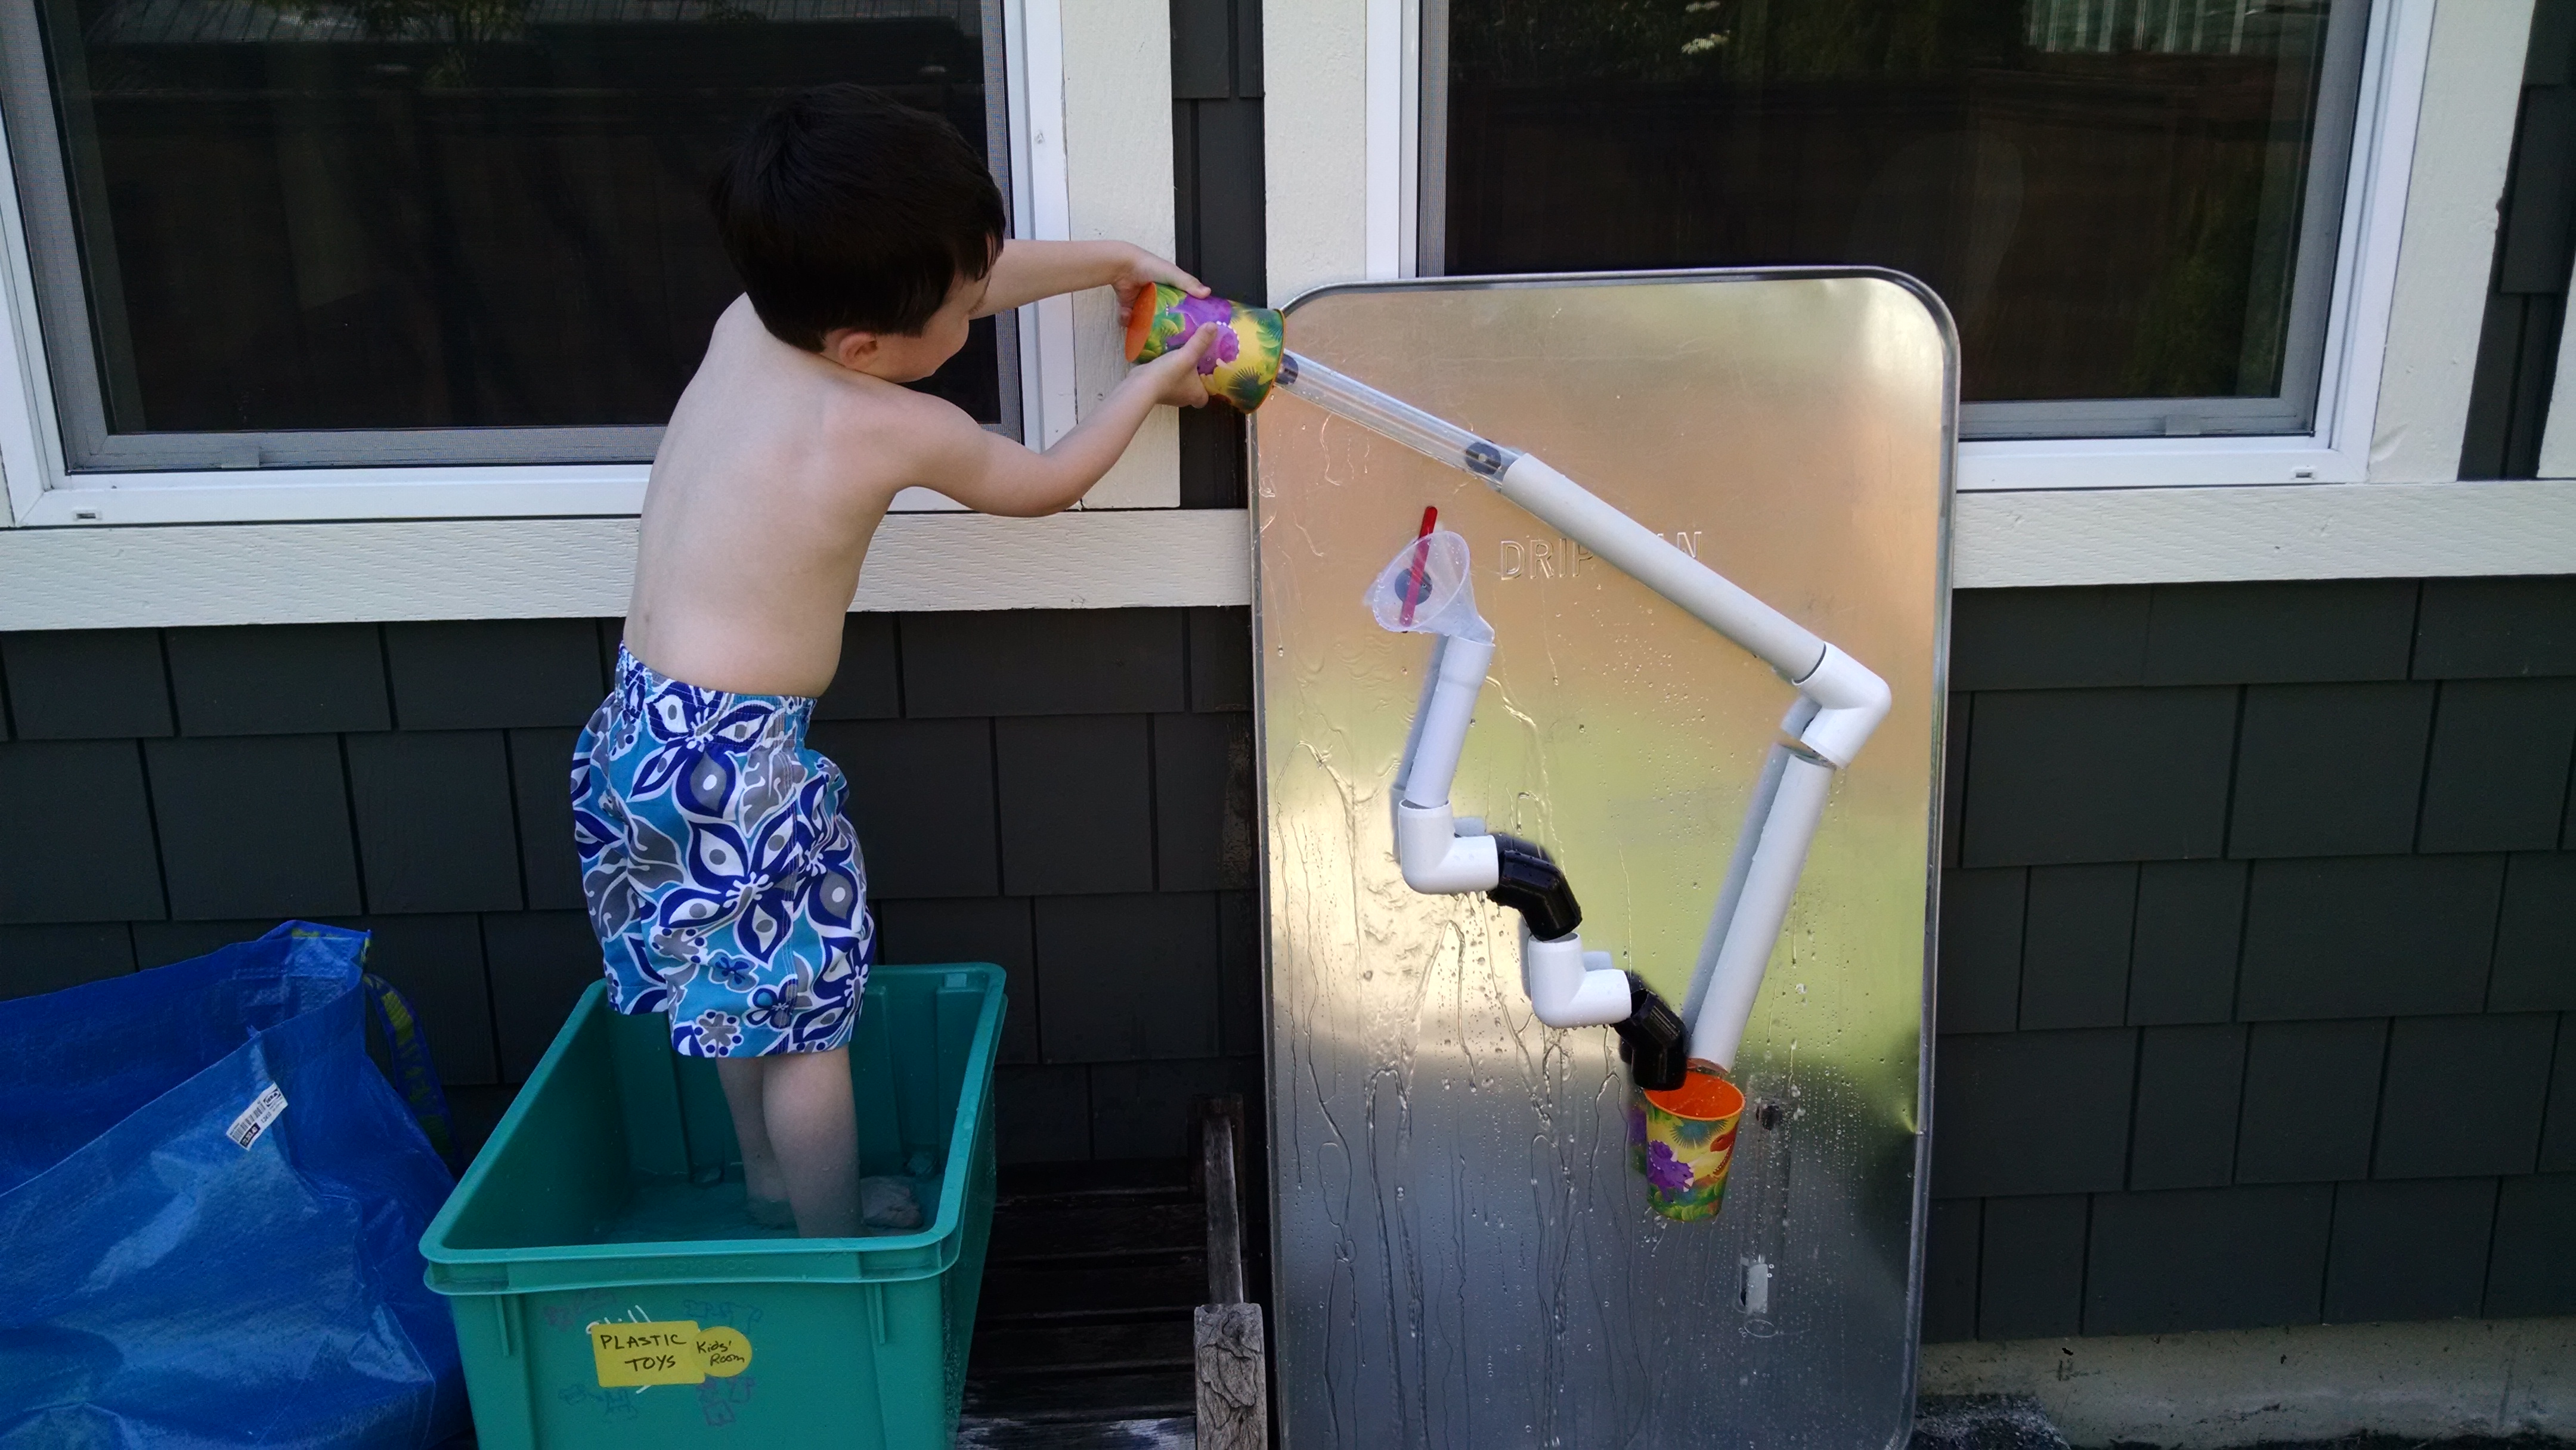
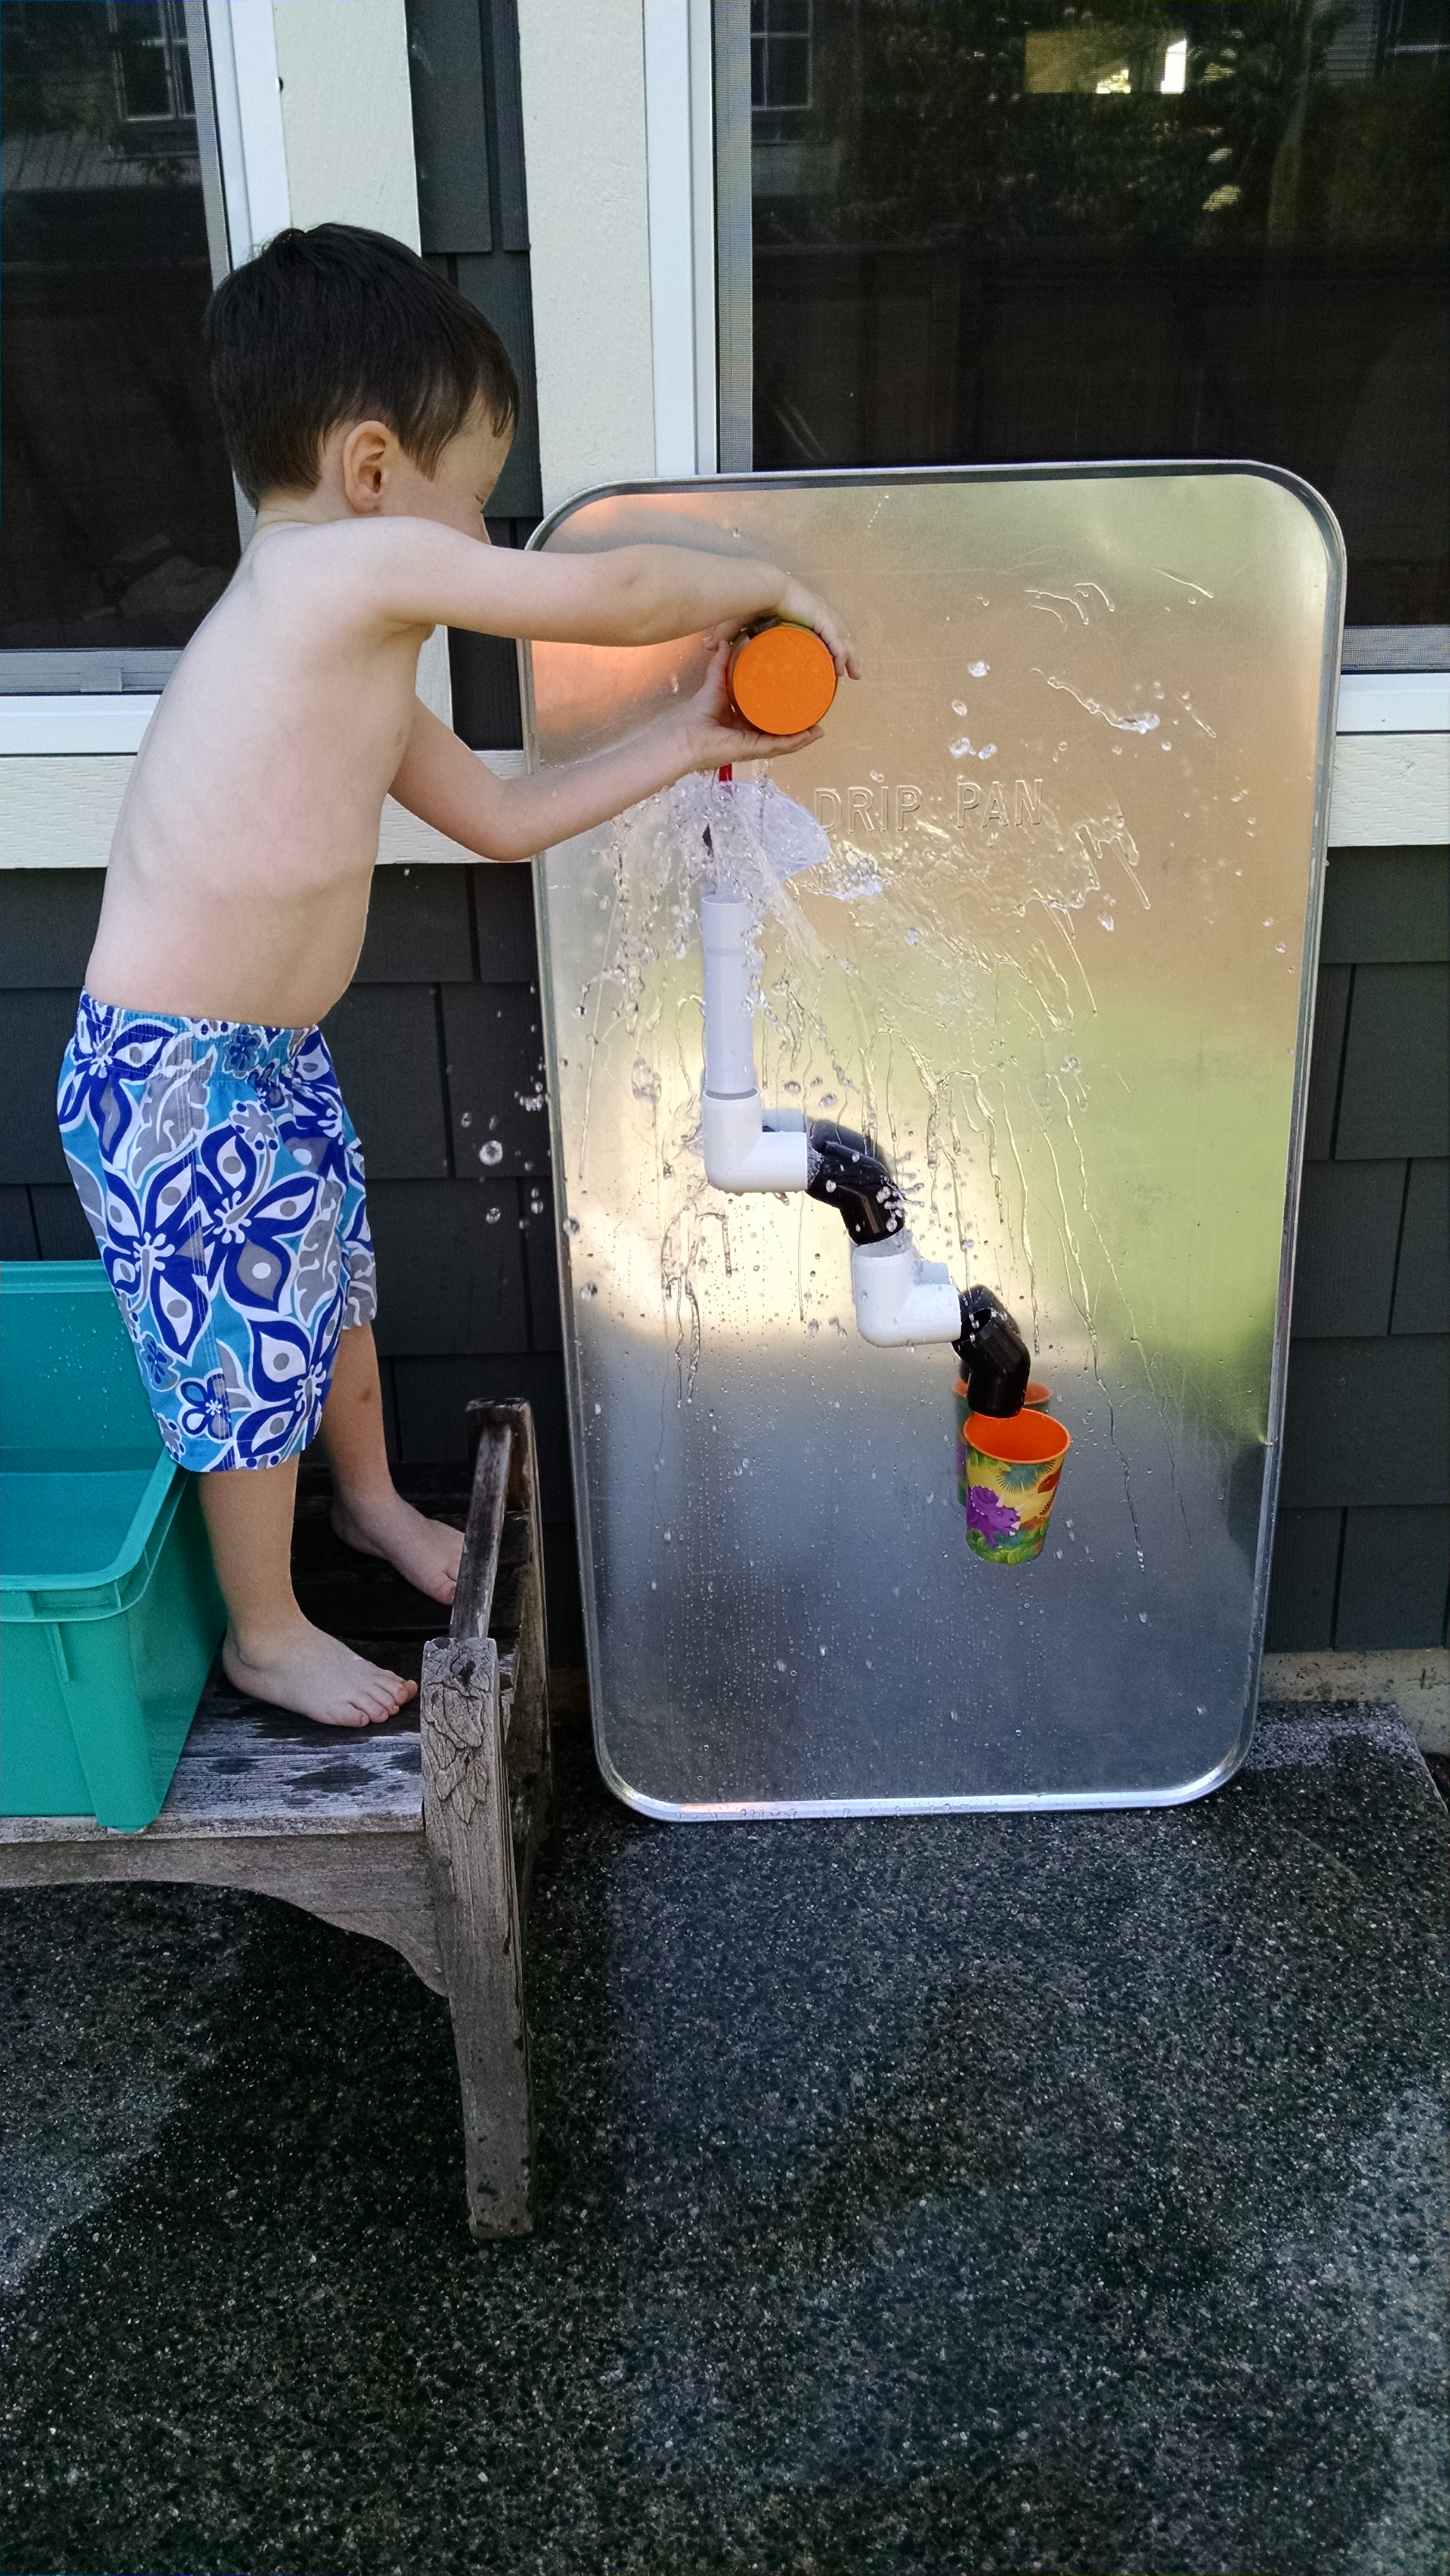
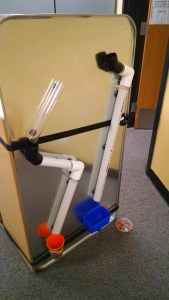
catapultM

Stage 4

Now bundle together 5 craft sticks to use as your fulcrum – this is what is shown in the picture above, and you can also find directions at http://cosmos.bgsu.edu/STEMinPark/takeHomeActivites/2012/MarshmallowCatapult.pdf

Is the catapult stronger with a taller fulcrum and more pressure on the rubber bands that bind the launch sticks together? What if you use 8 sticks in your bundled fulcrum?
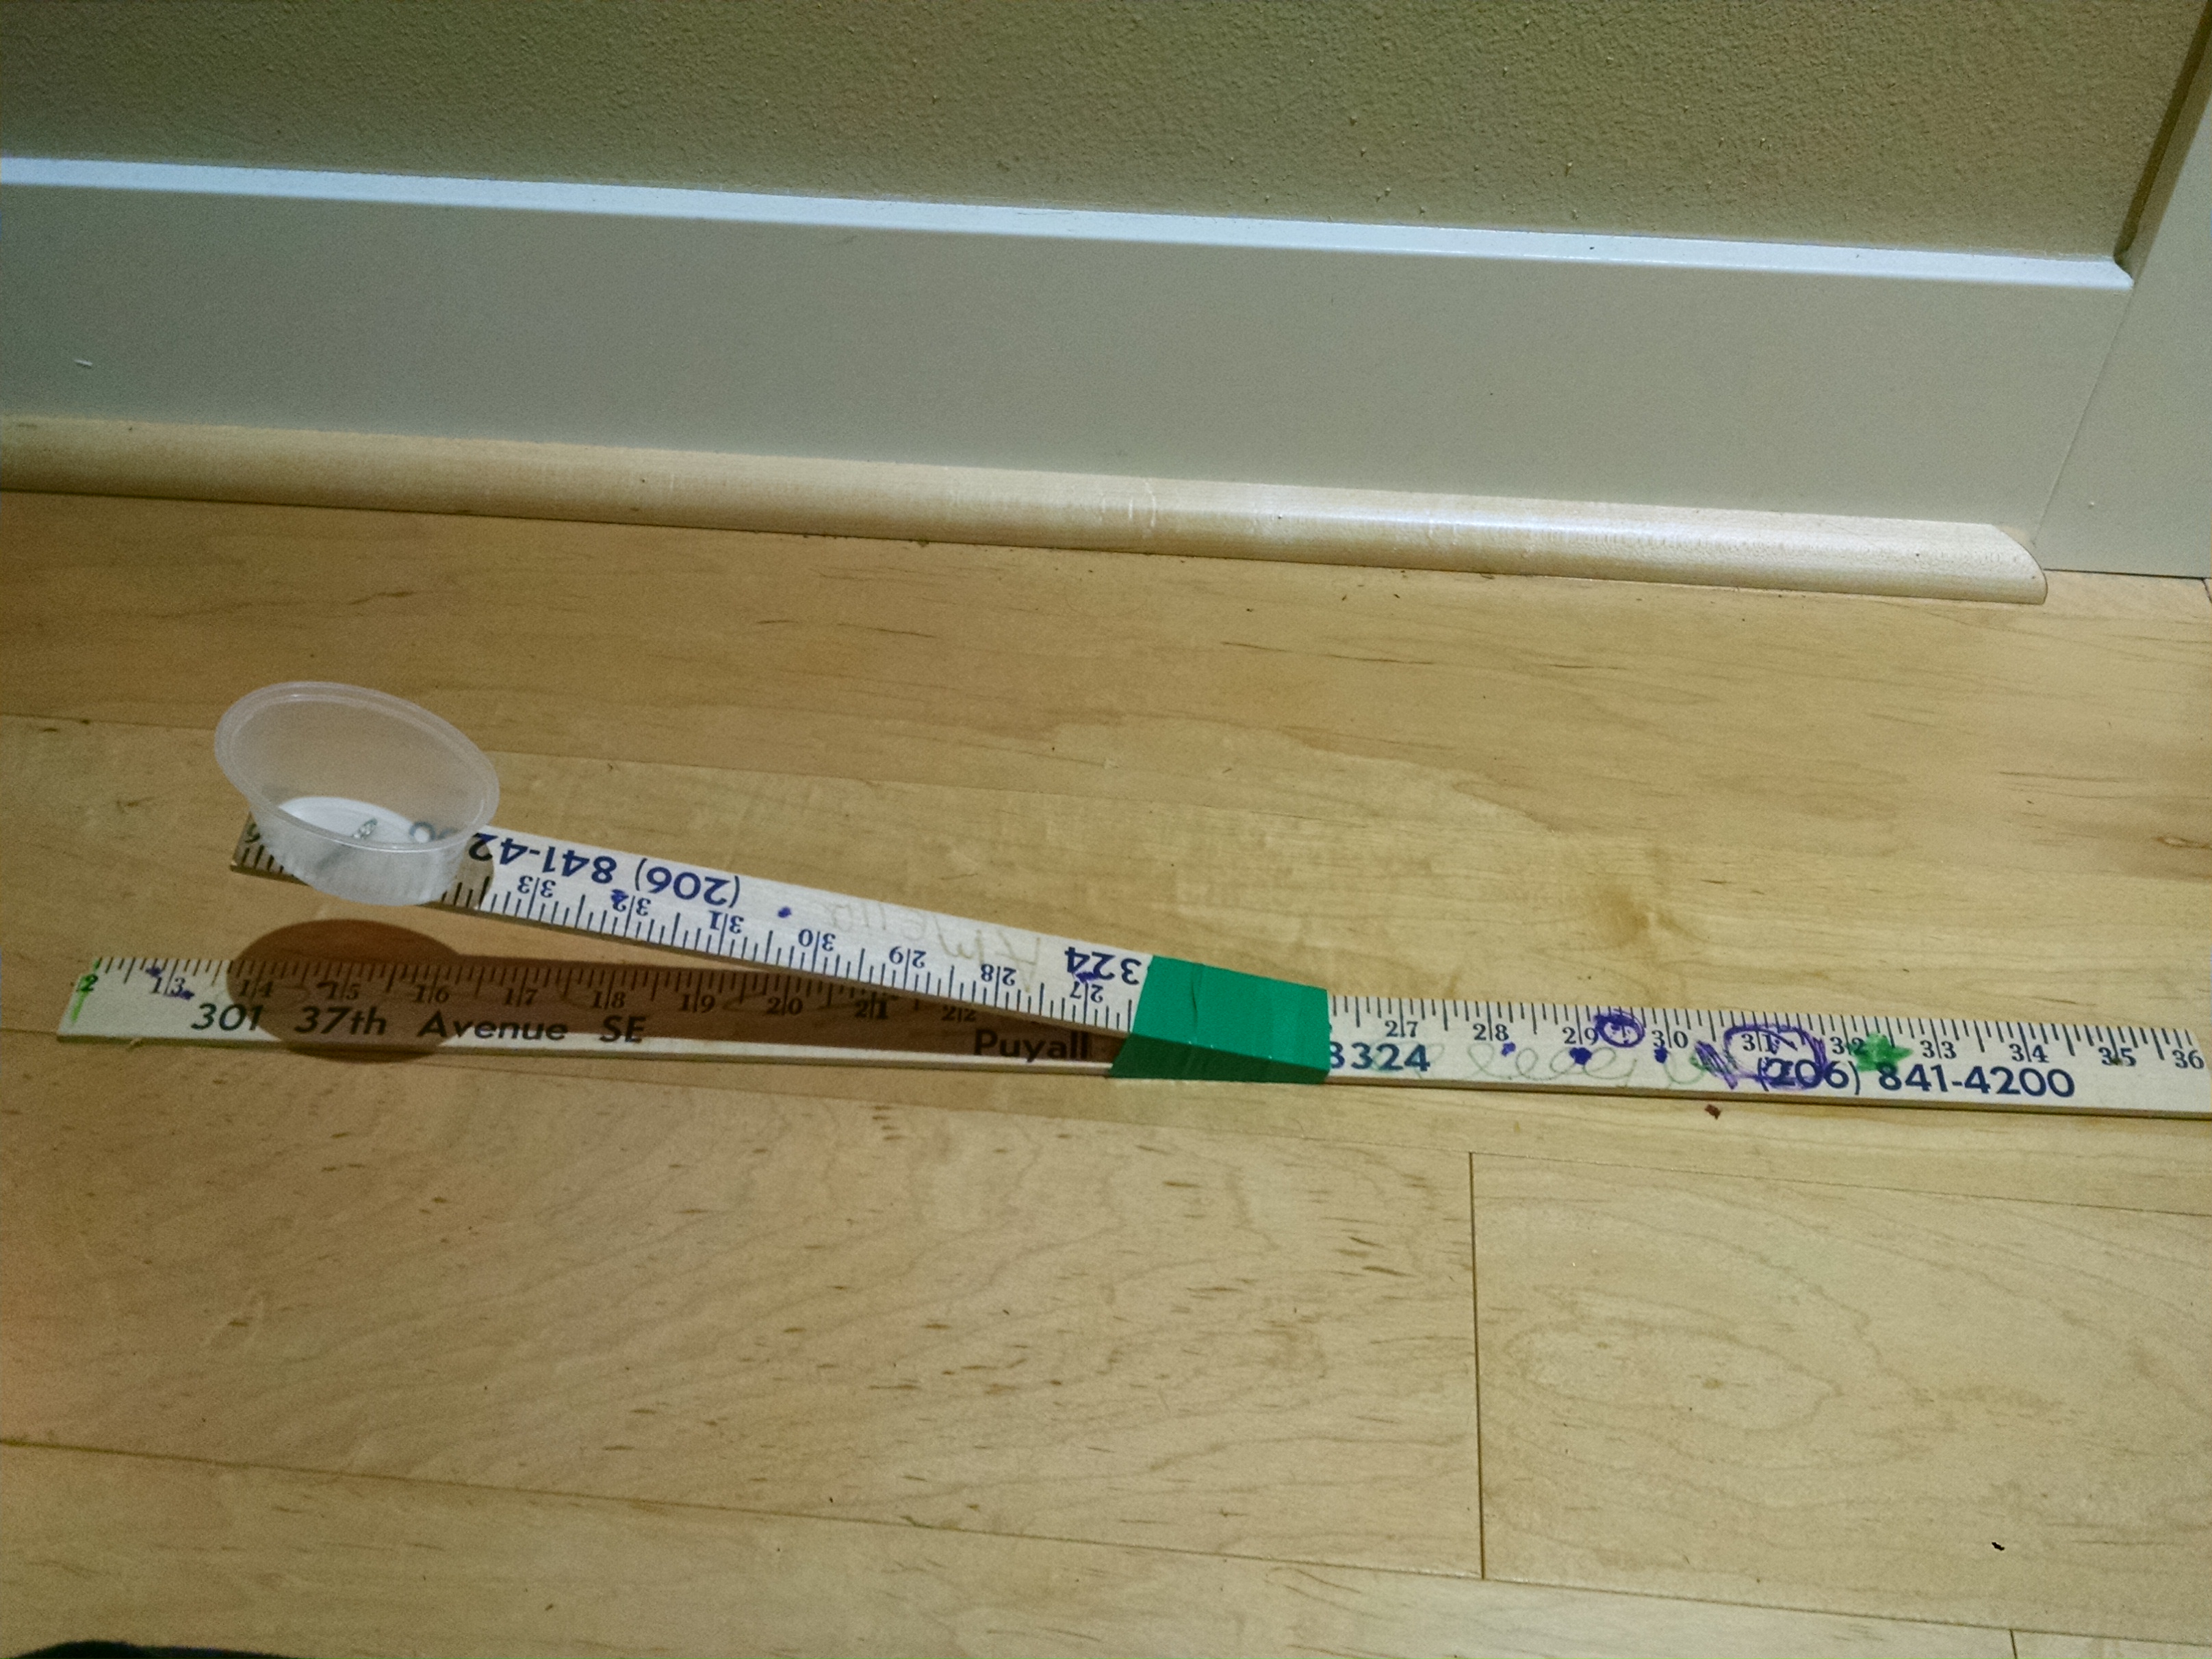
Stage 5

Use longer bars to build the catapult than popsicle sticks. Maybe rulers? Rubber band them together at one end, and keep using your bundle of craft sticks as a fulcrum.

Continue to experiment… Here’s a very similar catapult built from a couple of wooden yardsticks, a piece of cork (used as fulcrum to separate the two sticks – you could use your stack of popsicle sticks) and some tape (could use rubber bands).

IMG_20151005_135555240

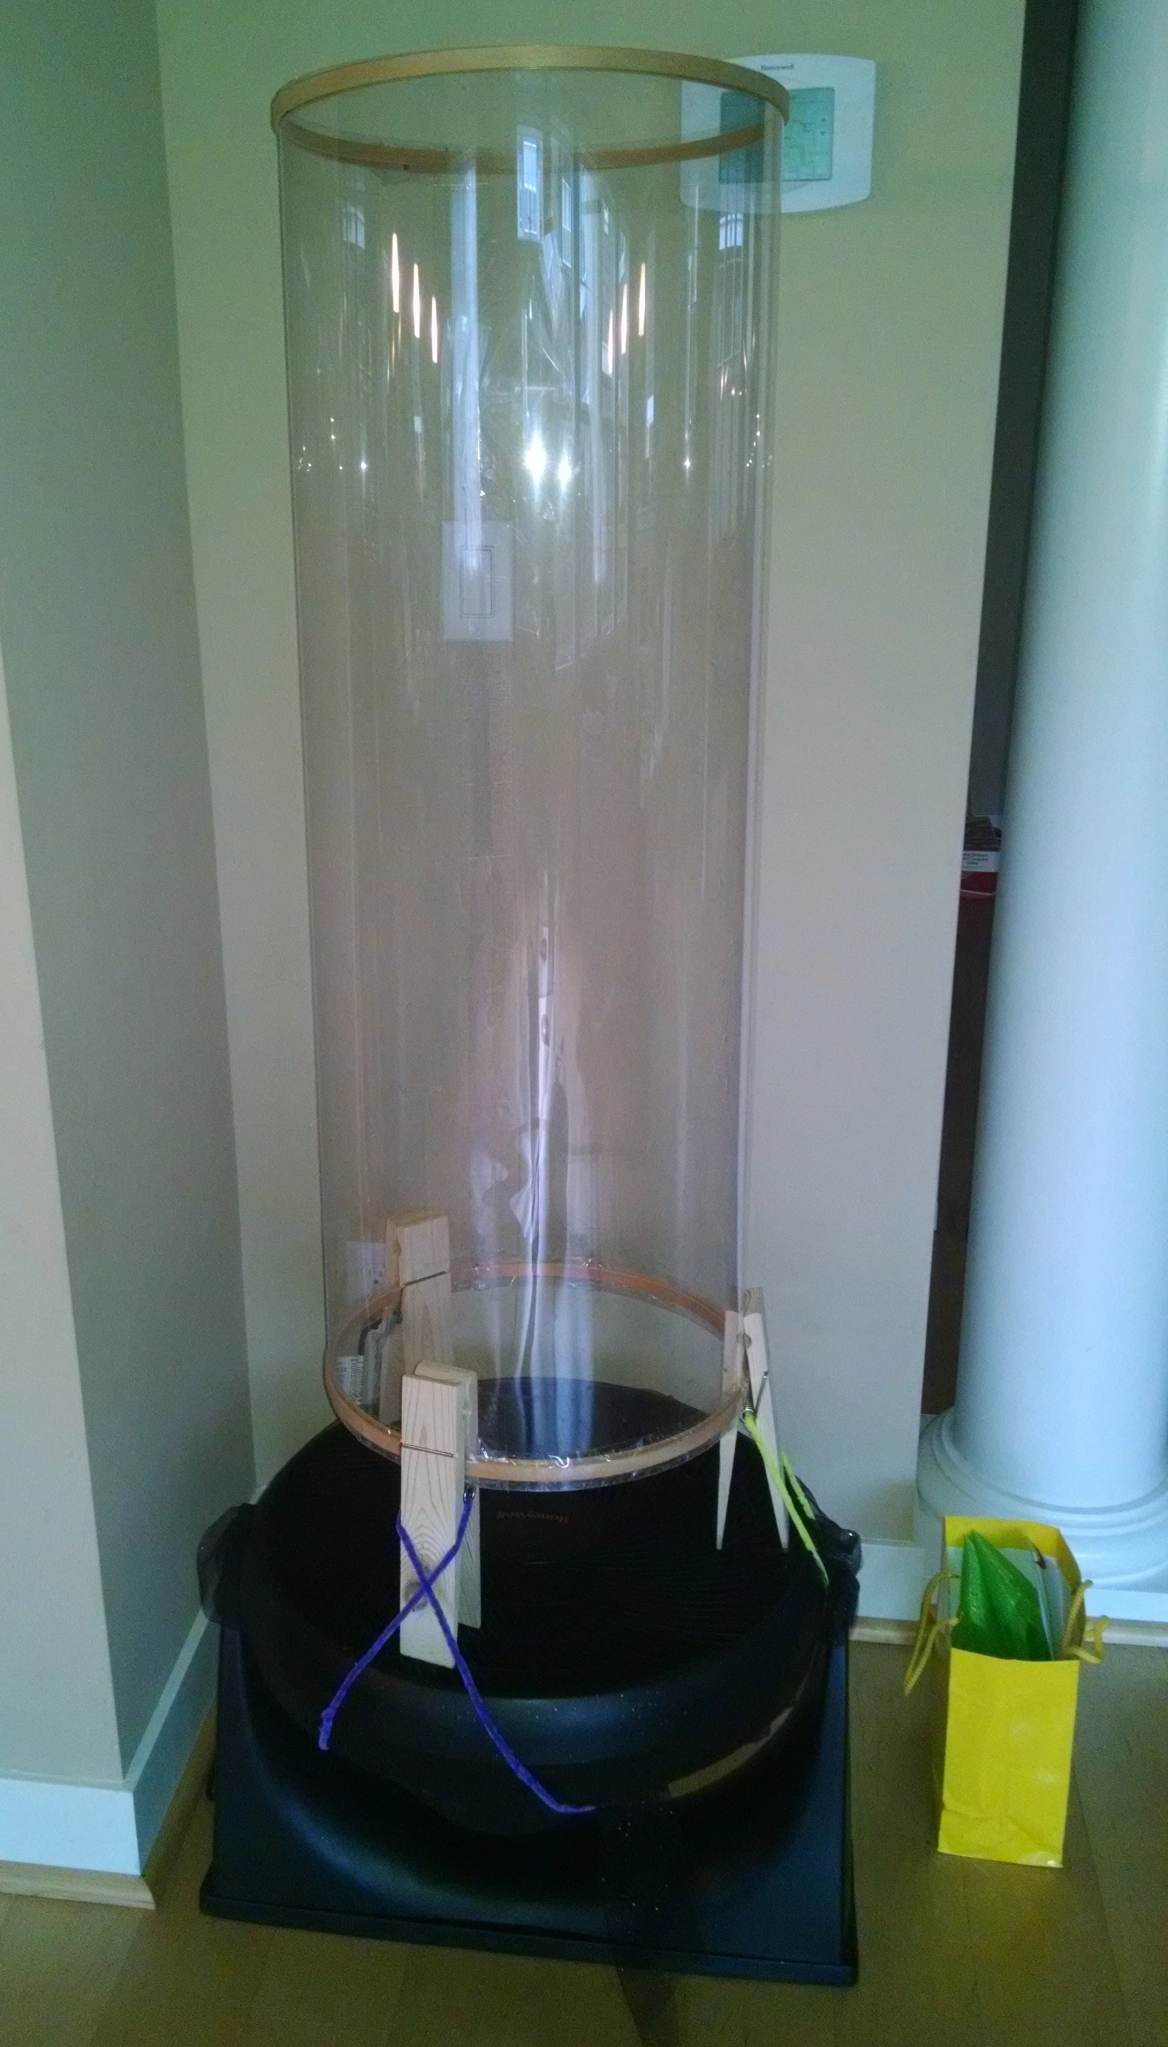
Testing and Tweaking

As you build a variety of catapults, test them. You can compare on two criteria: which designs launch the object the farthest and which launch it the most accurately (i.e. can you hit a target with it.)

For more STEM related activities, click on the word STEM in the right sidebar…

Book Series about Simple Machines

IMG_20151013_163855105

[An updated version of this post can be found at: https://inventorsoftomorrow.com/2016/10/26/simple-machines-engineering-for-kids/]

There are several series of books about Simple Machines. I got samples from each series, and will write up here my first impressions of each. These are not meant to be in-depth reviews, just snapshots of my opinions. Of course, what book is best depends on your audience and your setting. I am looking for books to read aloud in group time to children age 2.5 to 7. Many of these books that I don’t rate high might be great for a 5 – 7 year old, but I’m trying to find something to appeal to a very wide range.

In this post, I summarize my impressions of the series, based on the books I read (starred). In the attached spreadsheet, I share my specific ratings for the books I read. Here are the four criteria I ranked them on:

  • Pictures: Are they good photos (current, focused, visually appealing) of things that are interesting to kids?
  • Words: Would this be a good read-aloud book for a group of 3 – 6 year olds? Easy to understand and interesting to listen to?
  • Big Idea: Does it get, and adequately convey the key concepts about this simple machine and how it works? (For my summary of what I think those key concepts are, see my Inventors of Tomorrow posts on each of the types of Simple Machines.)
  • Examples: Are there several good examples of the machine that would be interesting to children? (But I don’t want examples of every single way this simple machine can be applied, because sometimes that makes it hard for a young child to remember the big picture.)

Series Name: Amazing Science: Simple Machines. Author: Dahl
Books: Roll, Slope, and Slide*; Scoop, Seesaw, and Raise*; Pull, Lift, and Lower*; Cut, Chop, and Stop; Tires, Spokes, and Sprockets
Review: Engaging pictures and words, though a little high level for us. But I didn’t think the pulley book and inclined plane book did the best job of explaining key concepts.

Series Name: Blastoff Readers: Simple Machines. Author: Manolis
Books: Ramps*; Levers; Pulleys*; Screws; Wedges; Wheels and Axles*
Review: These would be my top choice if I had only 5 – 7 year olds, but they’re a little too long and too sophisticated for my little ones. Brightly colored and engaging pictures. Good diagrams and descriptions of key concepts – very clear. Nice examples

Series Name: Early Reader Science: Simple Machines. Author: Dahl
Books: Ramps and Wedges; Levers; Pulleys; Wheels and Axles*
Review: Pictures OK, but not especially appealing to young ones. Length-wise, it would be OK for circle, but vocabulary a little high level. It gives examples of so many kinds of wheels and axles (steering wheels, gears, sprockets, cranks, cams, etc.) that the basic concept is lost. Does not mention friction.

Series Name: How Toys Work. Author: Smith
Books: Ramps and Wedges*; Levers*; Pulleys*; Screws, Nuts and Bolts*; Wheels and Axles*
Review: I want to love these books. The pictures are great. The language is age appropriate and engaging. There are lots of good examples, all of which are toys and other things that appeal to young children. In some of the books, the big idea is explained well (Pulleys and Screws) But others seem to miss the big idea. (Ramps and Wedges; Wheels and Axles.) I would use these books to engage the younger students, but also want some of the other series to share with the older readers to better explain concept.

Series Name: My World of Science. Author: Randolph
Books: Inclined Planes in my World*; Levers in My World; Pulleys in my World; Wedges in My World*; Wheels and Axles in my World [there doesn’t appear to be a Screws book]
Review: Pictures are fine; words are appropriate level and the book is a good length for circle time, big idea is explained well, and there are lots of examples, but they all tie together in a clear logical way to the same big idea. It ends with asking “can you think of [wedges] you see around you?” Then offers a picture glossary of key words. This is a reliable, useable, but not exciting series.
Note: this series is bilingual English / Spanish. So Wedges in My World is also Cunas en mi mundo. Each page has the text in English first, then Spanish.

Series Name: Simple Machines. Author: Armentrout
Books: Inclined Planes, Levers*, Pulleys*, Screws*, Wedges*, Wheels*
Review: The language level and the length would be fine for 5 – 7 year olds, but too much for our little ones. They also go beyond what we need with our younger age group (level book addresses first, second and third class levers and compound levers.) Pictures are fine, examples are good, but in some books there are so many examples the big idea is lost.

Series Name: Simple Machines. Author: Bodden
Books: Inclined Planes; Levers, Pulleys*, Screws*, Wedges*, Wheels*
Review: They’re pretty books, but photos may be a little artsy for little kids. Words are a little dry. In general concepts are very clear and easy to understand and examples clearly illustrate the ideas. But, I thought the screw book was unclear and jumbled examples together that it wasn’t clear how they related. We used several of these books in our circle times in class, but tried to balance with How Toys Work, which are brighter and more fun.

Series Name: Simple Machines. Author: Tieck
Books: Inclined Planes*, Levers, Pulleys*, Screws*, Wedges, Wheels and Axles
Review: A little long, a little old, and too dry for our purposes. But, I think these are the best descriptions of the big idea. We didn’t read these in circle, but I did have them on the bookshelf for the older kids to check out.

Series Name: Simple Machines to the Rescue. Author: Thales
Books: Inclined Planes to the Rescue*; Levers ttR, Pulleys ttR, Screws ttR*, Wedges ttR, Wheels and Axles ttR
Review: I see these recommended on other people’s sites, but I’m not a fan. The pictures aren’t great, the language is a little advanced. And I just find that they do the weakest job of explaining simple machines concepts. For example, in the screw book, their first example is a lid on a soda bottle, then a spiral staircase, then Archimedes screw, then an olive oil press, and then it talks about things that are held together by screws. Nowhere in there does it really describe what a screw is and what type of work each of these tools has in common.

Series Name: Useful Machines. Author: Oxlade
Books: Ramps and Wedges; Levers; Pulleys; Screws*; Wheels
Review: Good pictures, engaging and easy to understand for 5 – 7 year olds. I have only read the screw book, but I like it a lot. However, I would not use it as the intro to screws. Once kids had a solid grasp of the basics of screws, it does a nice job of giving examples of all the different applications

If you’re teaching about Simple Machines, be sure to check out my Inventors of Tomorrow series… I give examples of lots of hands-on activities you can use with kids 2.5 – 7 to teach these concepts.

DIY Water Wall

pourWhen I built our ball wall / marble run, my goal was to have a flexible design so the pieces could also be used for water play and for a sensory table. With this week’s nice weather, we were able to test the theory, and it was a great success in terms of fun!

You can see there is some leaking that happens around the joints when two same-dimension connectors or pipes are next to each other (which was fine with my son – he liked that there was water coming out everywhere), but probably 50 – 60% of the volume of the water made it all the way through the maze.

splashThe water works work better when you pour slowly, but my son liked the splash effect he got from pouring quickly.

The end point of our water maze was a plastic cup with two magnets glued on it. Whenever it filled up, we replaced it with the other cup, and poured the captured water back through the maze – we also had a tub full of water nearby.

The best part: when the cup fills up all the way with water, the weight is more than the magnets can support, so it slides to the ground. “Level complete!”

DIY Ball Wall

ballwall

marble run

The theme for this week’s Inventors’ Lab was gravity, so I made a ball wall (aka marble run). This is like those exhibits you find in most children’s museums where where are pipes and joints mounted on magnets. The children can re-arrange them to make any path they choose, then run a marble through them to test their path. They may find that the ball shoots off-course at some point, and need to re-adjust the pipes for the ball to reach its goal. Just playing with these is a great exercise in tinkering and hands-on engineering. My son can play with these for hours, so we decided to make one for home and for class.

I got my original idea from Frugal Fun for Boys.

This was a really easy project once I got the supplies. About three-quarters of the effort was deciding which supplies to buy in what size (and what strength of magnets), so down below, I’ll include my full list, with affiliate links, and the lessons I learned to hopefully make your life easier if you want to replicate. In class, the kids definitely had fun with it!

Note: This marble run is designed for repeated use by lots of kids. I will also be adapting parts of it as the year goes on for water play and sensory play. There are lots of easier / cheaper ways to build a marble run for short term use at home, so I’ll include links to those at the bottom.

ballwall2

Ball wall

Supply List

On Frugal Fun she used regular size marbles, so I needed to adapt her materials a little. In our class, we have children as young as 2.5, so I wanted to use the bigger shooter marbles instead to make them less swallowable.

The materials I used: oil drip pans, 1 1/4 inch PVC joints (45 and 90 degree elbows), 1 1/4 inch PVC pipe, 1 1/4 inch OD clear polycarbonate tubing, a tube with a curved end – it’s part of a p-trap (you can buy the piece separately but I don’t know what it’s called), ceramic magnets, glue, shooter marbles, miscellaneous funnels 1, 2, 3 And a couple dinosaur party cups to catch the balls at the end of the run.

Technical notes / things I learned in the tinkering process

Pipes and joints: Important lesson – 1 1/4 inch PVC pipes are not 1.25 inches around! I think that’s their inside diameter. Outside diameter is 1.66  inches. These pipes and joints are bigger than you need for shooter marbles, You could go down one size, I think. The marbles run just fine through the clear tubing, which has an outside diameter of 1.25 inches, inner diameter of 1 1/8.

Marbles: I liked these shooter marbles (Note: don’t order these… they are regular small marbles, not shooters, despite the description) I also made marble size balls from Model Magic clay, which seemed like a fine idea in advance. They were pretty, they ran through the tubes just fine, and since they were lighter weight, they didn’t knock the tubes out of line as much. But, there were a couple problems. 1) If you mixed them with the marbles, the marbles were heavy enough that if they fell on top of a model magic ball, they’d squish it out of its nice round shape, and then it would start getting caught in tubes. 2) if you step on the model magic balls, they squish flat, and 3) after this accidental discovery, a certain three year old in the class took great pleasure is stepping on all the balls and squishing them flat. If you squish them once or twice, I can re-roll them into a round ball, but after that, they’re pretty much useless.

Funnels: I ordered the widest mouth funnels I could find, but none of these funnels had a wide enough neck for the shooter marble to go through… I sawed the end off the yellow one so a marble would go through, then I taped it to a pipe because at that time I didn’t have a file to file off the rough edges of the cut.)

Magnets: I wanted some that were strong enough that the pipes wouldn’t slip out of place every time you sent a marble through. But, they couldn’t be too strong, as I wanted it to be possible for a three year old to pull the pipe off the metal pan and move it around. The magnets I ordered (linked above) are perfect. I put one on the back of each 45 degree joint, 2 on the back of most items, and three on the 2′ long segment of PVC.

One issue I hadn’t foreseen is that you can’t just lean the pans up against a wall and let the kids play. The first time they grab hold of a pipe to pull it off the metal pan, the metal pan would fall on their head. I could try to teach them to brace with one hand and pull with the other – but that’s not really gonna happen. So, you have to secure the pan. Lots of Pinterest folks who use drip pans for magnet activities mount them on their wall permanently (putting screws through them into the wall) or semi-permanently by putting wide velcro strips on the wall. Neither was an option for me in my classroom, so I used ratchet straps to tie them to a bookcase. The only problem was then you have straps going across the front of the pan. I’m betting you could also use bungee cords… there’s enough of a rim around the pans that the bungee cord could hook to it. But since bungees come in specific lengths, you’d have to know in advance what length you needed.

Or, for home use, don’t buy a drip pan. You can just use your refrigerator to mount your ball wall… just be sure that the marbles can’t roll under the fridge.

This was a very quick and easy project, except for sawing the PVC pipe and clear tubes into the lengths I wanted. Using a hack saw and files to smooth the rough edges was perfectly do-able, but took 15 – 20 minutes per cut, I would guess. Then I learned about Ratcheting PVC Cutters which make the job SO MUCH EASIER!!!

I have also bought some flexible tubing and some T-joints, and plan to experiment with using these items in a water wall and for sensory table play, with either rice or beans.

Easier ways to do a ball wall, and other ideas

Use toilet paper tubes, paper towel tubes and masking tape like Lemon Lime Adventures and Tinkerlab.

Or those same tubes and magnets, like Growing a Jeweled Rose or Teach Preschool.

Or water bottles and magnets, mounted on the fridge instead of a drip pan.

Build a hand-held marble maze in a shoe box lid with craft sticks.

Here’s a collection of links to good options, both DIY and store-bought.

Resource for STEM activities

If you’re looking for 100’s of ideas for hands-on activities to teach science, engineering, and math, check out my other blog, www.InventorsOfTomorrow.com.

Building a mini submarine

A few weeks ago at our Family Inventors Lab, we studied submarines, and our book for the day was Papa’s Mechanical Fish, a really well-written and enjoyable book that shares the adventures of a family where the father is an inventor, who is sometimes successful and sometimes not. He is inspired to make a mechanical fish, and after several failed attempts makes a submarine the whole family can ride in.

At class that day, our main tinkering activity was to make a water-tight mini submarine that would keep a little paper person dry inside for 20 seconds underwater. Our supplies included plastic easter eggs, miscellaneous plastic containers, and tools that would help to waterproof things (tape, plastic bags, silly putty, things to wrap objects in, etc.)

This activity did what we hope to do with all our activities… it adapts to various ages and it teaches kids to experiment and adapt their efforts till they succeed.

Our littlest kids (2 – 3 year olds) mostly just used this as a sensory tub. They played with whatever was floating in the water.

Some of the middle-sized kids (3 – 4 year olds) did things like  float an easter egg inside a plastic bowl boat or fill plastic Ziploc bags with water and float those.

Our next oldest (4 – 5) tested the other containers: water bottles, small food containers, and some travel-size toiletry bottles to see which would keep a paper person dry. Some would and some wouldn’t. They also tried wrapping the eggs in various things (paper, cloth napkins, plastic bags) to see if they would stay dry. All of those failed, except sealing the egg inside a ziploc.

The oldest kids (6 and 7) did the full tinkering activity with the easter eggs. Testing, diagnosing, hypothesizing, building a prototype,  testing again, and repeating till we got it right. We learned that plastic easter eggs leak water because they have holes in the ends. We tried taping the holes and sealing the gaps with play-dough or silly putty. But even after you seal the holes, there’s a gap around where the two halves come together, and the eggs still leak. (And play dough makes a big mess when it gets wet!)

We eventually discovered a working solution: seal the ends of the eggs with silly putty. Put the paper person in. Wrap a silly putty seal all around the gap where the two halves of the egg come together. Submerge it. Count to 30. Bring it out of the water, dry it off, open it up, and Voila! we had created an easter egg submarine.

This is a great activity to repeat at home during bath time. Just grab a wide variety of plastic containers with lids from your kitchen, tear up some paper from the recycling bin to be your “people” you’re trying to keep dry, and head for the bath tub. Your child will learn about sinking, floating, water-tight vs. leaking, and the  fact that bubbles coming up from your submarine is a bad sign… if air comes out, water will go in!