If you’re (C) happy and you know it, clap your (G) hands, If you’re happy and you know it, clap your (C) hands, If you’re (F) happy and you know it, and you (C)really want to show it If you’re (G) happy and you know it, clap your (C) hands.
Put your (C) baby in the air, in the (G) air. Put your baby in the air, in the (C) air Put your (F) baby in the air, Say, (C) how’s the air up there? Put your (G) baby in the air, in the (C) air.
Shake Your (C) Bells in the Air, in the (G) Air, Shake Your Bells in the Air, in the (C) Air, Shake your (F) Bells in the Air and (C) Freeze them right there, shake your (G) bells in the air in the (C) air… On Your Side… In the Front…
See you (C) soon raccoon. Bye (G) Bye. See you soon raccoon. Bye (C) Bye. See you (F) later alligator. After a (C) while crocodile. See you (G) soon raccoon. Bye (C) Bye.
There are (C) bubbles in the air, in the (G) air. There are bubbles in the air, in the (C) air. There are (F) bubbles in the air, there are (C) bubbles everywhere. There are (G)bubbles in the air, in the (C) air. (There are bubbles way up high… in the sky. …way down low… on your toes.)
More C G F Songs
Although you can play Row Your Boat with just a C chord, it’s better this way:
(C)Row row row your boat, gently down the stream. (F)Merrily merrily merrily merrily, (G)life is but a (C)dream.
Wave our scarves (tune of Jolly Good Fellow) (C) We wave our scarves to(F)ge(C)ther, we (G) wave our scarves to(C)gether, We wave our scarves to(F)gether, (G7) because it’s fun to (C) do.
Teapot Tune
(C) I’m a little teapot (F) short and (C) stout, (F) Here is my (C) handle, (G) here is my (C) spout. When I get all steamed up (F) then I’ll (C) shout (F) Tip me (C) over and (G) pour me (C) out.
(C) Here is my pumpkin, (F) round and (C) fat, (make a circle with arms) (F) Here is a (C) point on a (G) witches (C) hat. (make a triangle with hands on head) Here’s the mouth of a ghost (F) who says, (C) “BOO!” (circle hands around mouth) And (F) here are (C) owl’s eyes (G) looking at (C) you! (make circles by eyes with hands)
(C) I’ll plant a little seed in the (F) dark, dark (C) ground. (bend down, plant seed on floor) (F) Out comes the (C) yellow sun, (G) big and (C) round. (raise arms to make a circle) Down comes the cool rain, (F) soft and (C) slow. (wiggle fingers to make rain coming down) (F) Up comes the (C) little seed, (G) grow, grow, (C) grow! (squat on floor, rise up slowly)
Others
(C)Baa Baa Black Sheep, (F)Have you any (C)wool? (F)Yes sir, (C)yes sir, (G)three bags (C)full One for the (F)master and (C)one for the (G)dame (C)One for the (F) little boy who (C)lives down the (G)lane. (C)Baa Baa Black Sheep, (F)Have you any (C)wool? (F)Yes sir, (C)yes sir, (G) three bags (C)full
(C)Five Little Monkeys (G)Jumping on the Bed. One fell off and (C)bumped his head. Mama [Daddy, Nanny, Grandma…] called the doctor And the (F)doctor said – (G)no more monkeys jumping on the (C)bed
Maybe your child has tried out a sensory bin or a water table at a children’s museum, daycare, or a class, or maybe you’ve stumbled across sensory play ideas on Pinterest or Instagram or a Flisat table group on Facebook, and you want to try it out, but aren’t sure how to get started? Here’s a beginner’s guide.
Sensory play has a few basic components:
a bin – don’t feel like you have to start by buying a fancy table – it’s OK to start with water play in the sink or use a cake pan or a plastic storage tub
things to scoop and pour with – spoons and measuring cups work great, and tongs to pick up larger items
smaller containers to put in the bin – plastic cups and “tupperware” containers are good
a sensory material – I would start with something that’s really easy to pick up: balls made of crumpled paper, pompoms or cotton balls, pasta (bowtie or rotini work well); rice is always a good option, but expect that it will get spilled across the floor!
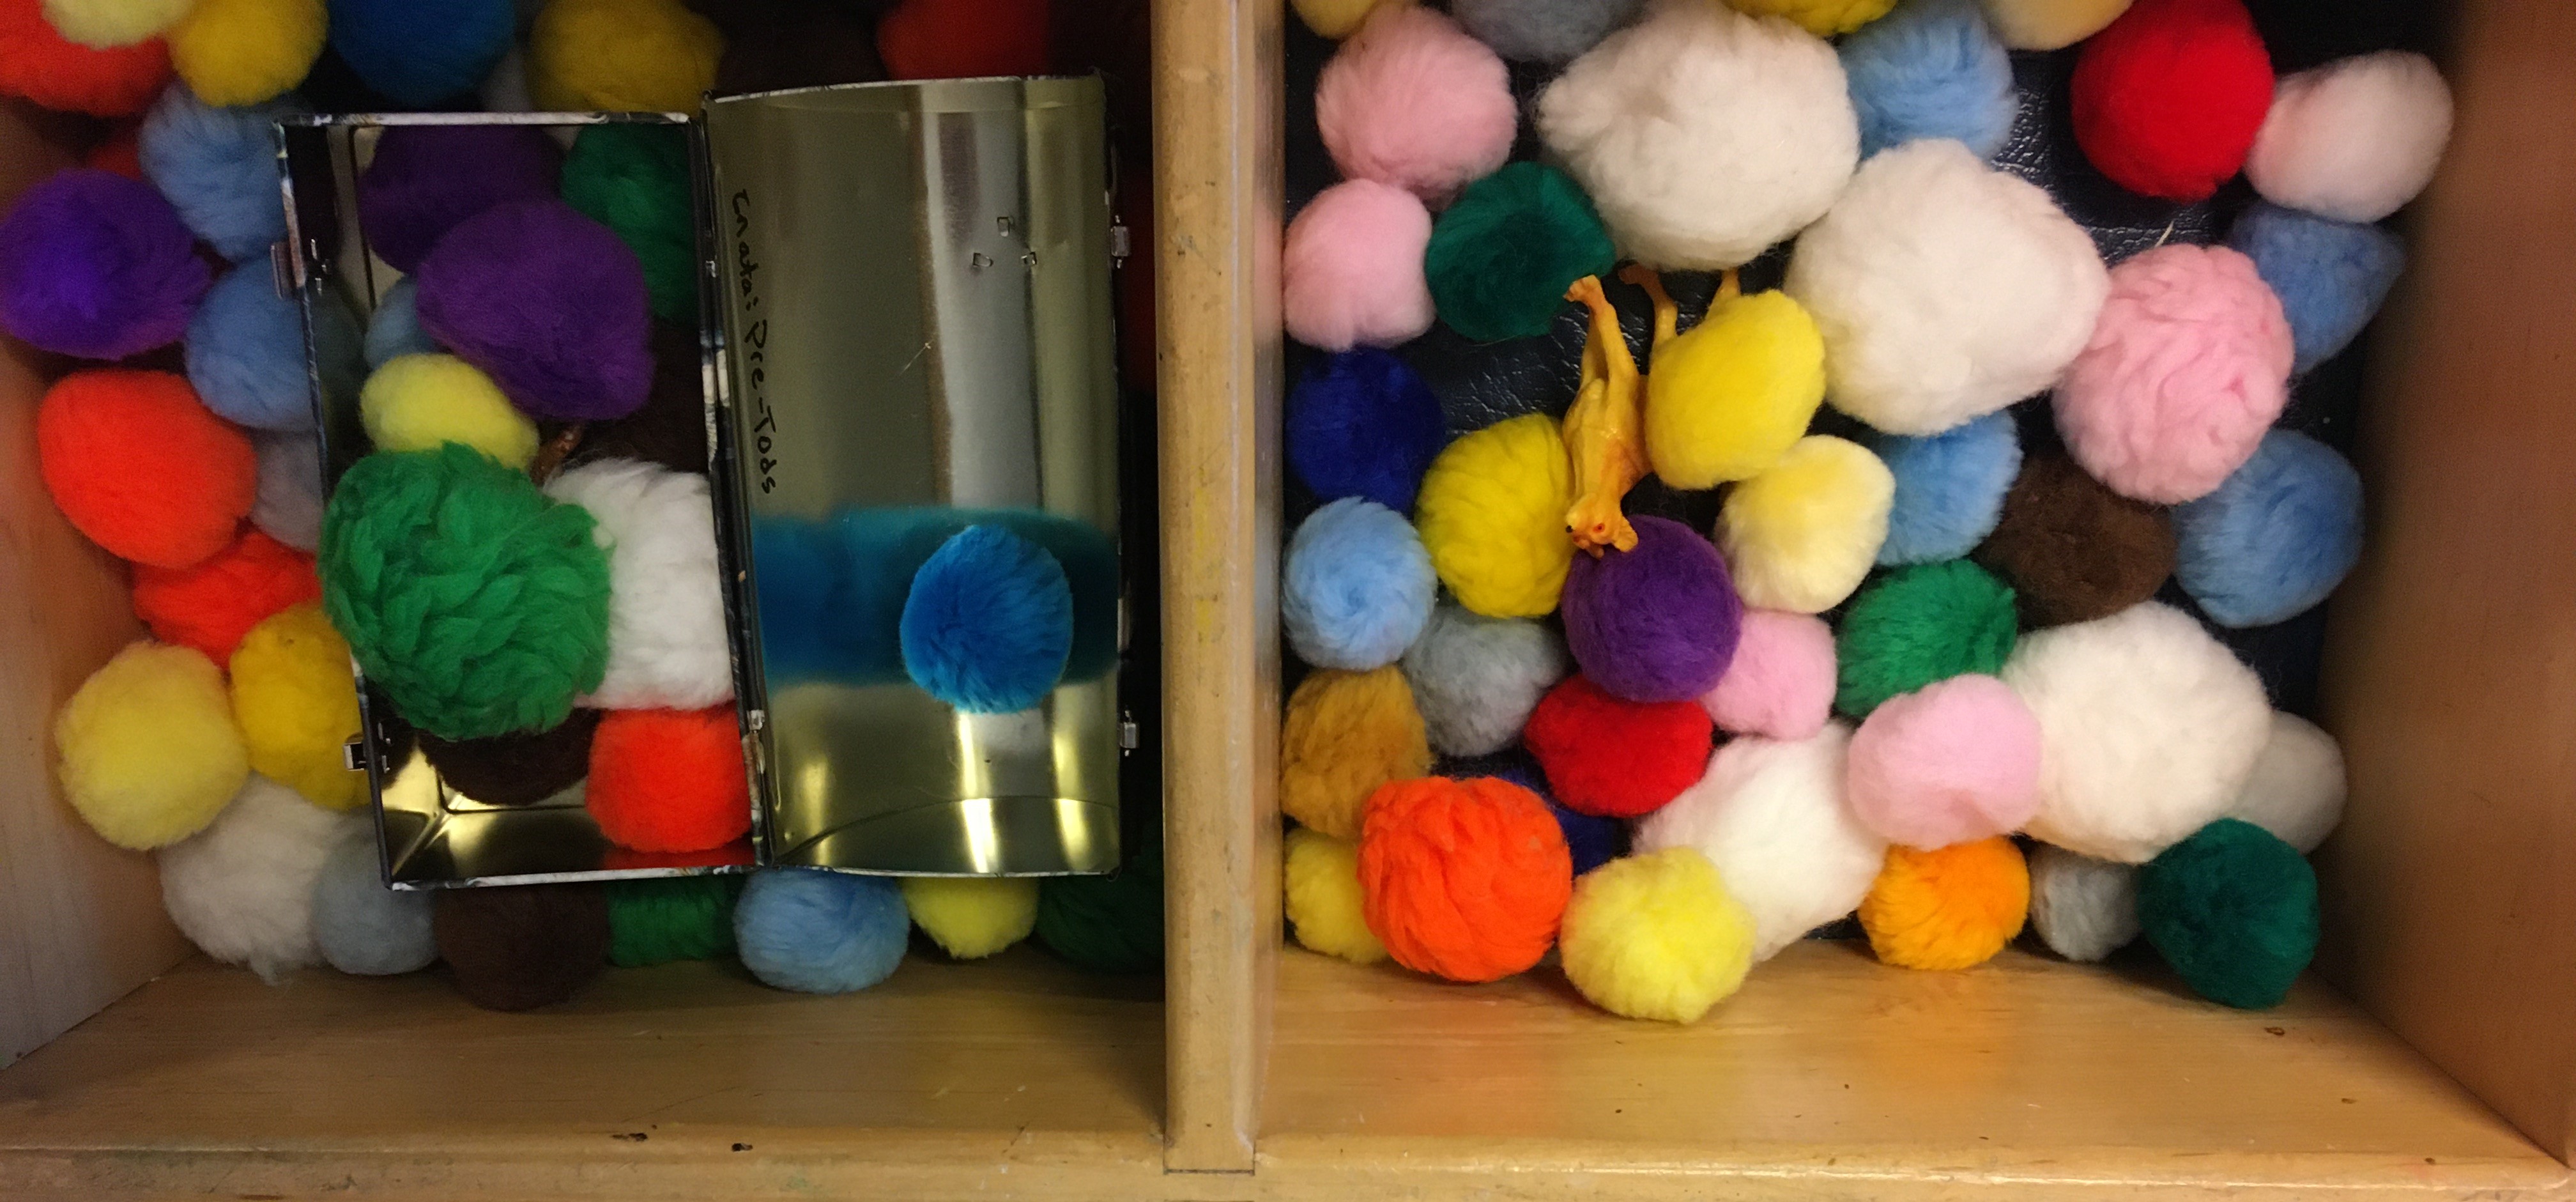
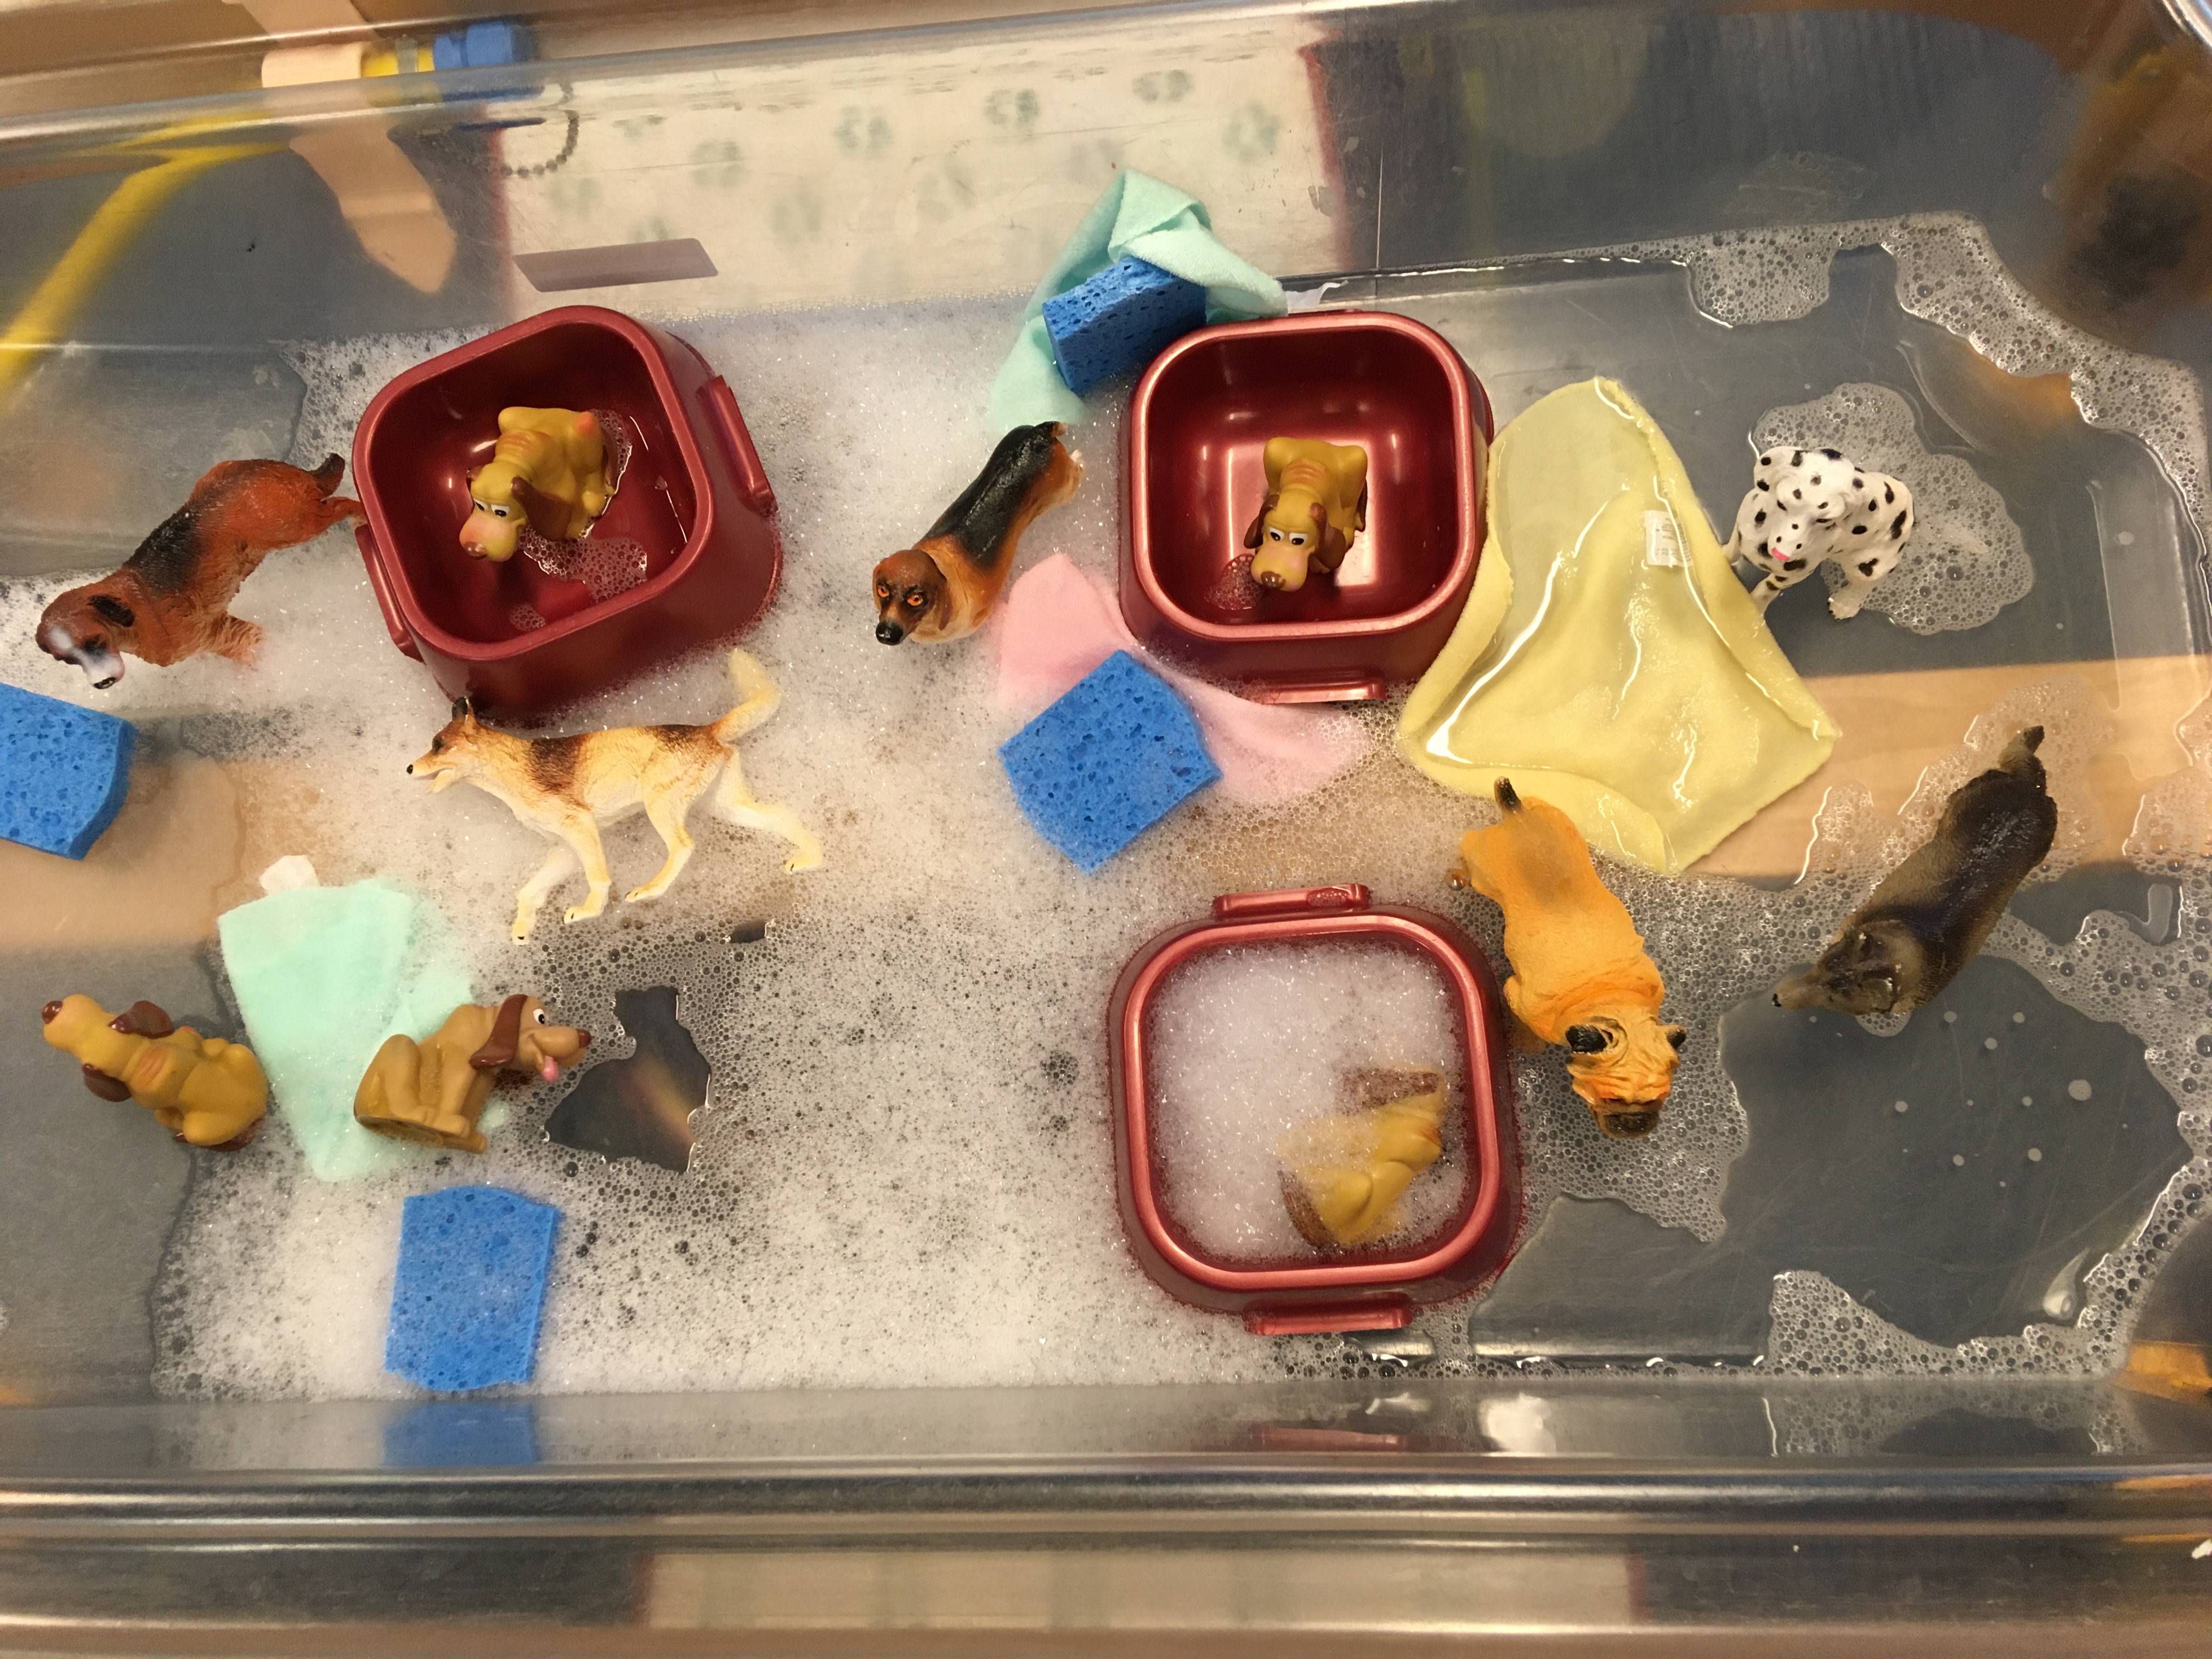
That’s all you really need to start with. Don’t feel like you have to create amazing Instagram-worthy wonders. Start simple! (For this post, I purposely picked photos of some really basic set-ups so you see how easy it is – like this one with pompoms, metal treasure box and some plastic animals.)
The first several times your child plays with it, sit alongside them, teaching them how to do sensory play – eventually this will be great independent play, but first they need you to teach them.
What do you do? It’s super simple – you scoop, you pour. You fill the container. You dump it out. You pick up a handful of rice and let it sift through your fingers. You stir. It’s OK if your child repeats the same actions hundreds of times. Sensory play is all about repetition. It can be a very soothing play activity while they’re also learning a lot about how to use their body and how to use tools to move things around. (Keys to brain development are: novelty, repetition, and down-time and sensory bins can bring all this.)
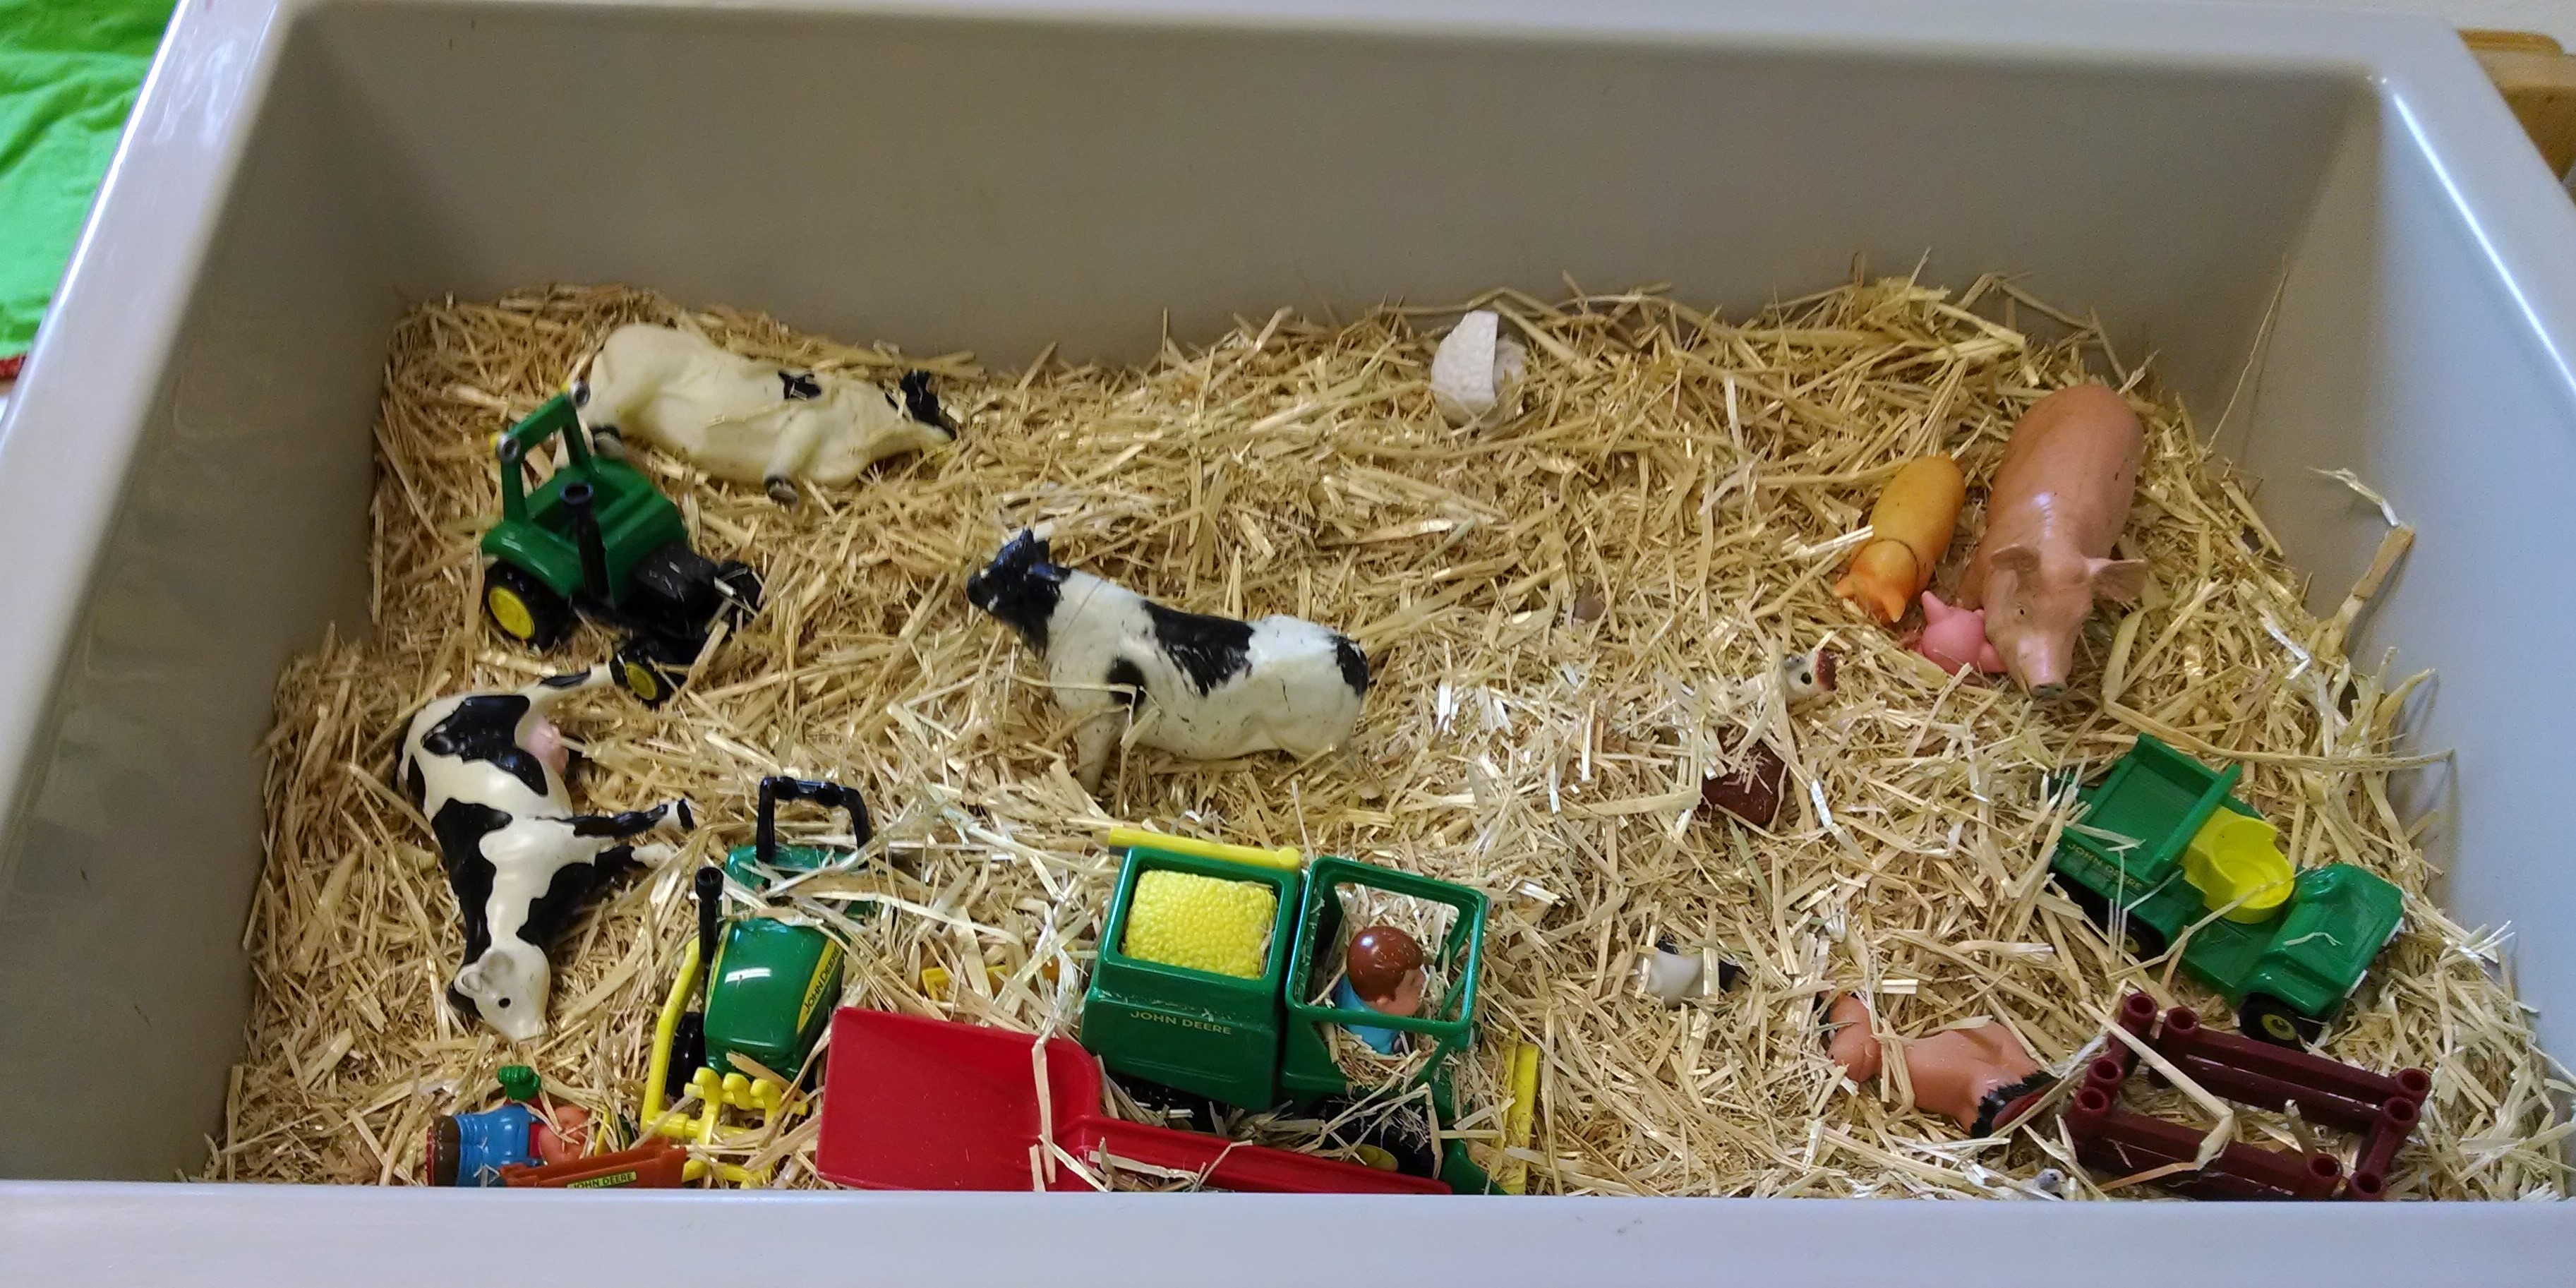
If you feel like you’re ready to liven it up a bit, the easiest way to add novelty is to take some of your children’s toys they already love and add them in so they can explore them in this new setting. (Filling a toy dump truck with rice, pouring rice over plastic animals, or hiding and finding puzzle pieces to assemble a puzzle with.)
Let them play as long as they want, and move on when they’re ready. They’ll come back to it again later. If they spilled materials on the floor, ask them to help with clean-up, even if they only clean up a few items, it’s a good practice to begin.
That’s it. That’s the basics.
Learn More
I’ve got lots more ideas on this blog which focuses on parenting skills, and my other blog Inventors of Tomorrow, which focuses on STEM learning.
This post is called Reducing Sensory Bin Mess, but it also talks a lot about how to teach your child appropriate ways to play with the bin.
Check out the Ultimate Guide to Sensory Bins to get LOTS more ideas about what sensory bins you could buy, what materials to fill them with (everything from flax seed to cloud dough), what tools to use (from water wheels to conveyor belts), and what add-ins to include (jingle bells? magnetic letters? seashells?). This post also talks about the benefits of sensory play for brain development.
Check out the Ultimate Guide to Water Tables to learn all about great options for enhancing water play. (Many of these ideas also work at bath time or in the swimming pool!)
Sensory Table Set-Ups shares lots of examples I found online and my observations about general lessons to learn from these ideas.
Looking for other simple, low cost ideas for what to do with a 1 – 4 year old child? Check out my Cheap Dates with Toddlers series.
When parents or teachers first introduce a child to sensory bin play, they usually make a big mess!
While some mess is inevitable, here are tips for reducing it.
Teach Them How Sensory Play Works
One of my core beliefs is that children want to do well. If they’re not behaving well, it’s usually because they don’t yet have the knowledge or skills they need. So, let’s teach them!
Play alongside
Over time, sensory play becomes a great independent play activity for children, where they can play with little supervision or intervention from adults for quite a while. However, first you have to teach them how to do it, and then gradually fade out your support. So, expect to be right next to them the first several sessions.
Role Model
I mostly just start playing appropriately next to them, and they quickly follow along! I narrate my play, and also narrate theirs. “Look, I’m scooping the beans – oh, you picked up the scoop – see how I use it? I can pour the beans in the bucket. Can you?”
Re-Direct
If they are doing something “wrong”, tell them the right thing to do. “Let’s keep the rice in the bin.” If they’re pouring on the floor, substitute a new target – “can you pour into this bucket?” Try to avoid saying “don’t _____”. If you say “don’t splash”, all they can think about is splashing. If you say “oh, look, when I move my hand slowly, see the ripples in the water?” they will often stop splashing.
Set Limits
Once they’ve learned how to do well in general, they may still have days when they’re having a hard time not making a mess. It’s OK to sometimes say “it looks like now is not the right time for this – let’s put it away / close it up for now, and we’ll try again tomorrow.” To be as fair as possible, I try this method: first when-then: “when you show me you can play well with this, then we can have it out more often.” Then if-then warning – “if you keep dumping things on the floor, then I’ll close the bin.” Then follow through on that consequence if needed.
Setting Up for Success
Fillers
Start with fillers that are easy to clean up. I use pompoms as the first material for my toddler class. Or paper crumpled into balls. Later, I might use pinto beans – they’re easy to sweep up. Other things are harder to clean up. For example, kinetic sand needs to be vacuumed up and can get ground into carpet, so it’s not the thing to start with.
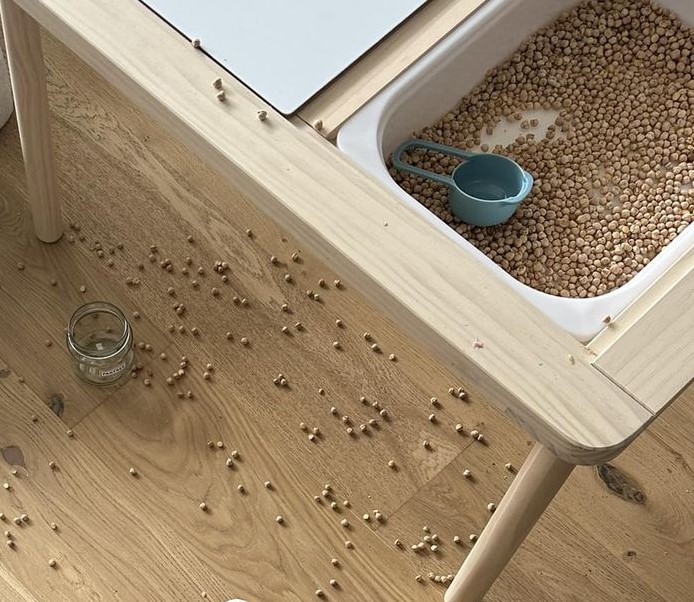
When you start, put a small amount of sensory items in a small bin inside the large bin. If they spill outside the small bin, the large bin catches it!
Don’t use too much filler at first. Don’t feel like you have to have a 3 inch thick layer of sensory material. Start with a thin layer – they can always pile it all up in one corner if they want a deeper pile.
Remember that they will mix together any item that’s within easy reach of the bin. So, if there’s something you don’t want to be mixed in, move it elsewhere. (For example, we don’t recommend putting a bin of rice right next to the playdough table or water table.)
What Surface to Put the Table On
If possible, put sensory tables on linoleum or hardwood floors – it’s way easier to clean up than carpet!
Many parents and teachers do sensory tables outdoors where they are less concerned about mess.
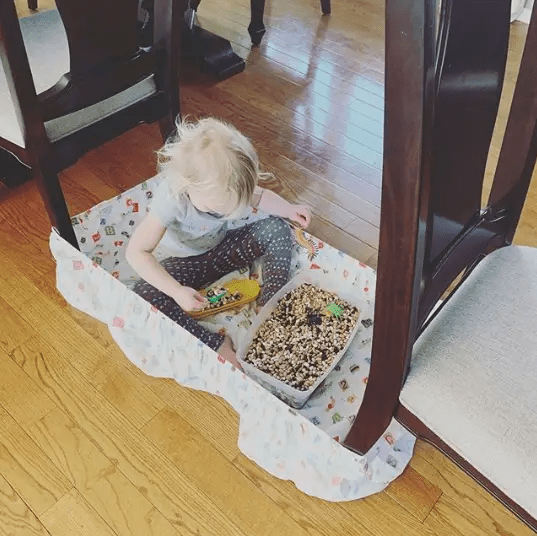
Many people recommend putting a mat under the table – like this mat where the edges can fold up to make a wall, or things like playpens and crafty pods and pop-up ball pits that help to contain the mess in one area where it doesn’t get tracked around. Some use fitted sheets – like in the image below (source) or shown here. Wrap the corners of the fitted sheet around some objects to create a little nest. Or use a table cloth or shower curtain liner. Sometimes you can salvage sensory material from any of these surfaces by lifting them up so the filler all slides to one corner and then scooping it from there.
One site recommended a “builders’ tray” that looks amazing, but the link is broken and I can’t find it anywhere… Amazon has a 20×20 play tray, or you could use an oil drip pan, maybe.
Allowing for Transport
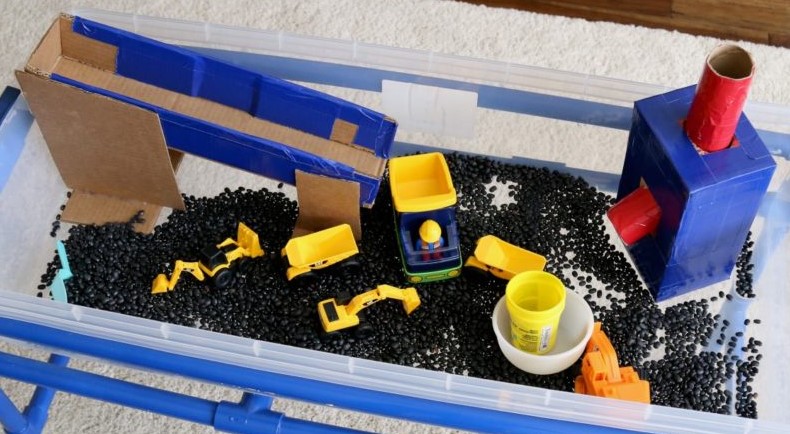
Kids LOVE to transport things. So, they often want to carry things from one place to another. Sometimes just having containers inside the bin, like having two buckets in the bin where they can move things from the bin to one bucket to the next is enough. Or setting up a cardboard box apparatus where there’s a higher spot in the sensory bin and a ramp for pouring things so they slide to the lower level, like these examples from Frugal Fun:
Or having a table right next to the sensory bin with containers on it they can move things into can work. But some kids like to have a separate bucket somewhere else they can carry things to – you can decide if that’s viable for you.
If they like the sound the beans make when they hit the floor, try putting a metal pie tin or hard plastic container upside down inside the sensory bin that they can pour onto to get the sound.
Helping with Clean Up
Ask your child to help with clean-up. You may choose to get them a mini broom and dustpan or a dust buster vacuum. (For some kids having to do clean-up is a disincentive – they don’t want to make a mess they’ll have to clean up later. Some kids like cleaning up the mess so much that they’ll make more of a mess!)
Remember, sensory play is a learning process, so they will accidentally (or intentionally) spill from time to time and there will be messes. Try to take a deep breath when it happens. If you’re having a day where you feel like the mess would be too stressful, it’s fine to close the sensory bin for the day and offer other activities.
Part of supporting our child’s brain development is helping them experience the world with all their senses (all 8!). As they use their senses, talking about what they are experiencing helps to reinforce the learning. Here are ideas for strengthening each sense.
Vision
One of the best things you can do for your child’s vision is to take them outside. Inside, you may only look at things that are a few feet away. Outdoors, we can look close at an ant, then at a tree, a cloud, then back down to a flower. If you stand in front of a baby as you push them on a swing, they gaze at you as you get further away, then come closer and closer. These shifts in focus build their eye muscles and reduce the chance they’ll need glasses later in life. (Genetics also plays a part.) Different types of light – rosy skies at dawn, bright light of mid-day, twilight and looking at stars at night also help with eye and vision development.
Help your child learn to track motion. For a baby, hold a toy in front of them. As they look at the toy, move it to the left then the right, then up, then down so they follow it to the edge of their peripheral vision. For older children, rolling or throwing balls helps them track motion.
Hearing
Give them lots of different things to listen to. Take music classes or get musical instruments or discover instruments around you (drum on a pot with a spoon, tap on a glass with a fork, shake a box of mac and cheese.) Sing a lot! Read to them. When they notice any sounds in the environment, talk about them – “I heard that too. That was a firetruck.” (Responsive language – noticing what your child is paying attention to and talking about it – is the best way to build your child’s language skills.) Watch for background noise. If your TV is constantly on or there is always background music playing, it can be hard for a child to focus on and learn from any one sound.
Taste
Breastmilk (human milk) changes flavor based on what the lactating parent eats, so exposes even young babies to a variety of tastes. As food is introduced, expose your child to a wide variety of tastes. There are five flavors: sweet, salty, sour, bitter and umami, and there is the sensation of spicy hot. Children tend to greatly prefer sweet and usually aren’t fans of sour and bitter. But encourage them to sample a wide variety of flavors, and give them the words to describe those flavors and what they like about them and don’t like. (Learn about picky eaters.)
Smell
Let them experience a variety of smells. Go for walks in the woods, go to a flower garden or an herb garden. Have them in the kitchen as you cook (let them smell the spices and herbs when you open the containers) and when you gather to eat, talk about how the food smells. “When I peel the orange, you can smell it, can’t you?” Try scented playdough, scented markers and stickers. Add scents to the bath water. (More scent activities.)
Note: In our culture, we have lots of artificial scents –soaps, detergents, perfumes, air fresheners and more. Many people have chemical sensitivity and get head-achey or dizzy from all this. Consider unscented cleaning products, choose air fresheners that neutralize or eliminate odors – not just cover them up, use a Hepa filter, open windows for fresh air often.
Touch
Let them experience a wide range of sensations: playing in dirt, sand, grass, mud. Petting animals and touching different fabrics or sandpaper or bubble wrap. You can rub their back, hold their hand, give hugs, tickle, give high-fives. Let them experience being hot or being cold. Explore things hands on and talk about what they are feeling. When you get them dressed, talk about how their socks are tight and stretchy, their shirt is loose and soft. Make sensory bins for them to play in.
Some children are resistant to messy play or touching different textures. You can role model – show them how you touch those things. Give them tools to use with the item – a child who won’t just put their hands in the mud might use a shovel to scoop it or a stick to stir it and then if their hands happen to get muddy, they then play in it. Or show them how it’s OK to be messy when we’re doing messy play and we can always wash our hand when we’re done.
Vestibular system
This helps us to stay balanced, and tells us if we are moving slowly or quickly through space. This helps us stand, walk and sit up without falling over. Carry your baby in lots of positions. As they get older, encourage your child to crawl, walk, climb, run, ride, roll, jump and dance. Swing on a swing, spin on a merry-go-round. Put them on your lap and sing bounce songs. (More about the vestibular system.)
Proprioception
This is how we know where our body parts are located in space without having to look at them. Also helps us figure out how much force to use – whether picking up a fragile glass or banging on a drum. Play blindfolded games, or play games in the dark. Do lots of movement games where they stretch out, or clap, or shake their shaker soft or loud, or wrestle and rough house so they learn how much is fun and what could accidentally hurt someone. Let your child move heavy things, or carry heavy things, and handle soft or fragile things. (Learn more about proprioception and self regulation and more about proprioception – this article is specifically about supporting neurodivergent kids, but all kids benefit from proprioceptive learning.)
Interoception
Senses of our internal bodily systems –being hungry or full, itches, the need to urinate and “butterflies in our stomach” when we’re nervous are not explained by the five senses and instead indicate other ways in which we perceive information.
You can build your child’s interoceptive intelligence with these 5 steps: helping them notice, naming sensations, linking emotion to sensation, understand what happens when we ignore the sensation, and managing the situation. (“You’re wiggling your bottom. That tells me you need to pee. You’re also seeming really anxious – that happens to me when I need to pee. I’m worried that if you don’t go to the potty soon you could wet your pants. Why don’t you take a break and go to the bathroom?”)
Responding to your baby’s cues that they are full or hungry, helping them to burp when they are gassy, changing their diaper when it is wet or dirty, and noticing and talking about these sensations help them learn to listen to and respect their body’s cues. As your child gets older, we continue to talk about these things as this knowledge helps your child be more independent and helps them stay healthy. (Read my full article on interoception. Then learn more about interoception.)
Sensory Cup
Some children are sensory seeking and can take in all the sensory input they can get. Others are easily overwhelmed. Some children might love touch, vestibular and proprioception activities, but find different tastes or too much noise overwhelming. Be sensitive to your child’s needs. Watch for disengagement cues (glazed eyes, turning away, pushing things away, muscle tension) that tell you their sensory cup is overflowing and they need a break. If you ignore those cues and keep piling on stimulus, you may face a sensory meltdown. (A “tantrum” they can’t control.)
image credits: swing Photo by Avin CP on Unsplash; high chair Photo by Vanessa Loring; dog Photo by bin Ziegler
Whether you’re a librarian planning story time, a preschool teacher looking for new songs or a parent of a toddler who is tired of the same five songs, here are resources for learning new children’s songs.
The very best resources I know of are:
Tell Me a Story from the King County Library System – searchable collection of hundreds of videos of children’s librarians singing songs and showing the motions
Jbrary – two children’s librarians (Lindsey Krabbenhoft and Dana Horrocks) have created a huge collection of videos of children’s songs (with motions) and also have lists of favorite books, ideas for storytime, etc.
Sing with Our Kids, where Nancy Stewart has created a song library which includes lyrics and .mp3 audio recordings of lots of great traditional kid songs, and a collection of “Books that Sing” – picture books that you can sing aloud.
And here are resources I have created that you are welcome to use:
For a preschool, here’s a full year music time curriculum with shaker songs, rhymes, songs, and recommended “books that sing” for 9 monthly themes – include ukulele chords. Here are the books-that-sing that I use.
my full lesson plan for a year’s worth of Toddler Circle Times. It includes lots more songs and rhymes, gathered around 9 monthly themes.
for an infant-wobbler class, here are all the baby songs I do during the year. (here are the same songs with the ukulele chords, and here are 11 x 17 posters of the lyrics to print and use in class)
collection of fun science themed songs for ages 3 – 6 which reinforce STEM concepts


