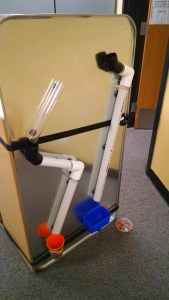
marble run
The theme for this week’s Inventors’ Lab was gravity, so I made a ball wall (aka marble run). This is like those exhibits you find in most children’s museums where where are pipes and joints mounted on magnets. The children can re-arrange them to make any path they choose, then run a marble through them to test their path. They may find that the ball shoots off-course at some point, and need to re-adjust the pipes for the ball to reach its goal. Just playing with these is a great exercise in tinkering and hands-on engineering. My son can play with these for hours, so we decided to make one for home and for class.
I got my original idea from Frugal Fun for Boys.
This was a really easy project once I got the supplies. About three-quarters of the effort was deciding which supplies to buy in what size (and what strength of magnets), so down below, I’ll include my full list, with affiliate links, and the lessons I learned to hopefully make your life easier if you want to replicate. In class, the kids definitely had fun with it!
Note: This marble run is designed for repeated use by lots of kids. I will also be adapting parts of it as the year goes on for water play and sensory play. There are lots of easier / cheaper ways to build a marble run for short term use at home, so I’ll include links to those at the bottom.
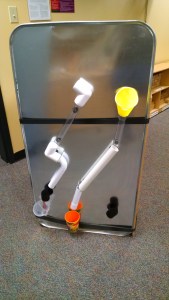
Ball wall
Supply List
On Frugal Fun she used regular size marbles, so I needed to adapt her materials a little. In our class, we have children as young as 2.5, so I wanted to use the bigger shooter marbles instead to make them less swallowable.
The materials I used: oil drip pans, 1 1/4 inch PVC joints (45 and 90 degree elbows), 1 1/4 inch PVC pipe, 1 1/4 inch OD clear polycarbonate tubing, a tube with a curved end – it’s part of a p-trap (you can buy the piece separately but I don’t know what it’s called), ceramic magnets, glue, shooter marbles, miscellaneous funnels 1, 2, 3 And a couple dinosaur party cups to catch the balls at the end of the run.
Technical notes / things I learned in the tinkering process
Pipes and joints: Important lesson – 1 1/4 inch PVC pipes are not 1.25 inches around! I think that’s their inside diameter. Outside diameter is 1.66 inches. These pipes and joints are bigger than you need for shooter marbles, You could go down one size, I think. The marbles run just fine through the clear tubing, which has an outside diameter of 1.25 inches, inner diameter of 1 1/8.
Marbles: I liked these shooter marbles (Note: don’t order these… they are regular small marbles, not shooters, despite the description) I also made marble size balls from Model Magic clay, which seemed like a fine idea in advance. They were pretty, they ran through the tubes just fine, and since they were lighter weight, they didn’t knock the tubes out of line as much. But, there were a couple problems. 1) If you mixed them with the marbles, the marbles were heavy enough that if they fell on top of a model magic ball, they’d squish it out of its nice round shape, and then it would start getting caught in tubes. 2) if you step on the model magic balls, they squish flat, and 3) after this accidental discovery, a certain three year old in the class took great pleasure is stepping on all the balls and squishing them flat. If you squish them once or twice, I can re-roll them into a round ball, but after that, they’re pretty much useless.
Funnels: I ordered the widest mouth funnels I could find, but none of these funnels had a wide enough neck for the shooter marble to go through… I sawed the end off the yellow one so a marble would go through, then I taped it to a pipe because at that time I didn’t have a file to file off the rough edges of the cut.)
Magnets: I wanted some that were strong enough that the pipes wouldn’t slip out of place every time you sent a marble through. But, they couldn’t be too strong, as I wanted it to be possible for a three year old to pull the pipe off the metal pan and move it around. The magnets I ordered (linked above) are perfect. I put one on the back of each 45 degree joint, 2 on the back of most items, and three on the 2′ long segment of PVC.
One issue I hadn’t foreseen is that you can’t just lean the pans up against a wall and let the kids play. The first time they grab hold of a pipe to pull it off the metal pan, the metal pan would fall on their head. I could try to teach them to brace with one hand and pull with the other – but that’s not really gonna happen. So, you have to secure the pan. Lots of Pinterest folks who use drip pans for magnet activities mount them on their wall permanently (putting screws through them into the wall) or semi-permanently by putting wide velcro strips on the wall. Neither was an option for me in my classroom, so I used ratchet straps to tie them to a bookcase. The only problem was then you have straps going across the front of the pan. I’m betting you could also use bungee cords… there’s enough of a rim around the pans that the bungee cord could hook to it. But since bungees come in specific lengths, you’d have to know in advance what length you needed.
Or, for home use, don’t buy a drip pan. You can just use your refrigerator to mount your ball wall… just be sure that the marbles can’t roll under the fridge.
This was a very quick and easy project, except for sawing the PVC pipe and clear tubes into the lengths I wanted. Using a hack saw and files to smooth the rough edges was perfectly do-able, but took 15 – 20 minutes per cut, I would guess. Then I learned about Ratcheting PVC Cutters which make the job SO MUCH EASIER!!!
I have also bought some flexible tubing and some T-joints, and plan to experiment with using these items in a water wall and for sensory table play, with either rice or beans.
Easier ways to do a ball wall, and other ideas
Use toilet paper tubes, paper towel tubes and masking tape like Lemon Lime Adventures and Tinkerlab.
Or those same tubes and magnets, like Growing a Jeweled Rose or Teach Preschool.
Or water bottles and magnets, mounted on the fridge instead of a drip pan.
Build a hand-held marble maze in a shoe box lid with craft sticks.
Here’s a collection of links to good options, both DIY and store-bought.
Resource for STEM activities
If you’re looking for 100’s of ideas for hands-on activities to teach science, engineering, and math, check out my other blog, www.InventorsOfTomorrow.com.
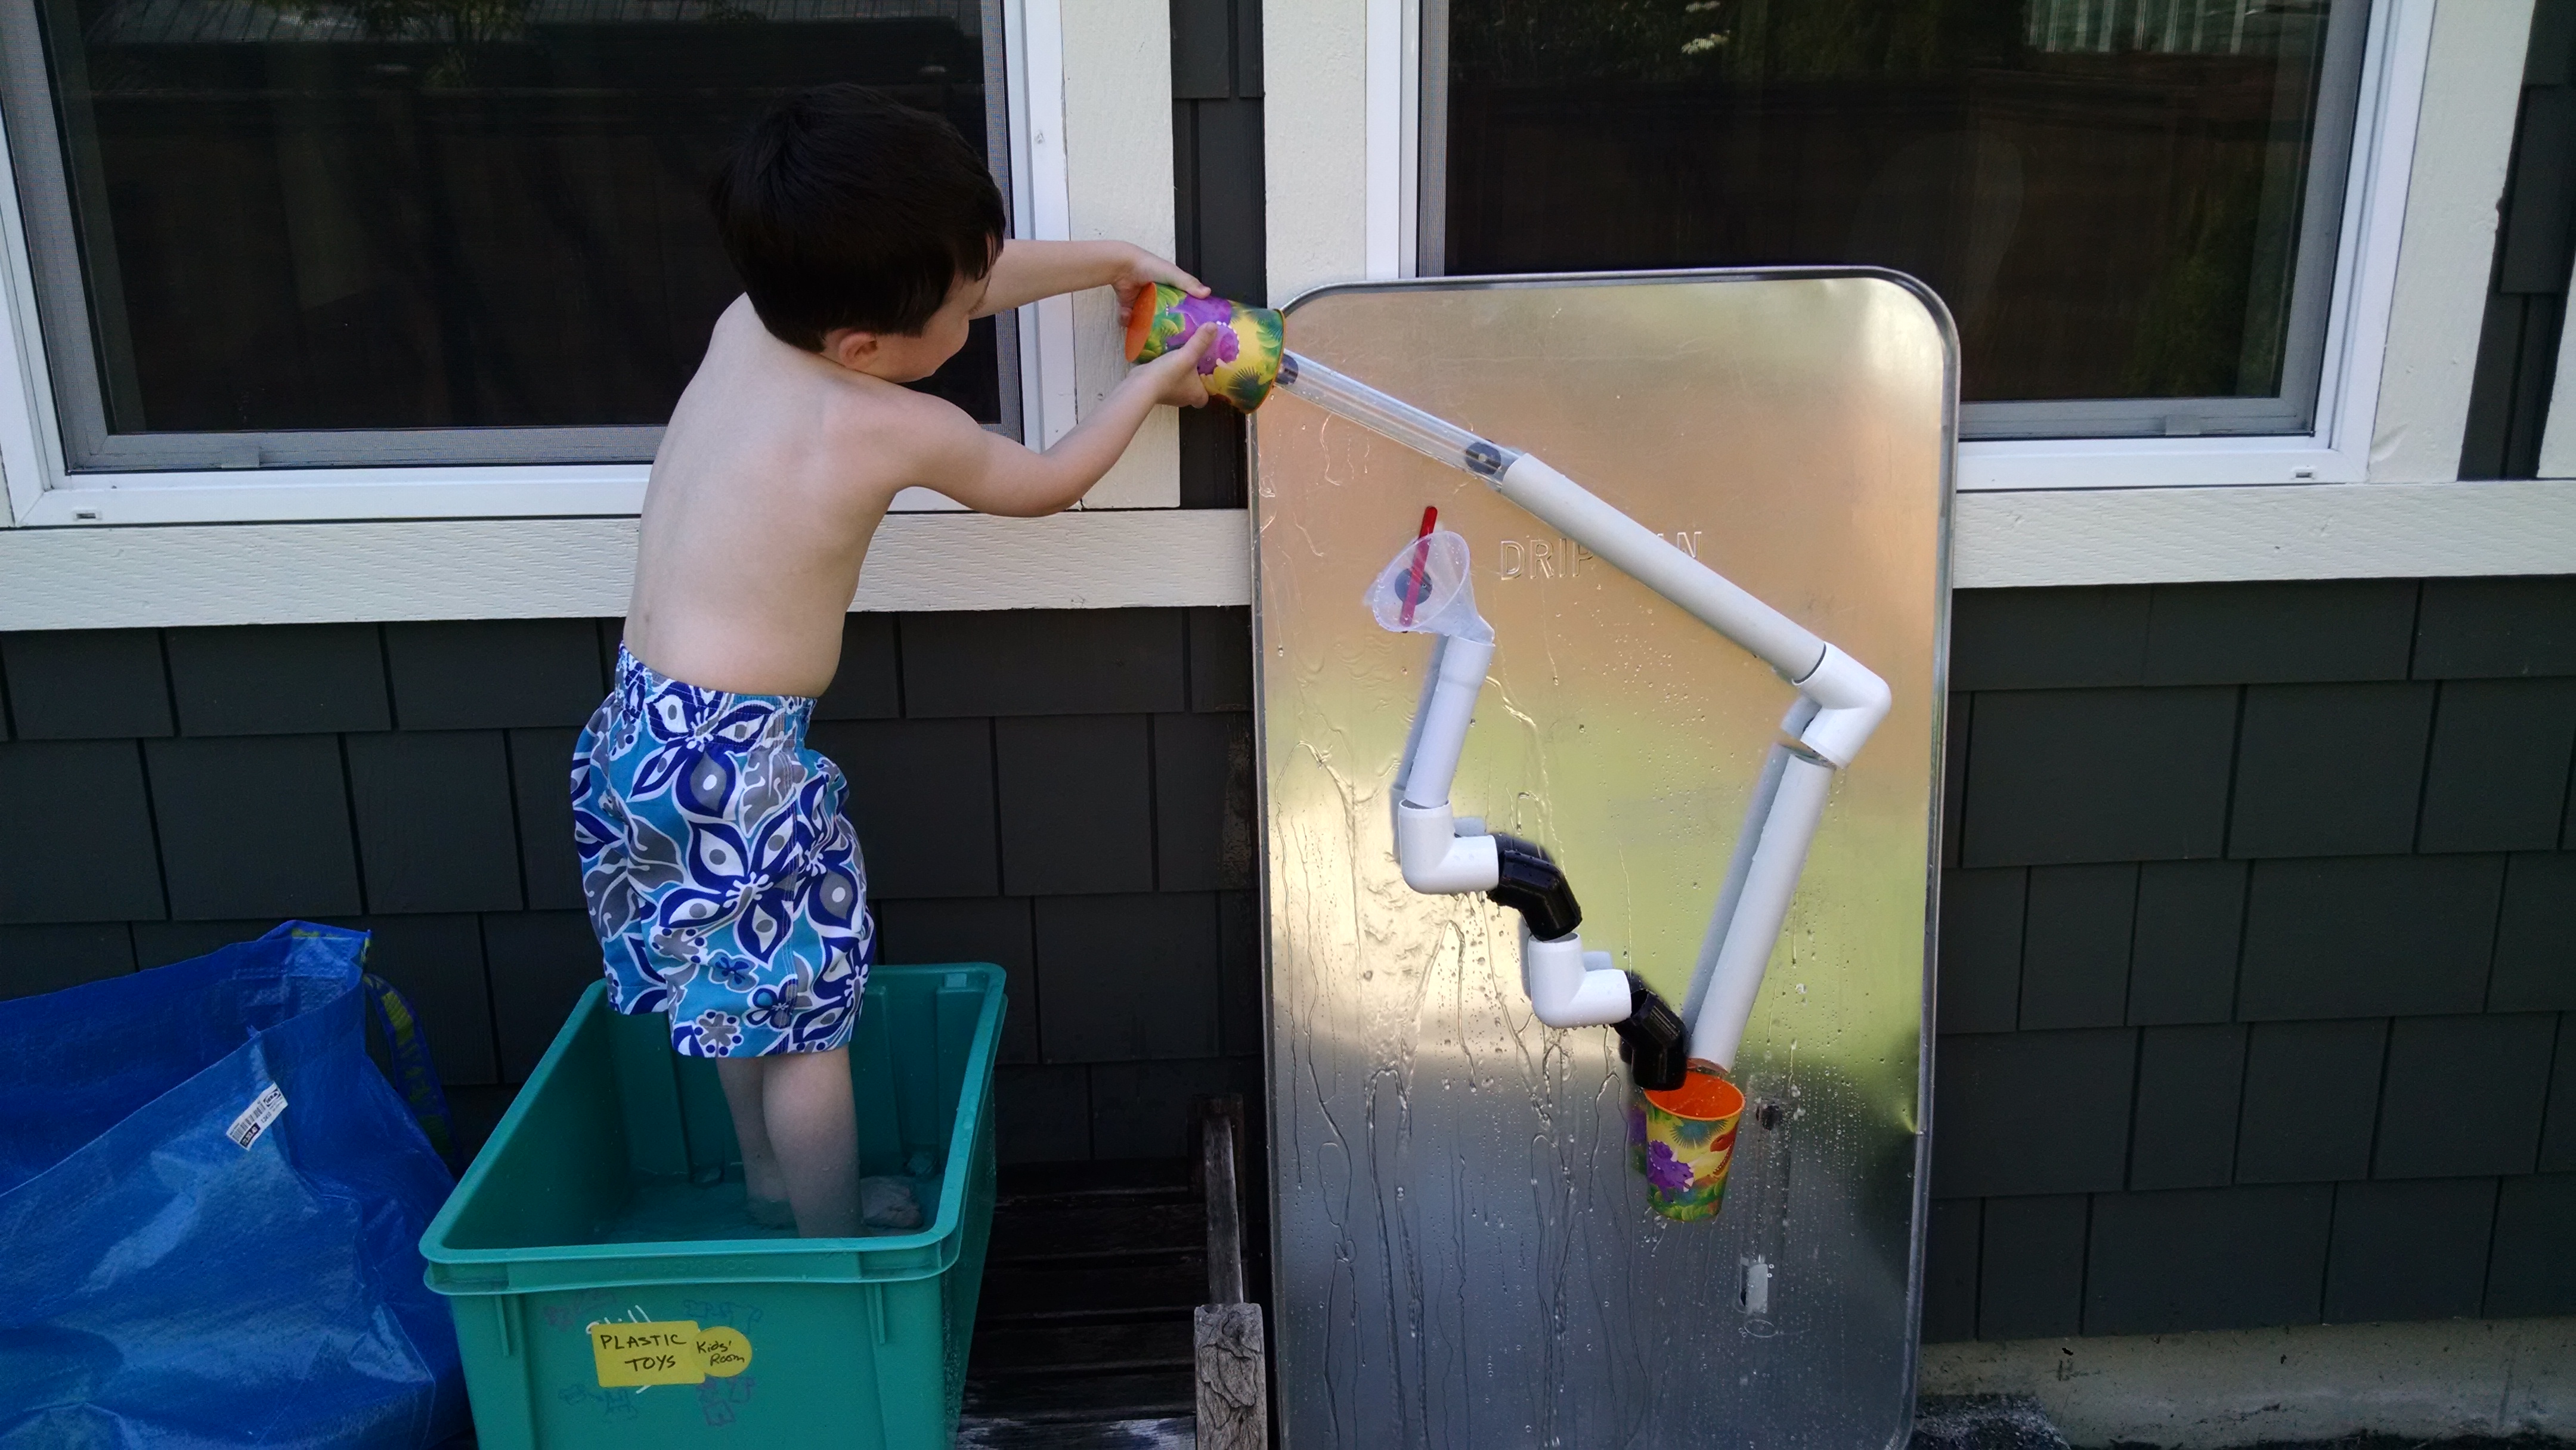 When I built our ball wall / marble run, my goal was to have a flexible design so the pieces could also be used for water play and for a sensory table. With this week’s nice weather, we were able to test the theory, and it was a great success in terms of fun!
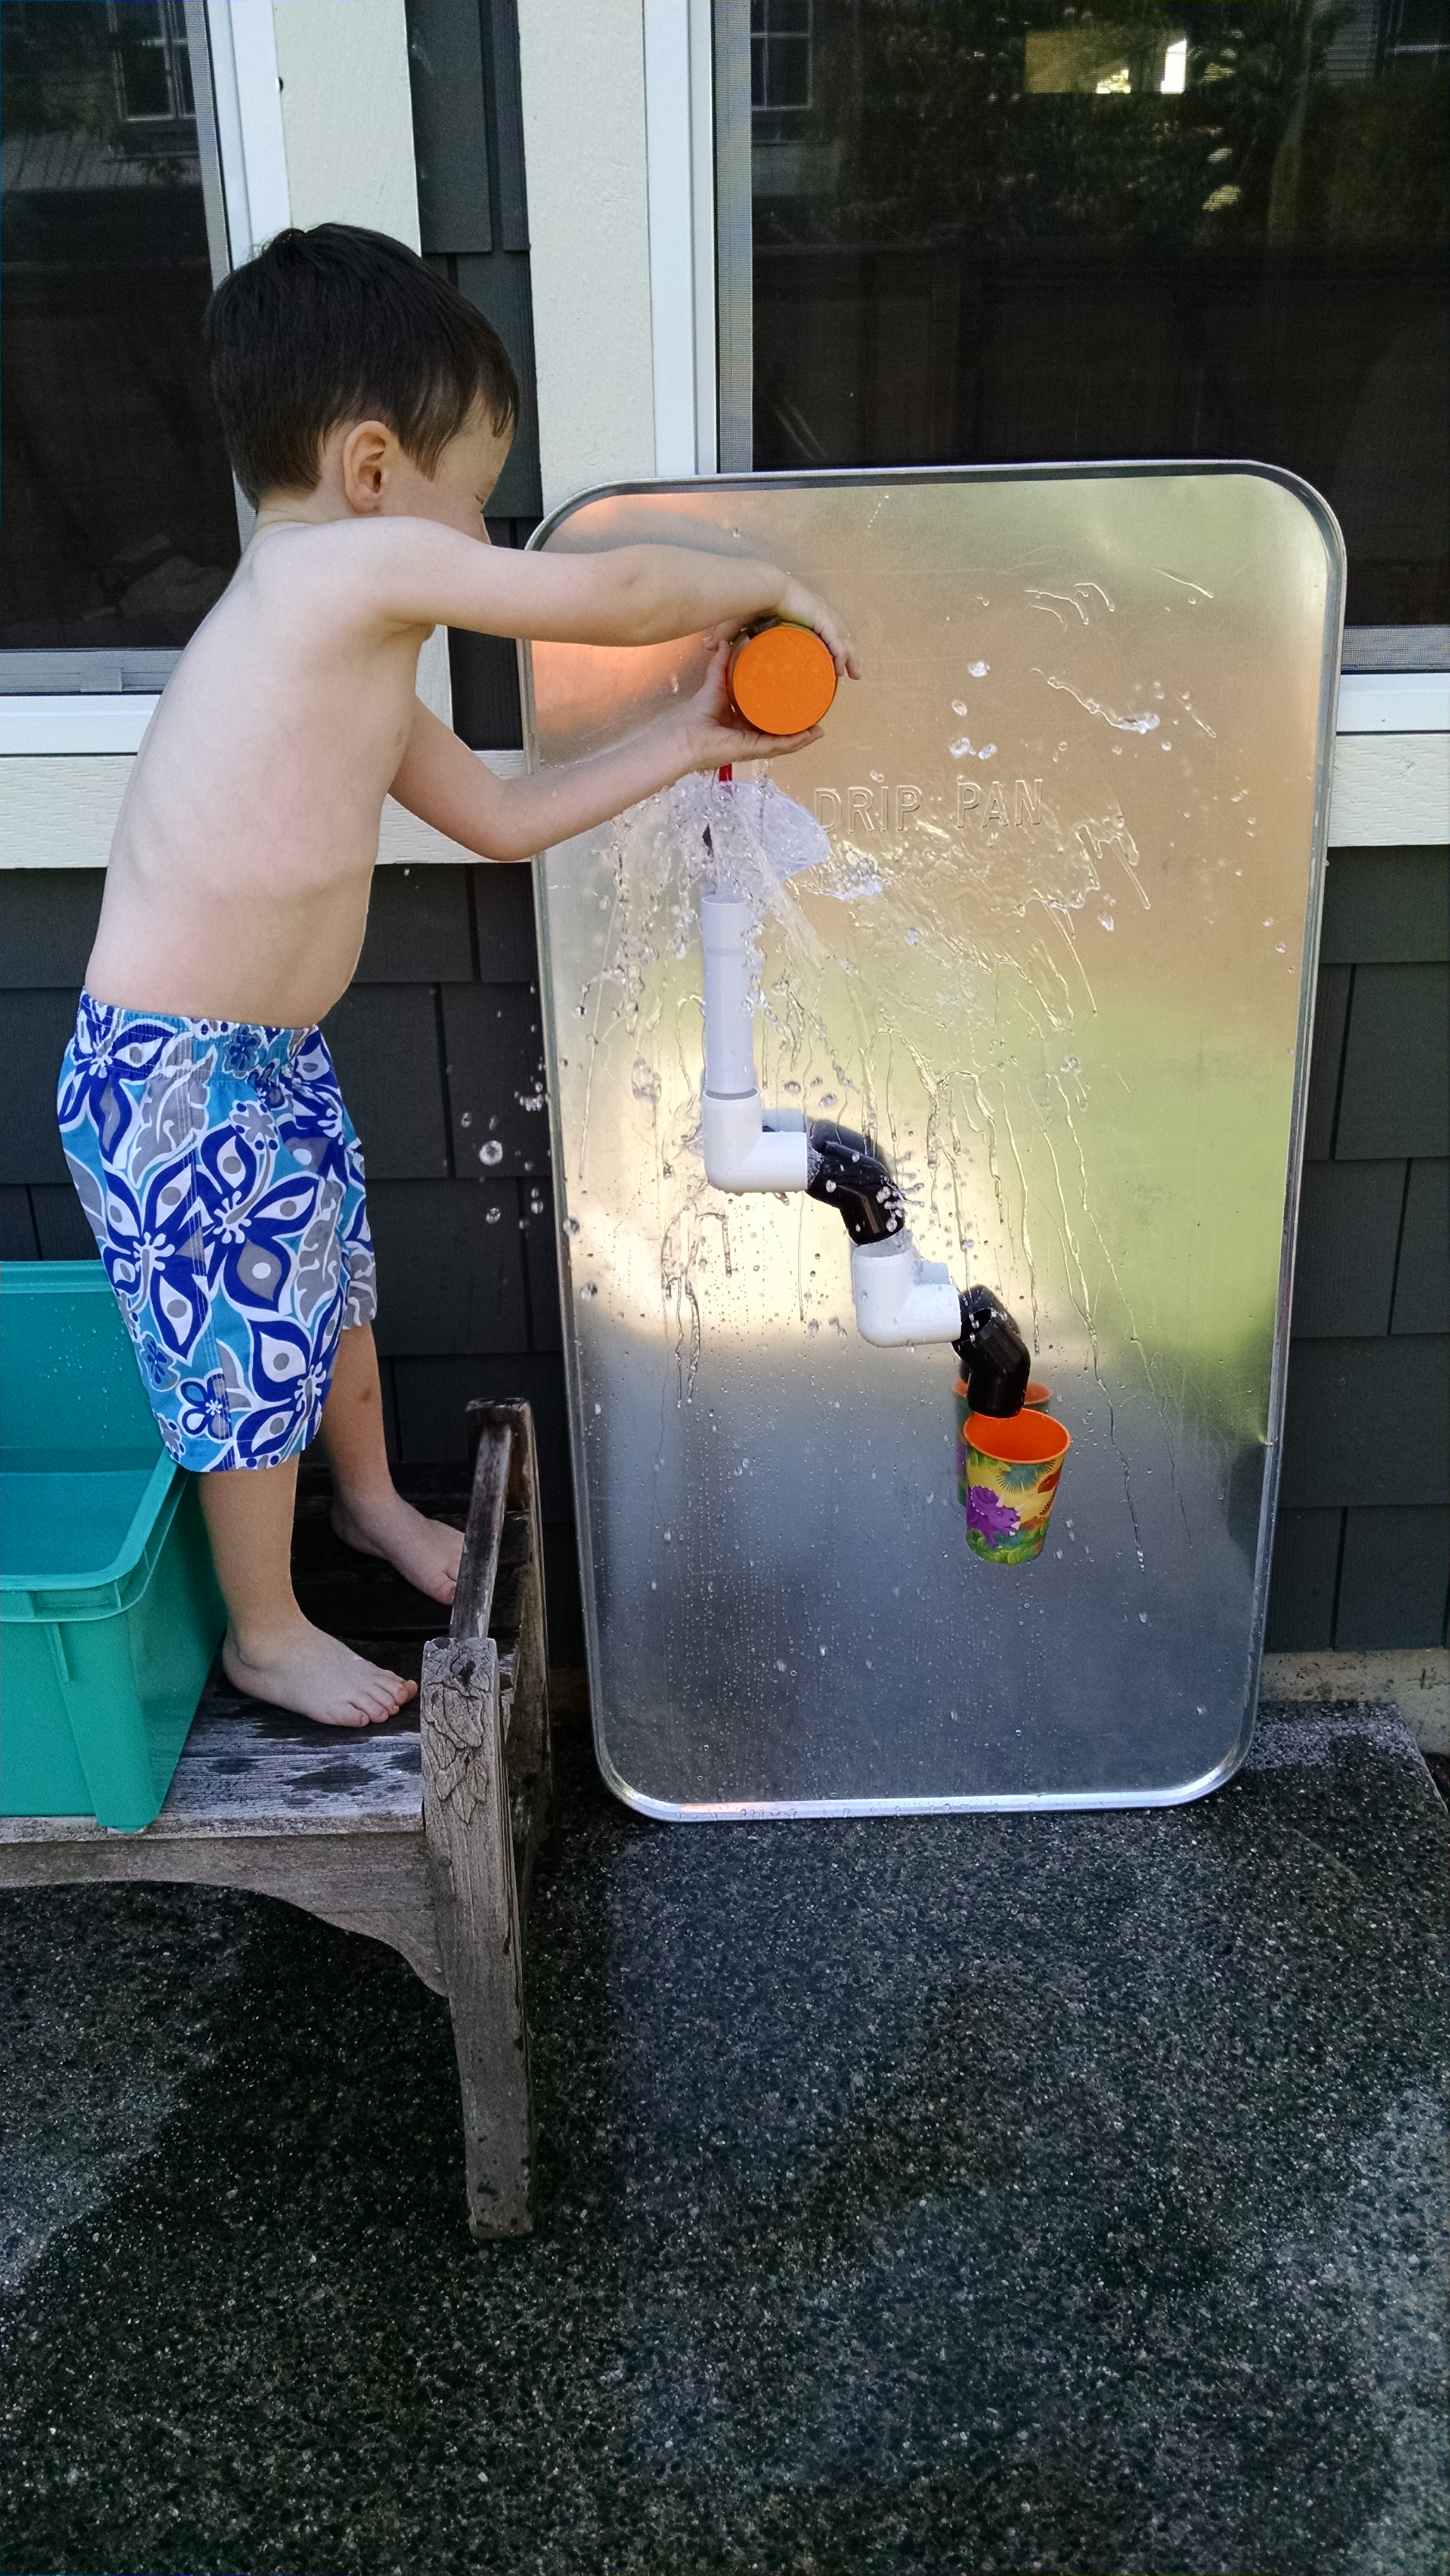 The water works work better when you pour slowly, but my son liked the splash effect he got from pouring quickly.